Woo, get me – I’ve been trying out 21st-century technology today, and have discovered how to put a lasercutting video onto TikTok.
I’m not sure it was worth all of the effort, to be honest. I’m hoping that TikTok goes away, and that I never have to interact with it again. Either that, or I’m hoping that as more middle-aged people (like me) start using it, TikTok will realise how much people hate the bossiness of an app that immediately starts playing video and audio content as soon as you open it up. Ugh.
Anyway, in an attempt to train TikTok’s algorithms into at least showing me more relevant looping streams of video, today I’ve been trying to teach it that I like crafts and art – especially laser-cut and polymer clay art.
Below is the actual video I uploaded. My first ever attempt at uploading some content on TikTok. It was such a giant, convoluted hassle that I might never bother again. But just in case I do, I wrote a reminder to myself on my KayVincent.com website, vaguely showing how I managed it.
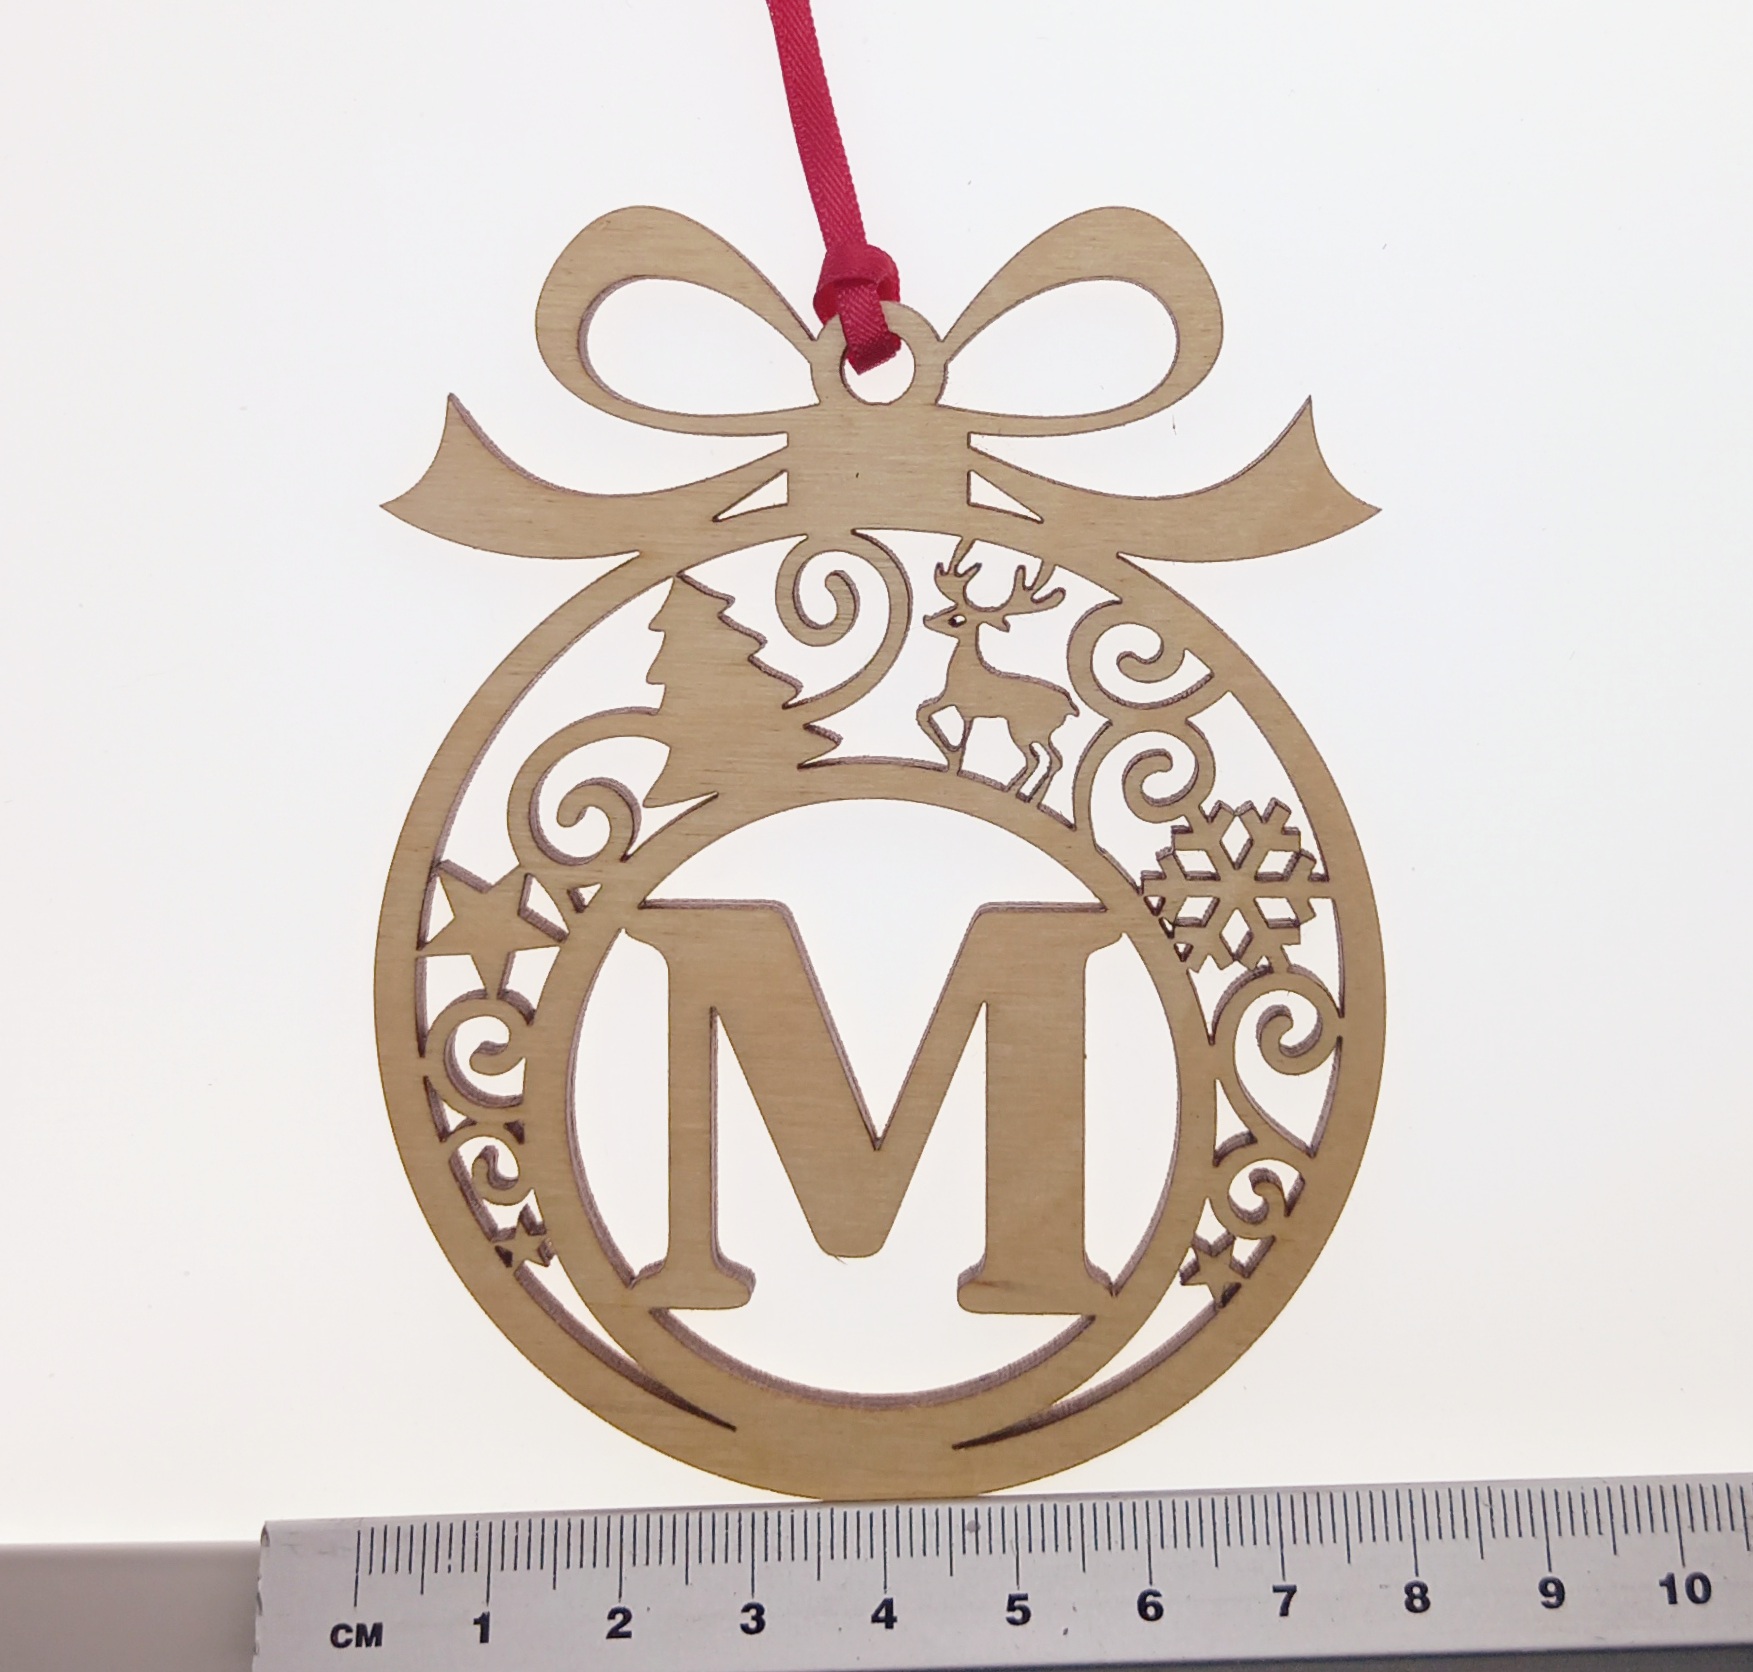
It was a speeded-up video clip showing my laser cutter in action, cutting this ‘M’ Christmas tree bauble decoration:
Maybe I’ll stick to YouTube, Pinterest, and Instagram, and leave TikTok for the kids. Dunno.
Sander sadness…
In the meantime, the reason I’ve been making lasercutting TikTok videos instead of sanding the decorations is that my sander is broken. It’s the second sander this year that has spontaneously conked, so I’m going to hunt down the receipt to see if it’s still under warranty. In the meantime I’ve ordered another sander, but have gone for a more industrial model, rather than the (literal) home or garden version. Hopefully by Friday my little sanding station (in the garage) will be back up and running. Because I definitely don’t want to be hand-sanding hundreds of wooden Christmas decorations.
What is a “sprue”, and why should I use sprues with my lasercutting designs?
(This is another article in “Money-Saving Lasercutting Tips” – a free tutorial series that demonstrates effective and efficient lasercutting techniques. Tip #3 is all about those awful moments when you watch your precision-cut laser pieces drop down into the guts of the machine … and how to avoid those moments in future.)
Definition of a sprue
Sprues are most commonly seen in injection-moulded plastic toys. For a fuller description check out the Wikipedia definition, but briefly:
In the image below, there are little links that connect the plastic toy components to the frame. These are the sprues. They are created as part of the moulding process, but the useful secondary function of sprues is that they hold the components securely in position within the plastic frame, until you twist or cut the components out. So below, the pieces stay safely in place until the user needs them, rather than rattling around in a box or falling on the floor and getting lost.
Why do I need to use sprues when I’m cutting with a laser?
In laser cutting projects, you often need to cut light materials such as paper or card. But because the machines often blow and/or suck air during the cutting process, it’s very easy for a lovely piece of personalised wedding card to just fly away while you look on in horror.
It’s also really common to need to cut very small pieces from plastic or wood. But if they are smaller than the holes in the cutting bed of the laser machine, the pieces often fall through the holes as they have been cut. Then you either have to fish the pieces out of the cutting bed, or cut them again. This can potentially be a big waste of time and money.
Oh no! Where have three of my little circles gone?
This will happen to all lasercutter users at least once, but not everyone knows what to do to avoid it.
It might seem like it doesn’t matter very much because they are only tiny pieces and you can always cut more of them. But in the example image above I have lost 75% of my pieces. And what started out as a cutting job of only a few seconds, has now turned into either a search-and-rescue mission to retrieve the three little circles, or a waste of more time and material because I need to cut more pieces.
So we therefore need a way to cut the pieces that automatically stops them falling down or blowing away.
One solution is to use sprues, and to include them in the cutting design right from the start.
When to Use Sprues
Generally speaking, use sprues if the piece to be cut is less than 1cm squared, and anytime you are cutting a design from a piece of paper.
How to Design Sprues
You can create sprues very quickly and easily in most vector-based drawing software (e.g. Photoshop or CorelDraw). I happen to use CorelDraw, but the principles are the same for most other apps/programs.
For most lasercutting projects, a sprue is just going to be a small break in the cutting line. It should be:
Big enough that the cut piece remains connected to the paper/wood/plastic
Small enough that the cut piece can be pulled or pushed out of the sheet of paper/wood/plastic by hand
There are two main ways to create them. The first is to ‘manually’ make a tiny break in the cutting line, and the second is to use the Weld function to make the break.
Method 1: Make a ‘manual’ break in the cutting line
Step 1) Make sure that you can edit curves and manipulate/add nodes on the cutting path of the design. (In CorelDraw the “Shape Tool” lets you do this.)
Note: If you can’t see any nodes to edit, you may need to convert the shape to curves first (e.g. by right-clicking the mouse and selecting “Convert to Curves”):
2) Zoom in really close to the object (e.g. so that a 3mm line fills the whole screen), then add two new nodes as close to an existing node as you can manage:
3): Select the middle node of the group of three nodes, then break the path of the curve. (e.g. by right-clicking and choosing “Break Apart”):
Screenshot from CorelDraw: breaking a curve
4) That middle node should have broken in two, so take one of the two resulting nodes and drag it about half a millimetre outside the curve. Then do the same for the other new node. This creates a small break in the cutting line, so that when you cut the piece it should now remain fixed in place until you’re ready to push or tear it from the material you were cutting.
Screenshot from CorelDraw with broken curve zoomed in
Screenshot of object with sprue at the top
5) Use the laser cutter to cut out the shape.
The object can now be pushed or pulled out of the sheet of material that it was cut from.
(You may need a knife or scissors to help cut it free, and a file or blade to cut off any extra material left over.)
Extra material at the top of the flower can be cut off with scissors
Conclusion
Using sprues helps laser cutters to save time, money, and annoyance. Instead of wailing in anguish as you watch another tiny precision-cut object fly away or disappear down a hole, consider using this little ‘design hack’ to avoid those problems.
Basically, whenever you’re lasercutting and you think “tiny” or “paper”, you should also think, “use sprues!”
I hope you found this article useful.
Method 2 (using the ‘Weld’ function to create sprues) is coming up later, but in the meantime if you have any comments or questions, please feel free to share them in the comments section or via the contact form.
Money-saving lasercutting tips #2: How to make “money for nothing” from scrap materials
(This is part of a series of money-saving tips for lasercutting businesses and enthusiasts.) The previous article discussed why you should use your leftover sheets of lasercutting material. This follow-up article delves a bit more deeply into how you can use these scrap pieces more economically, and potentially make ‘money for nothing’ by inserting bonus shapes between the main shapes that you are going to cut. It includes a link to a free lasercutting vector file that contains examples of these bonus shapes.
(If you don’t want to bother reading the article you can just click the button below. It should link straight to the free lasercutting file of sample ‘bonus’ shapes. (If the link is broken, please let me know, so I can fix it again.)
In the current ‘austerity’ economy there is always an interest in make-do-and-mend activities. At the moment even the BBC are running aprogramme calledMoney for Nothing. In this programme, dustbin-diving cheapskates thrifty people find old objects and then take them to artists and craftspeople who then convert the items into something beautiful and/or useful.*
The tips below follow that notion, and demonstrate how you can hopefully turn some of your scrap materials into cash.
Getting more value from your lasercutter
Artists and crafters are rarely well-paid, and so always try to get the most value out of materials as possible. This article shows how to avoid the feelings of frustration and guilt that can come with wasting materials … by using the leftover lasercutting materials to potentially gain some extra money. Win/win!
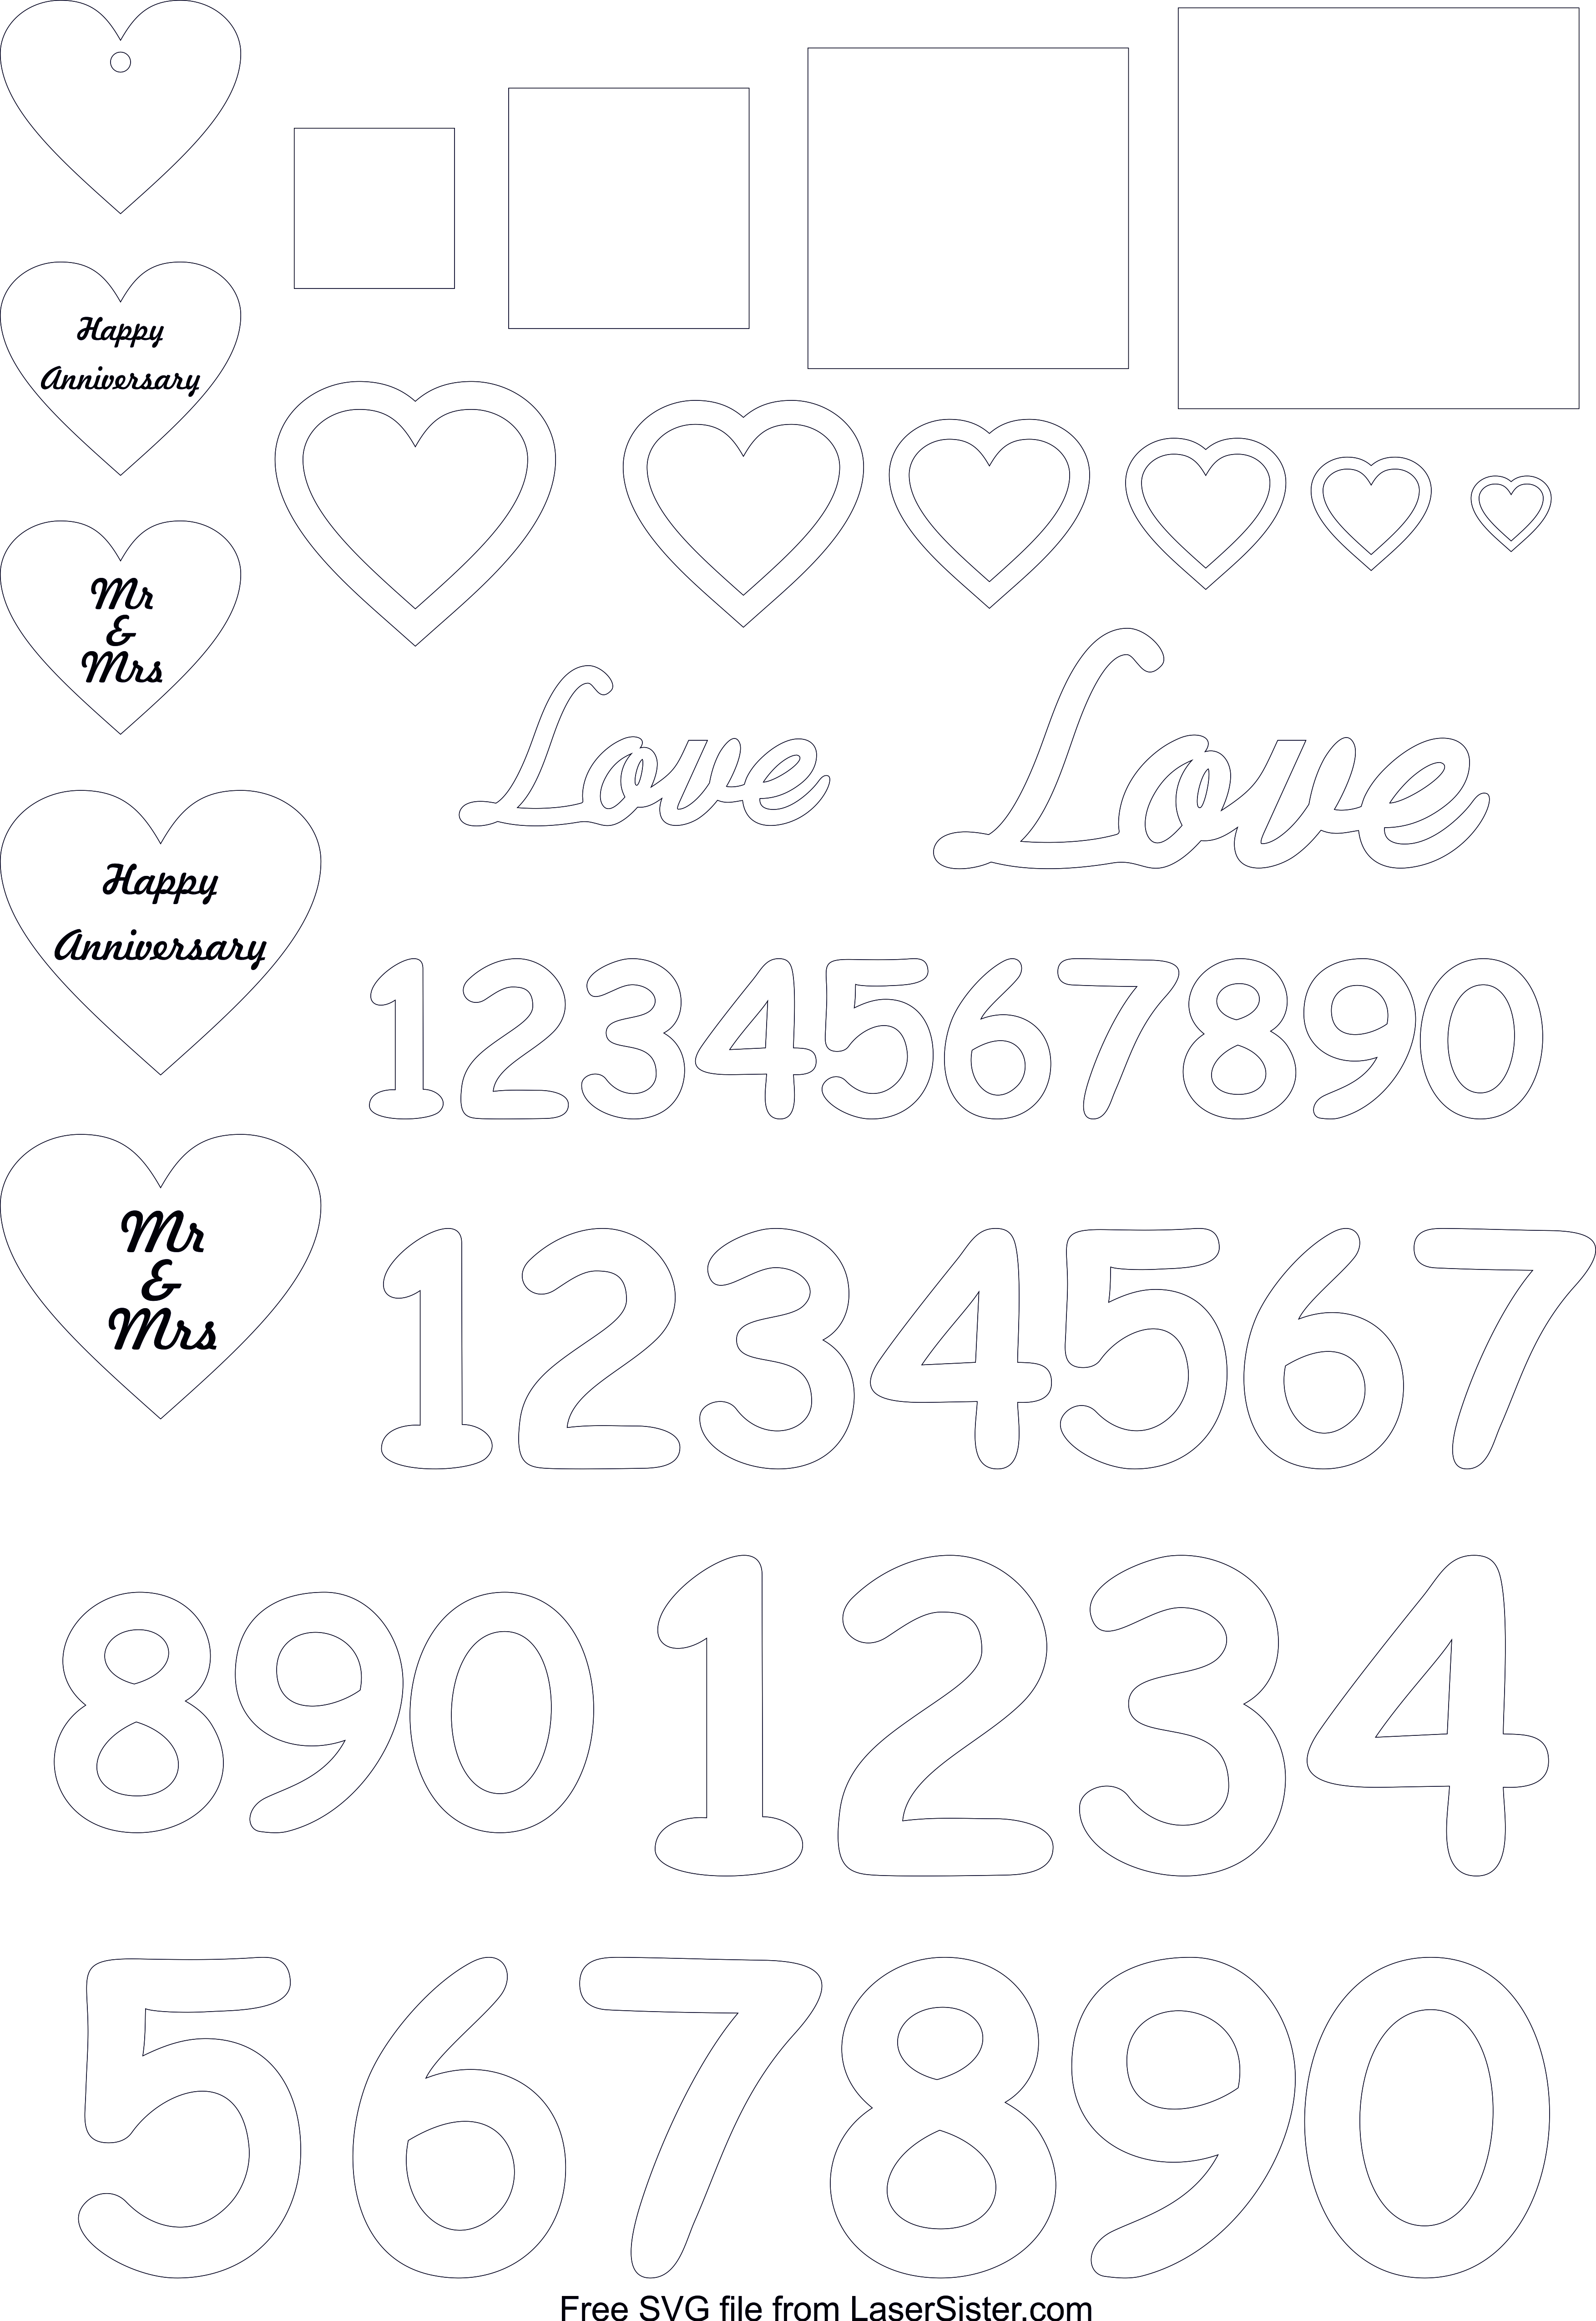
And as mentioned above, there is a free lasercutting vector file (PDF, SVG, or EPS) available. The file contains examples of extra items that can be inserted in between the main items you are cutting. That way you can use even very small sections of wood or acrylic to make useful products.
The idea is that your time is used more efficiently by cutting out (potentially) useful items straight away, rather than saving small weirdly-shaped bits of wood ‘just in case’.
And because you have used the scrap wood to cut out these (hopefully) useful items, your subconscious won’t give you a constant guilt-trip about wasting materials. So you can get on with doing other, more important lasercutting jobs instead.
Designing your own ‘bonus’ shapes
Below is a link to a free lasercutting vector file. It contains examples of popular shapes that can be used immediately. As mentioned in the previous article, I use this type of ‘bonus’/filler object all the time. When cutting family trees for example, these use large sections of wooden sheet – which then leave funny-shaped scrap pieces…
There’s plenty of space either side of the trunk to cut other objects!
…so rather than waste the leftover wood, I use my ready-made ‘bonus’ shapes to fill in the gaps. Shapes like numbers, letters, and hearts are always popular with other crafters, and so I might cut out a set of hearts and put them on Ebay or Etsy or Folksy. That way, the expensive lasercutting wood sheet material is then used to its full potential.
Have a think about items that you might be able to sell to other crafters, for example. Acrylic letters and numbers to use as card toppers? Little wooden hearts to use as table confetti or jewellery? Different sizes of circles that could be used by toymakers?
Conclusion
By having a file of pre-made popular designs, you can use your leftover wood/acrylic to potentially generate extra income. Instead of keeping weird little bits of wood ‘just in case’, you can make an immediate decision about what to do with the scrap wood, so that you produce far less waste and far more profit.
Challenge: think about small objects that might be useful to other crafters (or even to yourself) in future, and create a file of those shapes. Then the next time you do a cutting job that leaves gaps between the main objects, insert some of the ‘bonus’ shapes into those gaps and cut them out as you go along.
In the meantime, here is a link to a free file which contains examples of some of those bonus shapes:
Free lasercutting file
I hope you found this article useful. If you have any comments or questions, please feel free to share them in the comments section or via the contact form.
*Fellow Guild of Makers member Bad Dog Designs has had several pieces featured on the “Money for Nothing” programme. Check out his amazing ‘nixie clocks‘, made from objects such as old radios and record players.
Laser cutting materials such as wood veneers or acrylic sheets are often really expensive. Here are some money-saving laser cutting tips that will help to get the most out of your materials, and should also save time as well as money…
(Note: some of my blog posts contain affiliate links. If you’d like to know more about these, please check out my “policies” page.)
Tip #1: Fill in the gaps!
The other day Kitronik kindly sent me some samples of wood and acrylic…
…so I decided to test the acrylic by making some pink sparkly unicorns (obvs).
I found the designs on Vectorstock.com then downloaded them and laid them out ready to cut:
BUT I didn’t cut them out immediately. I knew there was a way I could get even more value out of that one small square of acrylic.
When doing any cutting job that involves irregular shapes, there will always be spaces in between the objects. So once you’ve cut out the main objects, what do you do with the acrylic/wood/card/paper/etc. sheet that is left behind? There are three main options:
Option 1: Throw it away (or send it for recycling, if it’s the right type of material).
The main advantage is that you get a tidier workspace.
But my reaction to this option is:
Noooooooooo!
Because there is still enough of the remaining wood/acrylic/whatever to cut other objects from. So you could save yourself some money by using those scraps of material.
Option 2: Keep it (because you don’t want to waste material that you could still cut from).
In the example image above, there are quite a few gaps between the unicorns. So there is enough acrylic sheet left over that could be used to cut other small objects. Theoretically then, the advantage of this option is that you don’t have to cut the small items from a new sheet of acrylic – you can just use the gaps in the leftover piece of material instead.
This is what I used to do. Keep the leftover materials for later. But my answer to this now is also:
Noooooooooo!
No matter how organised you are, it is highly unlikely that you will ever go back and use those little spaces in the leftover wood or acrylic.
Because whatever shape you cut out next will need to fit onto a very weird shape of material. You might know that you want to cut out a circle that has a diameter of 20mm, but until you open the old cutting file for the previous job (e.g. sparkly pink acrylic unicorns), you’ll have no idea what the dimensions are of the leftover wood/acrylic from that previous job.
In the image below, the red circle does fit on the leftover sheet because it has a diameter of 20mm. But if it had a diameter of 30mm then it wouldn’t have fit:
…and the only way to find that out is to open the original cutting file (or find the piece of leftover material itself) and measure the gaps. This also assumes that you keep all of your cutting files, and that you can match them up to the exact piece of leftover material that is stored in some ‘leftover purgatory’ pile in your workshop somewhere like this:
scrap graveyard
So let’s just face it – it is almost certain that you will never use that piece of material again, once you’ve finished your initial cutting job. It’s always easier just to start from a fresh new piece of cutting material, because you know exactly how big that piece is, and you don’t have to worry about fitting your new piece around some oddly-shaped object that has already been cut out of the sheet.
It reminds me of when my husband was helping his mother to clear out her attic. He swore that he had found a box up there labelled “pieces of string too short to save”.
It may also be a false economy to hunt down the piece of scrap to cut the new object from. Finding the correct computer file and/or piece of physical scrap material might take several minutes, whereas cutting from a fresh sheet of material will be much quicker.
However, you may still hate waste (of both resources and time) and want to make the most of your material. In this case there is still a third option available. This is what I tend to do nowadays instead of the two options above:
Option 3: Fill in the gaps
This is a good compromise. It lets you cut your ‘main’ objects (unicorns, in this case), but also make something useful with the leftover material.
I suggest keeping a separate file of ‘gap-filling objects’, ready for you to copy and paste into your other projects. Heart shapes always come in handy for crafters. Letters and numbers are also very popular.
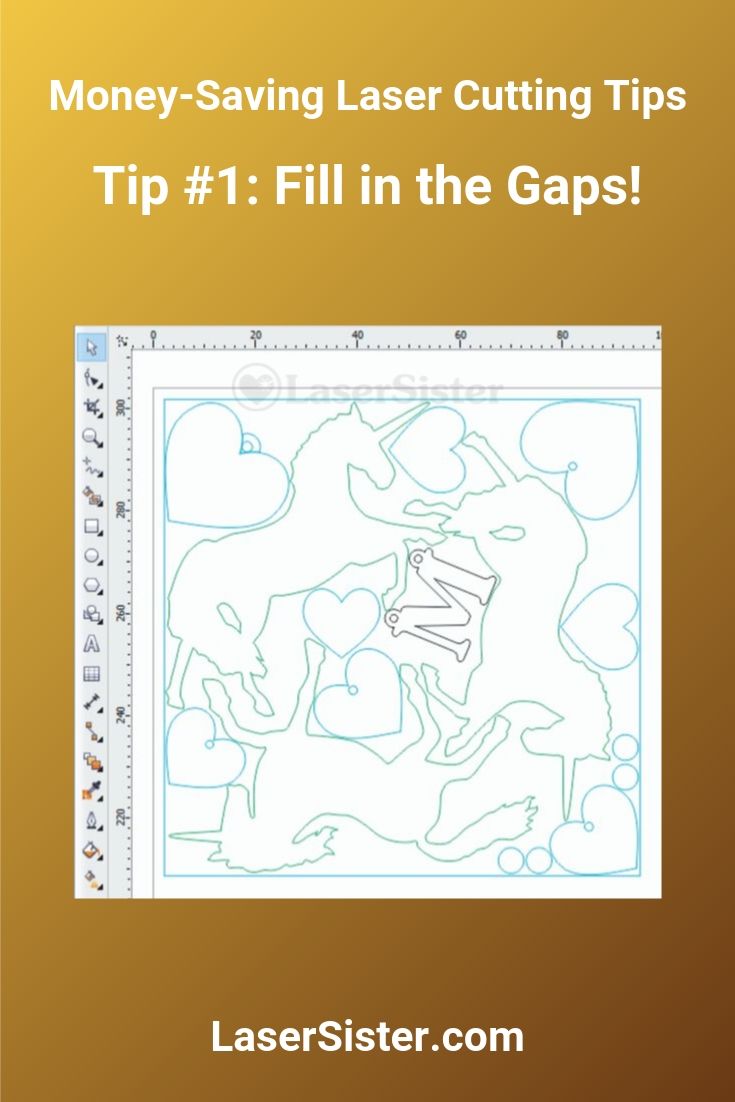
The screenshot below shows the solution in action.
First I inserted the outlines of the unicorns, and experimented with fitting as many of them onto the little square of material as I could.
Then I copied and pasted the letter “M” and some hearts into the document, to fill in the gaps.
Finally I inserted some tiny circles (bottom right-ish). The sparkly acrylic was a completely new material that I was testing, and so I needed to cut out a few small shapes first in order to find the correct speed and power settings for the laser cutter.
unicorn sampler with extra shapes for economy
As a result, from one little square of acrylic that was less than 10cm x 10cm, I managed to cut out:
3 sparkly pink unicorns
8 sparkly pink hearts
1 sparkly pink letter
The result was that (1) the new material was thoroughly tested, (2) I didn’t have to store a piece of nearly-useless acrylic sheet in my superShed, and (3) I ended up with a few bonus items that could possibly be sold or given away later, and (4) even if I ended up discarding the bonus shapes later on, I wouldn’t feel too guilty because they were basically cut from scrap material in the first place.
Additional tip:
Don’t spend too long worrying about what the ‘filler’ shapes should be. Remember that the point is to turn the laserable material into something more useful (or better still, more sell-able), than the material which would have just gone to waste otherwise.
Conclusion
This is a really fast and efficient way to get the most value out of your laser cutting materials. It solves the problems of waste and guilt, and saves time as well as money. If you are running (or considering running) a laser cutting business then it’s definitely worth trying this option.
I hope you found this article useful. If you do have any questions or comments (or more money-saving laser cutting tips) then please do get in touch.
Papercut 082 : Oh dear! I’m in the process of changing over my website host, and have been a week without being able to access my blog.
I’ve moved the old pages and blog posts across to the new host, but there are still a lot of tweaks that I need to make in order to get the site fully working again.
In the meantime, I continued to do my papercuttings every day, so now (belatedly) I am finally able to update the website with my latest papercuttings:
It might not look it, but this was quite a tricky design to cut. The design involved having to leave just tiny links of paper in order to hold the actual physical piece of paper together. So the overall piece got very lacy and delicate towards the end.
I’d cut similar designs to this one earlier on in this project (i.e. even before starting this ‘100 days’ project), but I didn’t really like the results, before. However, now that I’m getting more proficient at cutting by hand (and also at adapting designs so that they can be cut out but still look fairly attractive), the end result is quite close to what I had imagined in the first place:
Plus, it’s another art nouveau-style design, so that quite appeals to me, and it also makes any mistakes less obvious because the curves and swirls in the design make it harder to spot.
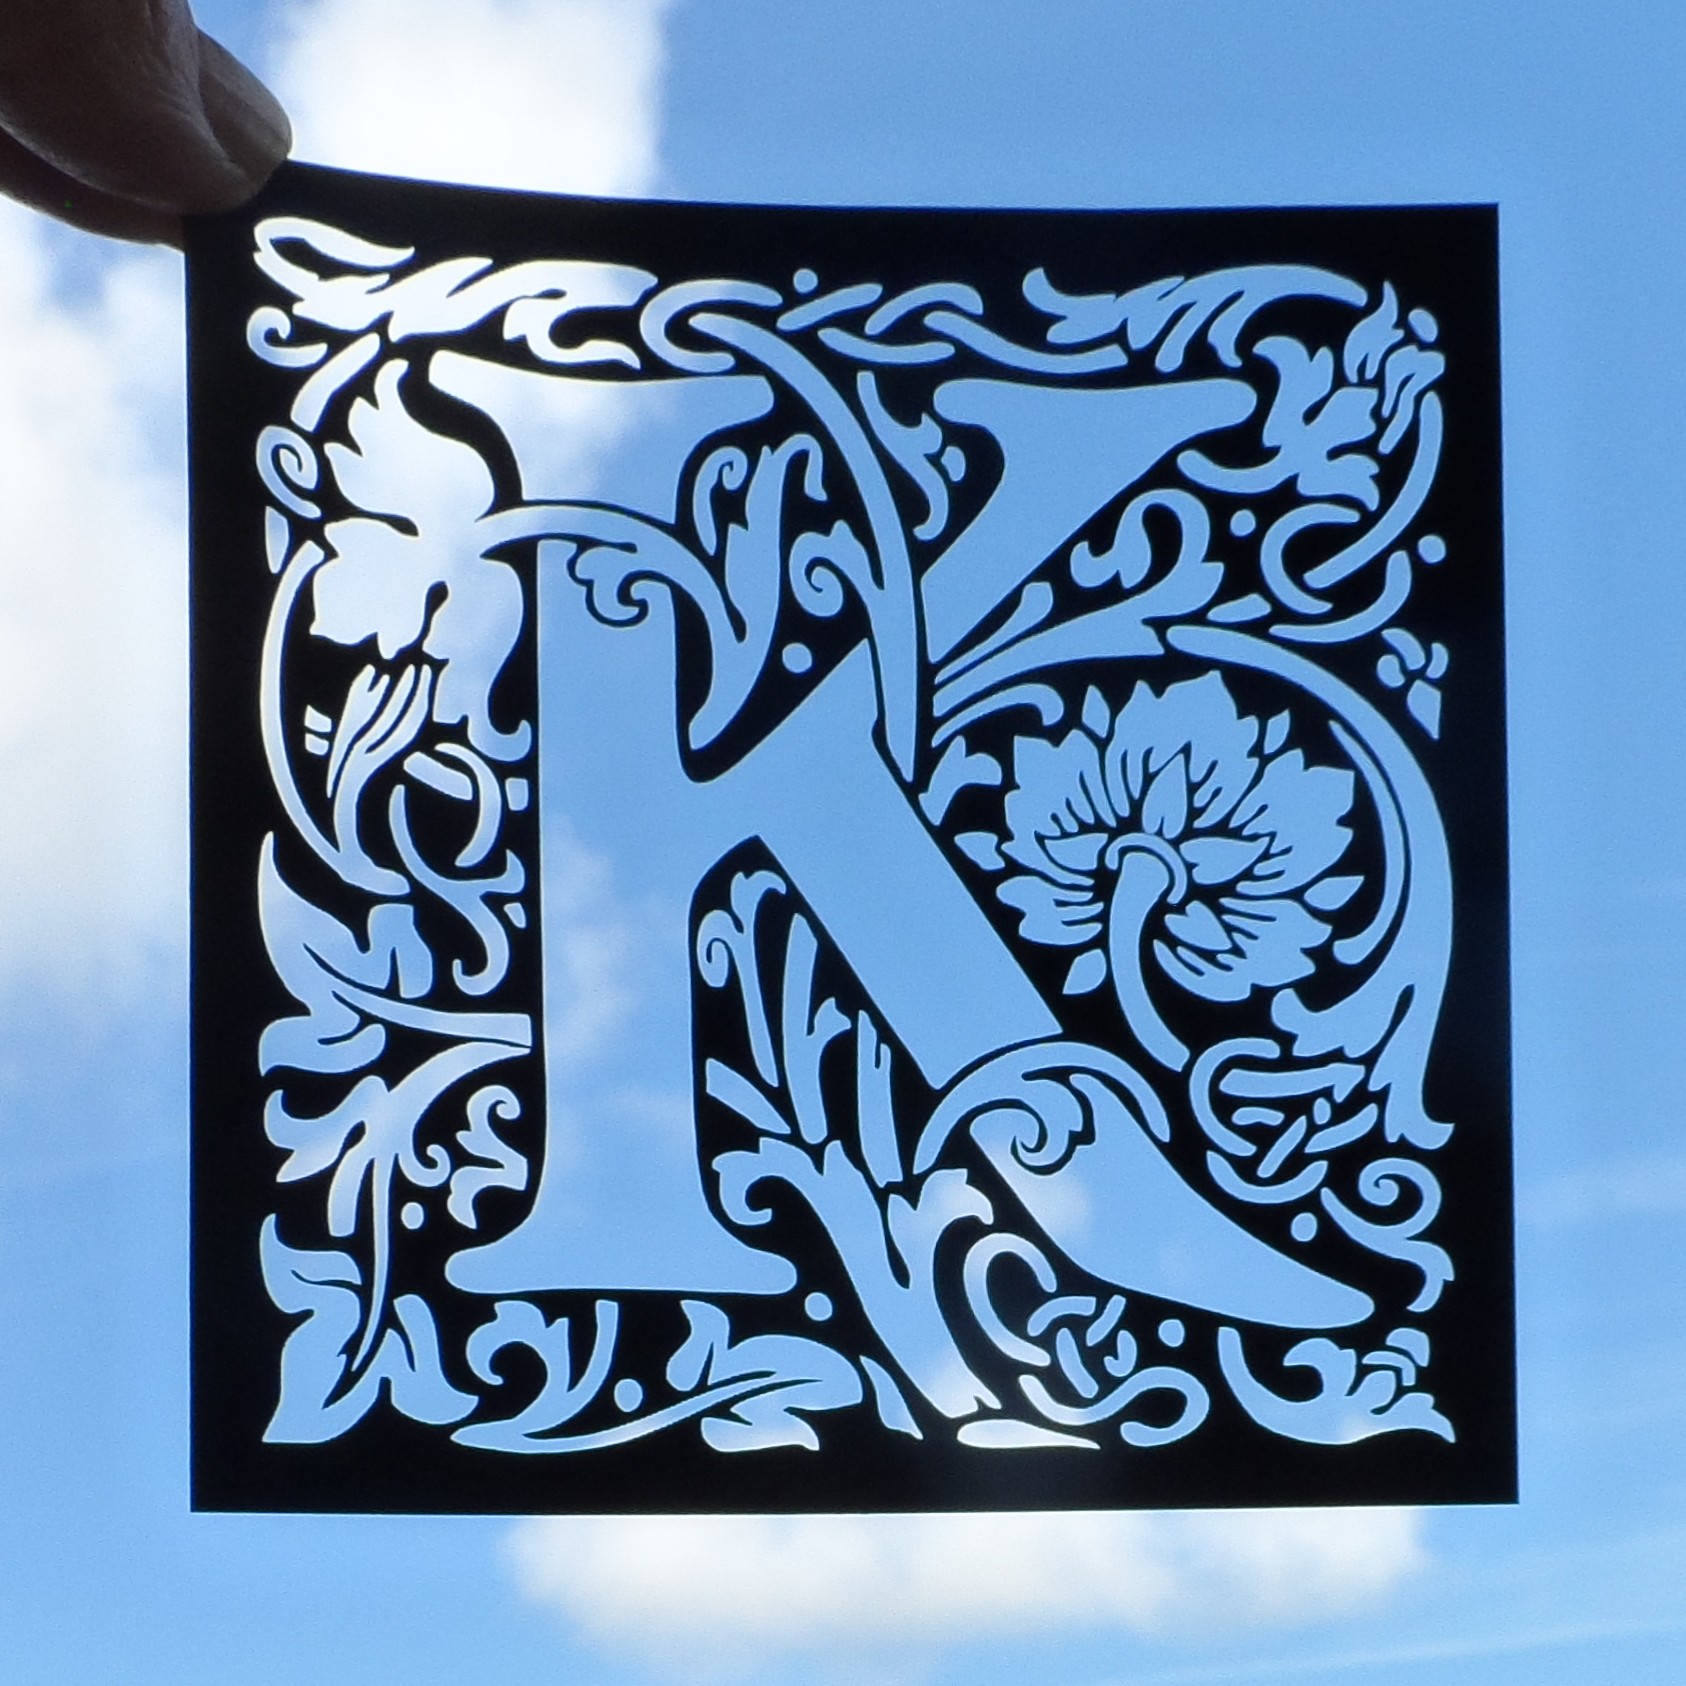
This week I’ve been developing William Morris-style laser cut birthday cards.
After a couple of days’ tinkering, I ended up with some really nice filigree designs of card toppers:
Birthday card design: E
Testing a gold “F” design
Where to find images and inspiration for your laser cutter
For the letters shown above, I bought the extended licence from Dreamstime, which is a website where you can buy royalty-free photos and vector-based illustrations.
Here are the art nouveau alphabet images that I used. Alternatively, you can enter your own search terms in the box below, to look for specific resources. For example, type “Art nouveau”, or “William Morris alphabet” in the box, and then click the ‘search’ button.
Another great resource that I’ve found for royalty-free designs is Vectorstock.com. They seem to have forgotten to use an apostrophe in the link/banner below, but they still do a brilliant range of illustrations. And because their files are all vector-based graphics, that means that they are usually very straightforward to cut with a laser cutter:
And at the moment (April 2018) both sites are even more useful if you have your own laser cutting business, because they can provide a little bit of extra income on top of your actual laser-cut products. You can either upload some of your own original designs and allow people to buy licences to use them, or can sign up as an ‘affiliate’.
For example, with Vectorstock I uploaded my elephant design so that other people with laser cutters can use it in their own designs. Then every time someone purchases a licence for the elephant, I receive a few cents, but there is no extra cost to the purchaser. Win/win!
Similarly, with affiliate links and referral schemes, you can also receive small payments just for pointing people towards something that they are already interested in. As another example, if you include the banners/ads for these services (like the ones shown above) you could receive a small payment each time someone signs up and/or purchases a licence.
Hope you enjoyed this post. Don’t forget to say ‘hi’ via the contact us page, or to tweet me @LaserSister if you’ve tried any of the above ideas or if you’ve got comments or questions.
(This post was originally on my KayVincent.com website, but now that I’ve got the LaserSister.com site I am moving or copying a lot of the laser-related articles over here. That way I should end up with a website full of posts relevant to laser-cutting, and can leave the other website/blog as a more general source of info.)
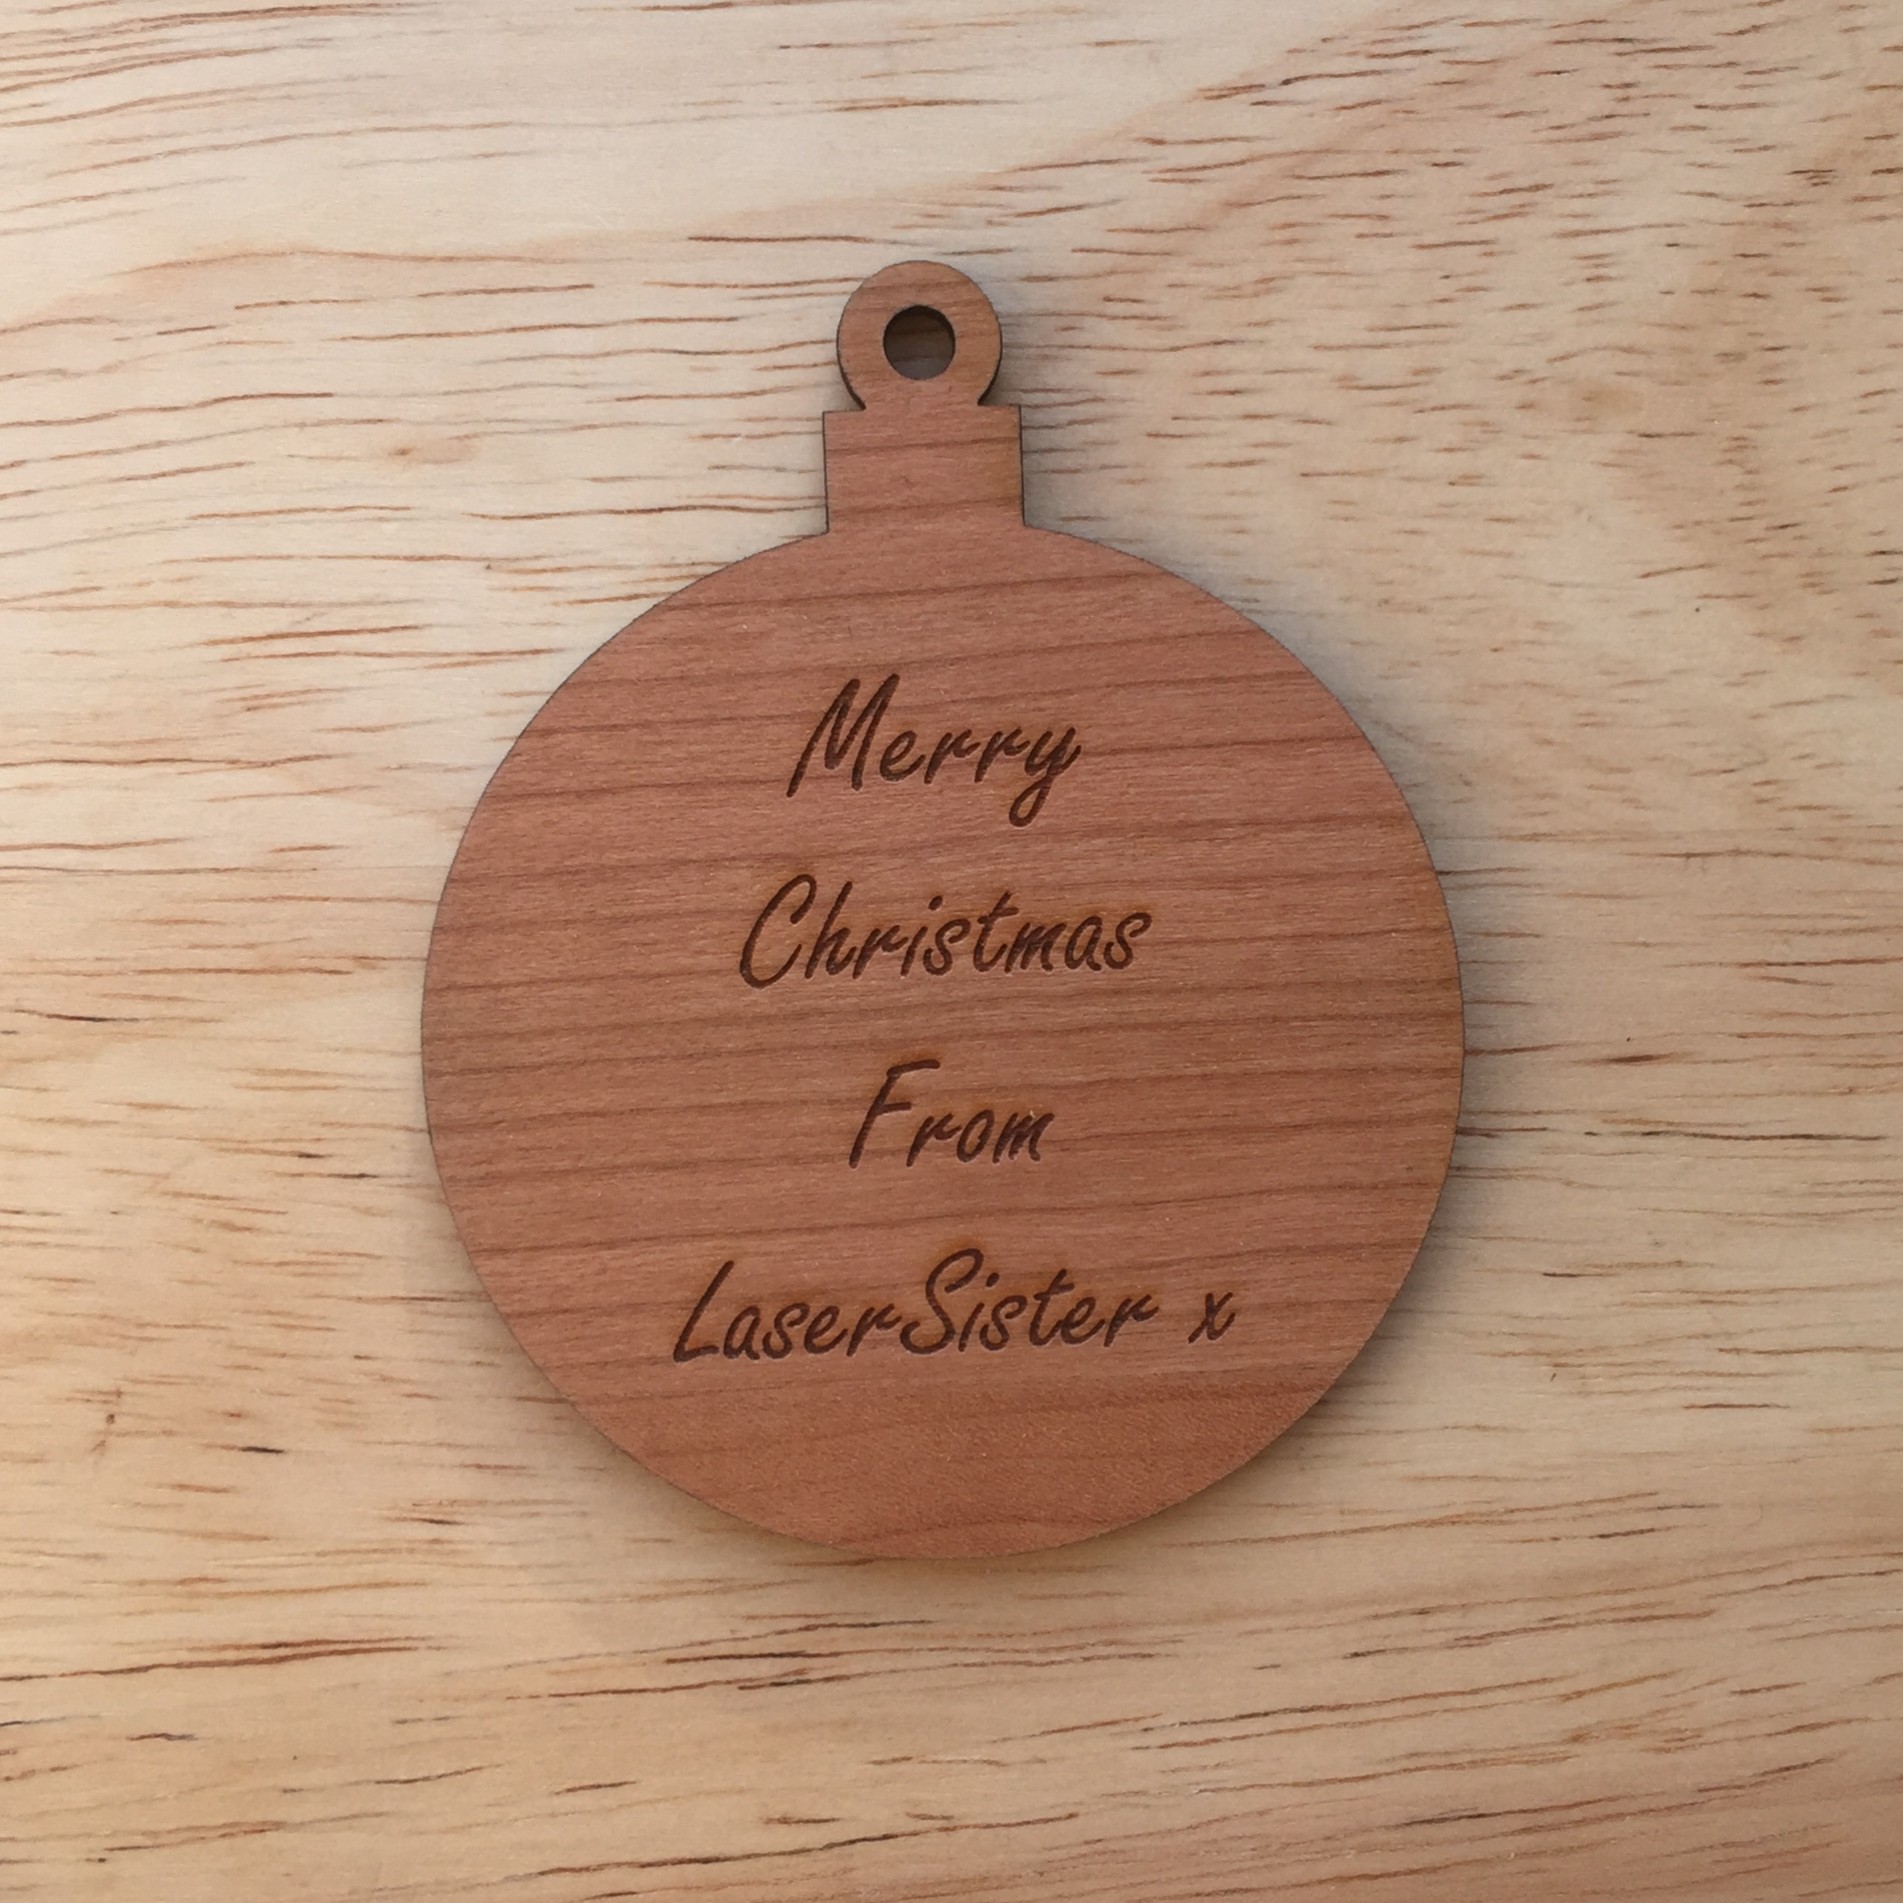
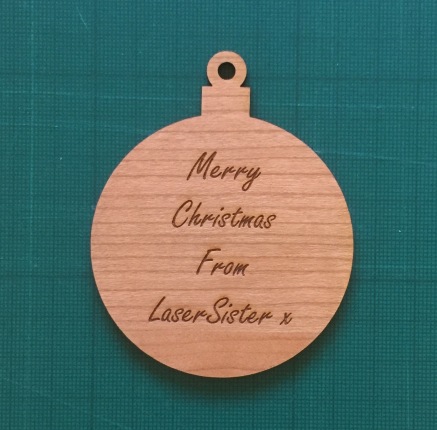
How to Make Quick and Easy Personalised Christmas Tree Ornaments Using a Laser Cutter
Here is a step-by-step tutorial on how to make quick and easy personalised Christmas tree ornaments with a laser cutter. It shows how to create a really simple round bauble shape that you can then etch with a message or image. Alternatively, you could decorate it by hand (or give/sell it to someone else so that they can decorate it by hand). If you’ve got access to a laser cutter then this could be a great (fast!) boost to your Christmas income.
If you don’t have time (or can’t be bothered) to go through the steps learning how to create the shape yourself, just click on the button below and it will take you to a (free) pre-made version of the design so that you can immediately start using it and cutting your own personalised Christmas baubles with your laser cutter. The vector design is done for you, so all you have to do is put your own text on there and it should be ready to cut.
The reason I’m using CorelDraw is because that is the recommended software for my particular laser machine, but most other vector-drawing software has similar commands and effects (although the tools and menus might be called something slightly different).
Step-by-Step: How to Make a Simple Christmas Bauble Shape With a Laser Cutter
1) Start a new blank document in CorelDraw. Mine uses millimetres as the measuring unit. If you want to change that, just click anywhere in the blank document and the “Units” dropdown should appear along the top somewhere:
2) Use the Ellipse Tool to create a circle 80mm wide (Tip: Hold down the Ctrl key at the same time as you are drawing, to make sure you end up with a circle instead of an oval)
If the circle didn’t come out at exactly 80mm, you can change it. Make sure that the ‘Lock Ratio’ button is selected, then type “80″ into the width for “x:”
3) Use the Rectangle tool to create a rectangle 15mm wide by 9mm tall
If you don’t get exactly that size it doesn’t matter, but if you want to use precisely those dimenstions then:
Use the Pick Tool to select the rectangle
Un-select the ‘Lock ratio’ button so that the x and y measurements can be changed separately to each other
Type in “15″ for the x measurement, and “9″ for the y measurement
(then it’s usually best to go back and re-select the ‘Lock ratio’ button)
4) Align the two objects on the same central line
Use the Pick tool to select the circle and rectangle. Then press “C” on the keyboard. This will make sure both objects are lined up vertically with each other.
(You can also go via the menu: Arrange> Align and Distribute> Align centers vertically)
5) Position the rectangle on the top of the circle
Use the Pick Tool to select just the rectangle.
Then either use the ‘down’ key on the keyboard to move the rectangle, or hold down the ‘Ctrl’ key and drag the rectangle downwards.
Aim to get the bottom corners of the rectangle just inside the circle:
6) Create a 5mm circle for the ‘hanging loop’
Use the Ellipse tool to create a circle with a 5mm diameter. (Remember to hold down Ctrl + C to make it a perfect circle instead of an oval.)
7) Create a 12.5mm circle as the outside part of the ‘hanging loop’
Use the Pick Tool to select the 5mm circle, then duplicate or copy it*.
Then change the second circle so that it is 12.5mm across:
*To make a copy of any shape, you can do this by selecting the shape then:
using the shortcut of Ctrl + D
… or by copying and pasting (Ctrl + C then Ctrl + V)
…or by using the Step and Repeat menu and clicking ‘Apply’. (If you can’t see the Step and Repeat menu go to Edit > Step and Repeat)
8) Link the two circles to convert them into just one object
Use the Pick Tool to select both circles. Then press Ctrl + L to link the two objects together to make them into one doughnut-shaped hanging loop (this is important for a Step 12 later, when the ring is ‘welded’ to the rectangle shape).
9) Align the hanging loop and rectangle
Use the Pick Tool and highlight the bauble and the rectangle at the same time (e.g. either draw a box around them both, or select one shape then hold down the Shift key while selecting the other shape.) Then press “C” on the keyboard to align them both on the same central line.
10) Reposition the hanging loop
Use the Pick Tool to select the hanging loop, then move it down (using the cursor key, or hold down “Ctrl” button at the same time as dragging the object down) until the bottom of the loop overlaps the top of the rectangle:
11) Use the Boundary tool to combine the rectangle and large circle
Use the Pick Tool (and hold down the “Shift” key) to select the rectangle and large circle at the same time.
…then use the Shaping Tool to create a boundary. This will now be the main bauble shape.
You can find this tool via Arrange > Shaping > Boundary (make sure that you un-select “Place Behind selected” and “Leave Original Object(s)”):
12) Weld the hanging loop and main bauble shape together
Use the Pick Tool to select the hanging loop, then click the “Weld to” button (If you can’t see the Weld To button, you can find it in Arrange > Shaping > Weld.)
Then click on the outline of the main bauble shape, and the two shapes should then weld together.
You should now have a simple bauble shape, ready for cutting!
Now you can use the Text Tool to add a personal message for etching onto the ornament, which will make a really quick and easy gift for someone.
Speaking of Christmas – here is a gift for you! I’ve created a free downloadable file for you to use with your own laser cutter, if you like. Just click the button below and it will take you to the downloadable resource.
Well, this is turning out to be an interesting (and busy!) week.
Checking out my blog stats, it appears that my laser cutting blog is in the top 40 of a list of laser cutting blogs
Woo – some automated software has given me an award!
Disappointingly, there are only 33 websites on the list (I am currently number 30) – so it appears that at the moment if you have a laser cutting blog then you are automatically in the list. On the other hand, (1) I only moved to this website host a few weeks ago, so it’s lucky any web-crawling bots can find me anyway, and (2) at least I’m actually on the list!
The previous article described how to use ready-made stock vector images for lasercutting work, but sometimes (depending on how the artist created the original image) it can still take several hours of ‘tweaking’ to make them suitable for your own project.
What if you already know the sort of design you want, and could draw it quickly by hand but you’re stuck with using a mouse or trackpad that doesn’t quite do the job? This article will show a quick way to create hand-drawn vector images for your lasercutting projects, that you know will be exactly right for your work because you created them. Plus they’re original and you don’t need to pay anyone for the rights to use them!
You will need:
White paper
Thick black pen (e.g. a Sharpie, or I just get cheap markers from Wilko)
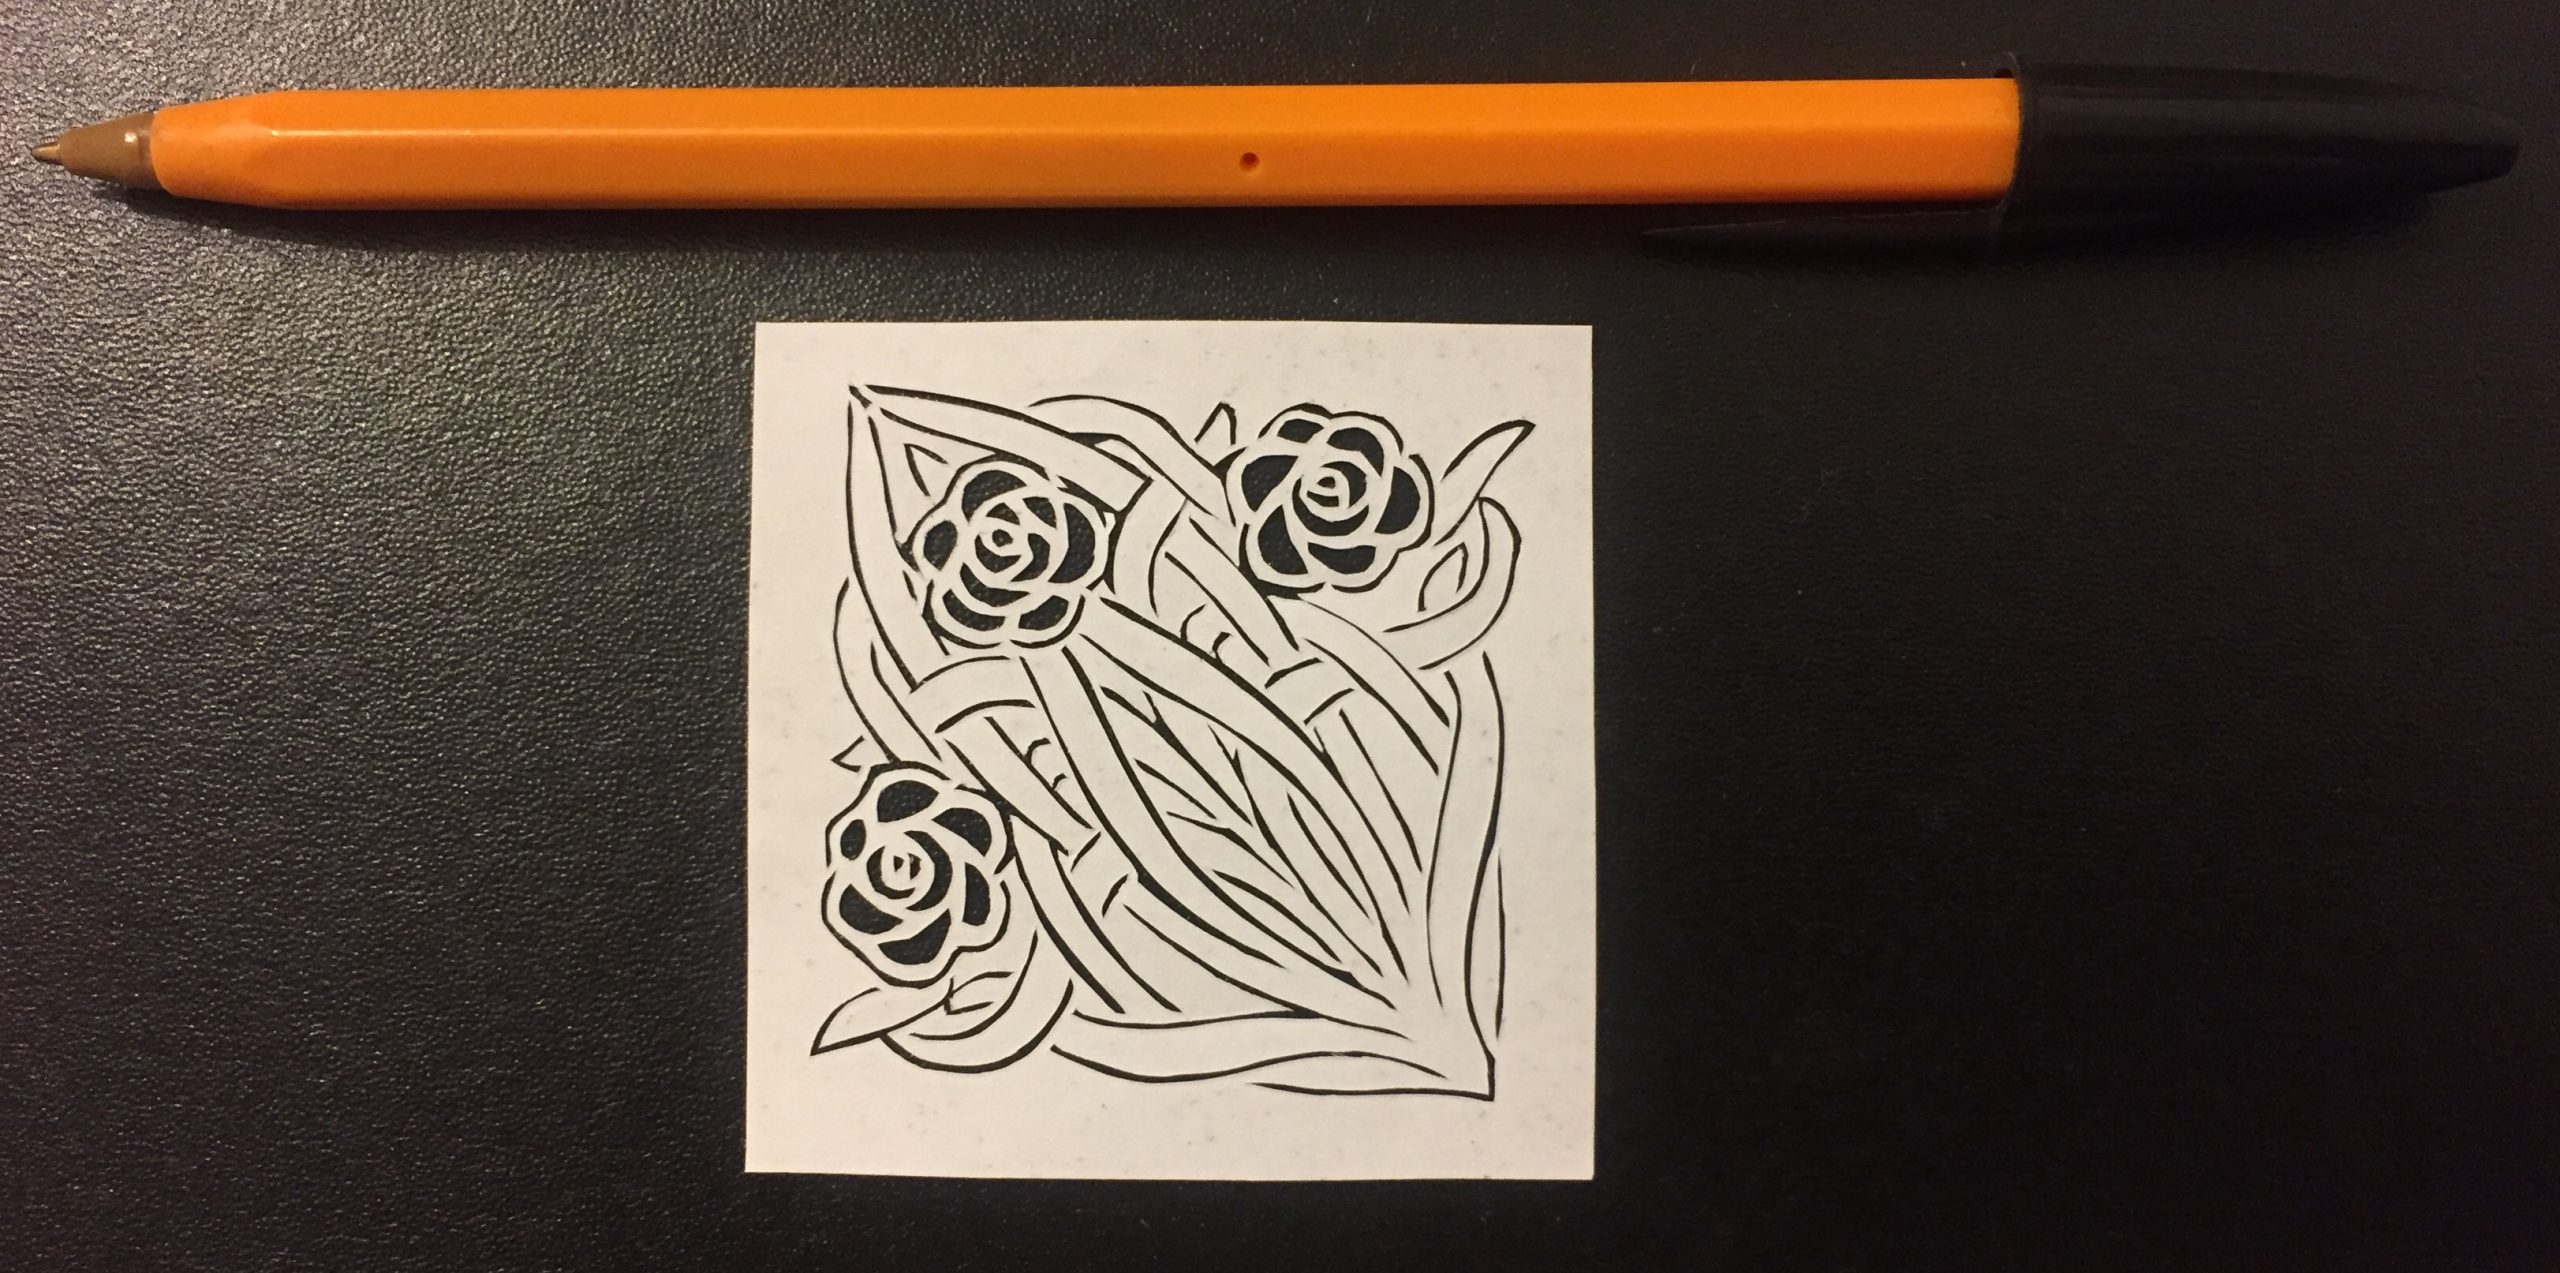
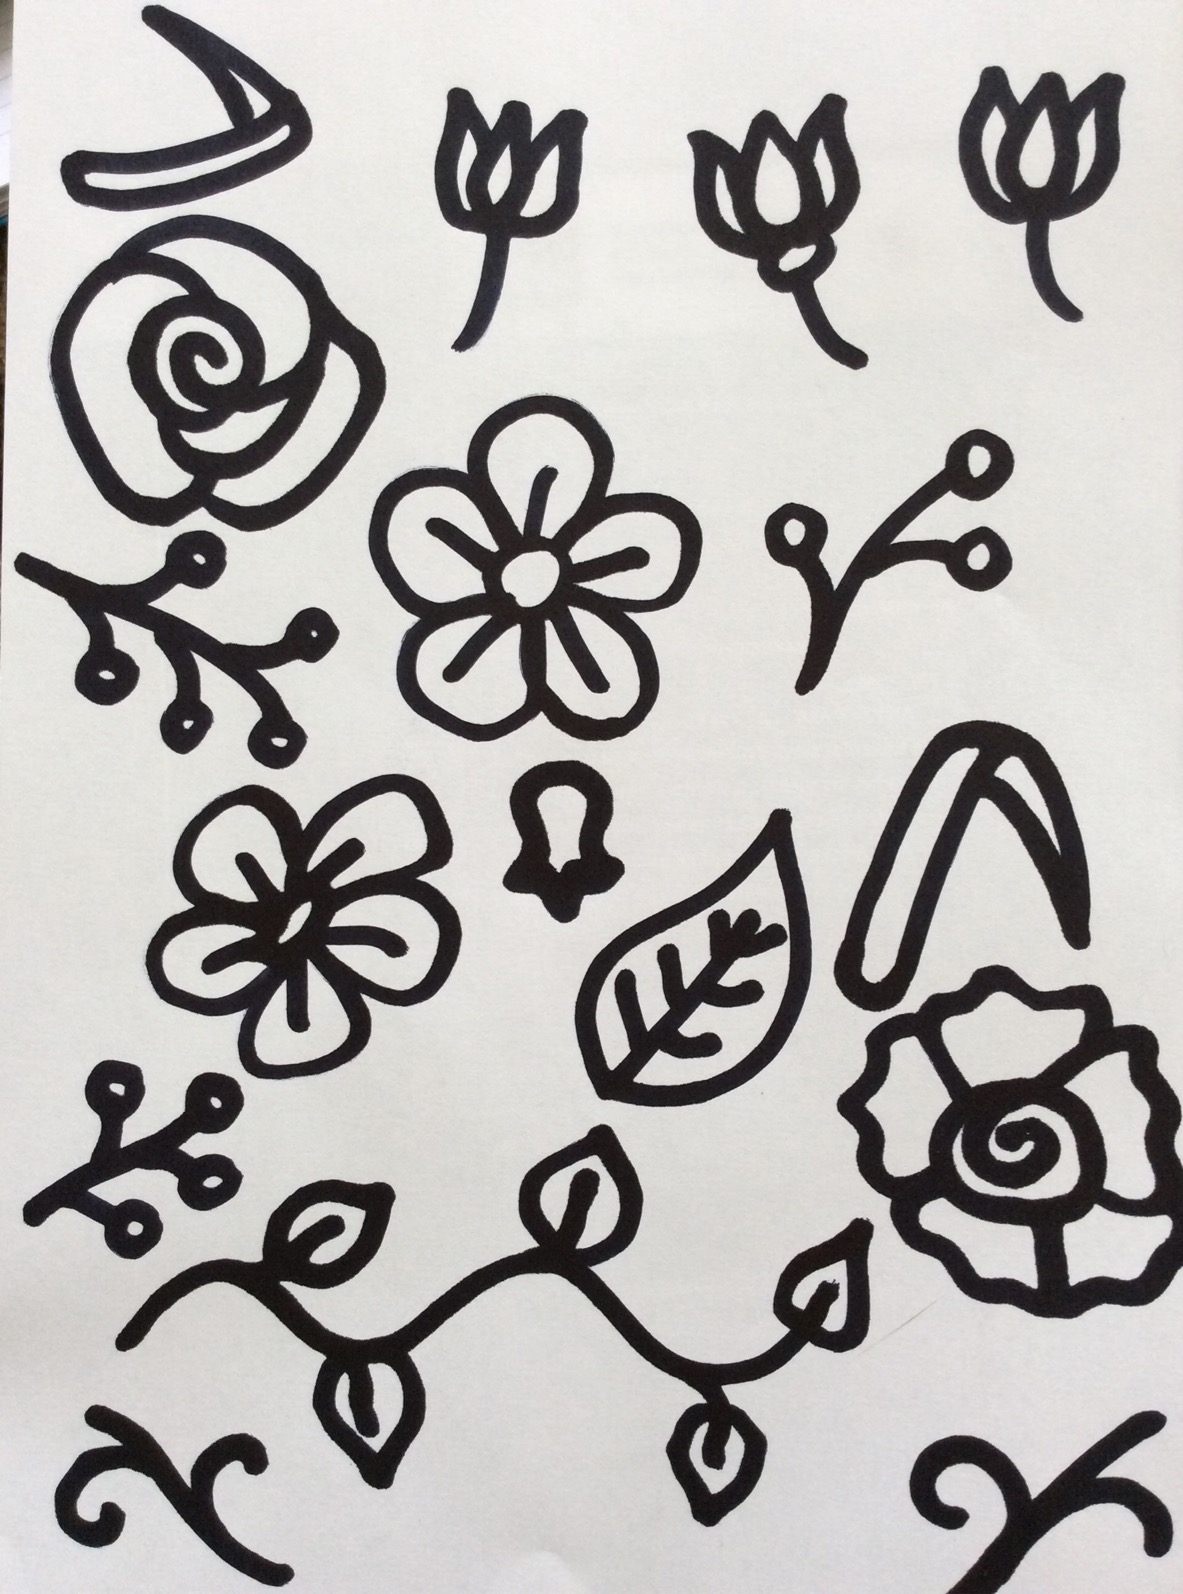
Step 1: Use the thick black pen to draw your designs.
Hand-drawn florals: thick black pen on white paper.
Step 2: Scan or photograph your hand-drawn image, and save it somewhere that you’ll be able to retrieve it from your drawing application.
Step 3: Open your drawing software and import the image (in CorelDraw use Ctrl + I, and in Illustrator I think it’s File > Place)
Photo of hand-drawn flowers has been imported into CorelDraw
Step 4: Now you basically need to get the software to turn your photo (millions of pixels) into vectors (hundreds of coordinates), so you’ll be able to create a design that your laser can cut. In CorelDraw you can do this by selecting the image and then go to Bitmaps > Quick Trace. (In Illustrator it’s called Live Trace.) The software then simplifies blocks of colour and turns them into separate objects:
The black parts of the image have automatically been changed into black objects with smoother outlines.
Step 5: (Optional) The software doesn’t always get the conversion exactly right, so you might end up with an object made up of a couple of layers of colour (in the case below, there is a solid black flower outline, with some grey petal shapes on top of it, instead of being made of thin black outlines). In CorelDraw it’s easy to ungroup the object (Ctrl + U), and then highlight the group of object (e.g. the flower in this case) and go into Arrange > Shaping > Back Minus Front.
Left-hand flower looks like one object, but it’s actually made up of a big black shape with six grey shapes on top of it.
Grey shapes have been removed, so the flower is now one object made of black lines.
Step 6: (Optional) If you want, you can copy shapes and/or move or re-size them until you have the design that you want.
Step 7: If you want to cut the shapes then make sure they have a thin or hairline-width outline, but if you just want to etch the shapes then they don’t need the thin outline:
Hand-drawn flower vectors with thin blue outlines
Step 8: (Optional) If you have combined several shapes in one design, you may need to ‘weld’ them together before you cut them. The laser cutter will cut anything that has a thin outline, and so in the example above, the three flowers would be cut out separately. To make sure the laser sees all of the flowers as one design and not as individual objects to cut out, you can use the ‘weld’ function (in CorelDraw it’s Arrange > Shaping > Weld.)
Hand-drawn flowers with one outline (compare the middle flower with the previous picture), ready for laser cutting
The design should now cut properly.
Laser-cut hand-drawn flower vectors (smaller and larger versions)
If you have a laser business it’s often hard to find the time to create new designs when you are already busy with making existing products. One way to save time is to use existing “stock” images, to help fast-forward the design process.
There are many stock image services online where you can find existing vector designs, created by professional designers or independent artists. And each of these websites has a huge range of images, suitable for just about every occasion.
Note: Although these images are ‘royalty free’ (you don’t have to keep paying every time you use them in your own products), the designs do usually cost something to actually buy in the first place.
There are also different types of license that you purchase. It is often free or fairly cheap (e.g. $1USD, or £1GBP per image) to download an image if you are just buying it for your own personal use. However if you want to sell products with these images on them, you usually need to buy an ‘extended’ license, which lets you make multiple copies of the designs and sell objects which include them.
Screenshot of choosing a vector image license in Dreamstime
Luckily, there are also a few rare sites and collections which include free royalty free images (!) for commercial use. In other words, this is where either the image is out of copyright, or the artist has given permission for other people to make multiple copies of their designs and sell objects that include it.
Examples of some of these sites include CraftsmanSpace, Vector4Free, FreeVectors, BUT be careful again that the license allows commercial use (i.e. it lets you copy the image and use it on products that you sell).
Screenshot of a free vector on craftsmanspace.com
Once you’ve found a suitable vector image on the website, here are the general steps you will need to follow:
Step 1: Download the image and save it in a folder or system where you’ll be able to easily find it again (e.g. create a folder called “vector downloads for commercial use”).
Step 2: Open a new document in your drawing/design software (e.g. CorelDraw).
Step 3: Import the saved vector into the new document.
Screenshot of free vector image imported into CorelDraw
Step 4: Then depending on your laser system: if you want to cut the image, make sure it has got hairline (or very thin) outline, and if you want to etch the image, make sure it hasn’t got the thin outline.
So that’s it. Instead of spending hours drawing and tweaking your own designs (when you could be doing some lasercutting), just search for a vector that you like, make sure that you’ve got the rights to reproduce it commercially, and download it into your drawing software.
Hope you find this article useful – if so (or if there’s something else you think I should have mentioned), please feel free to comment or use the Contact page. Cheeers.