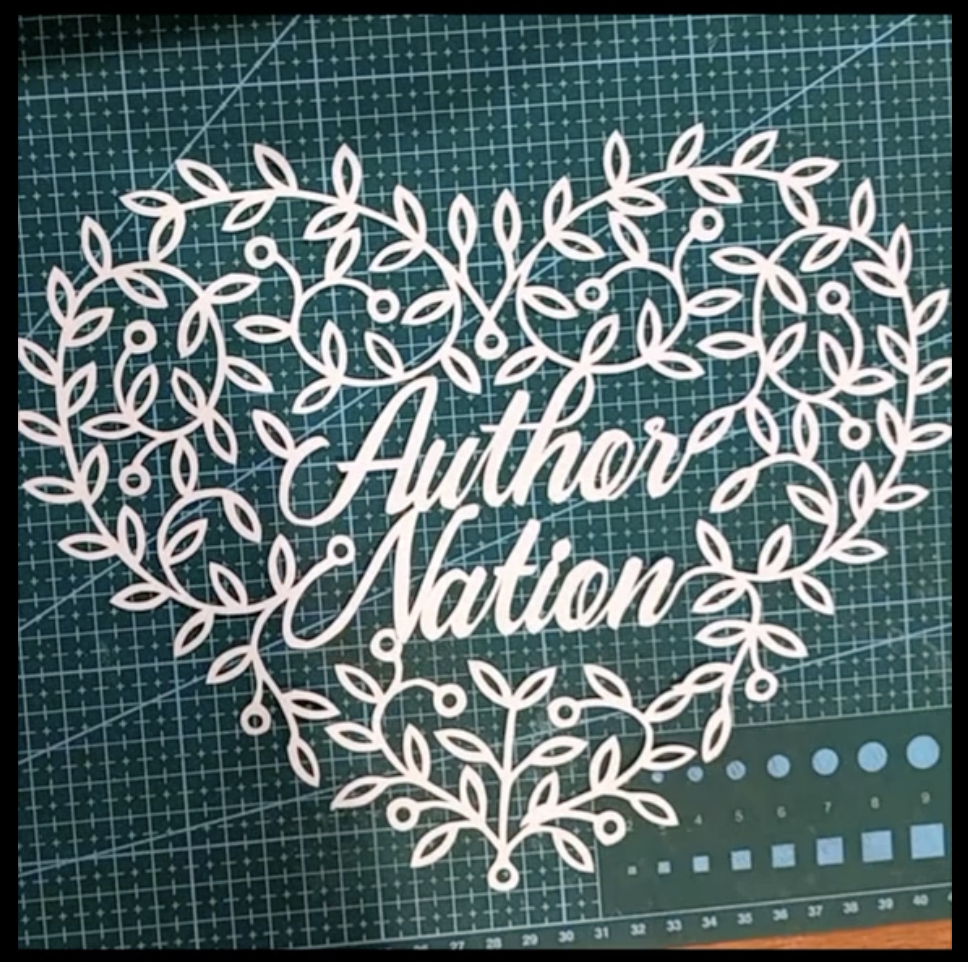
I don’t really do Valentine’s Day. But I do love the Author Nation community! So for Valentine’s Day I created and cut an “Author Nation Valentine Heart” artwork.
I recorded myself making it as a timelapse video, and here’s a link to the TikTok version of that:
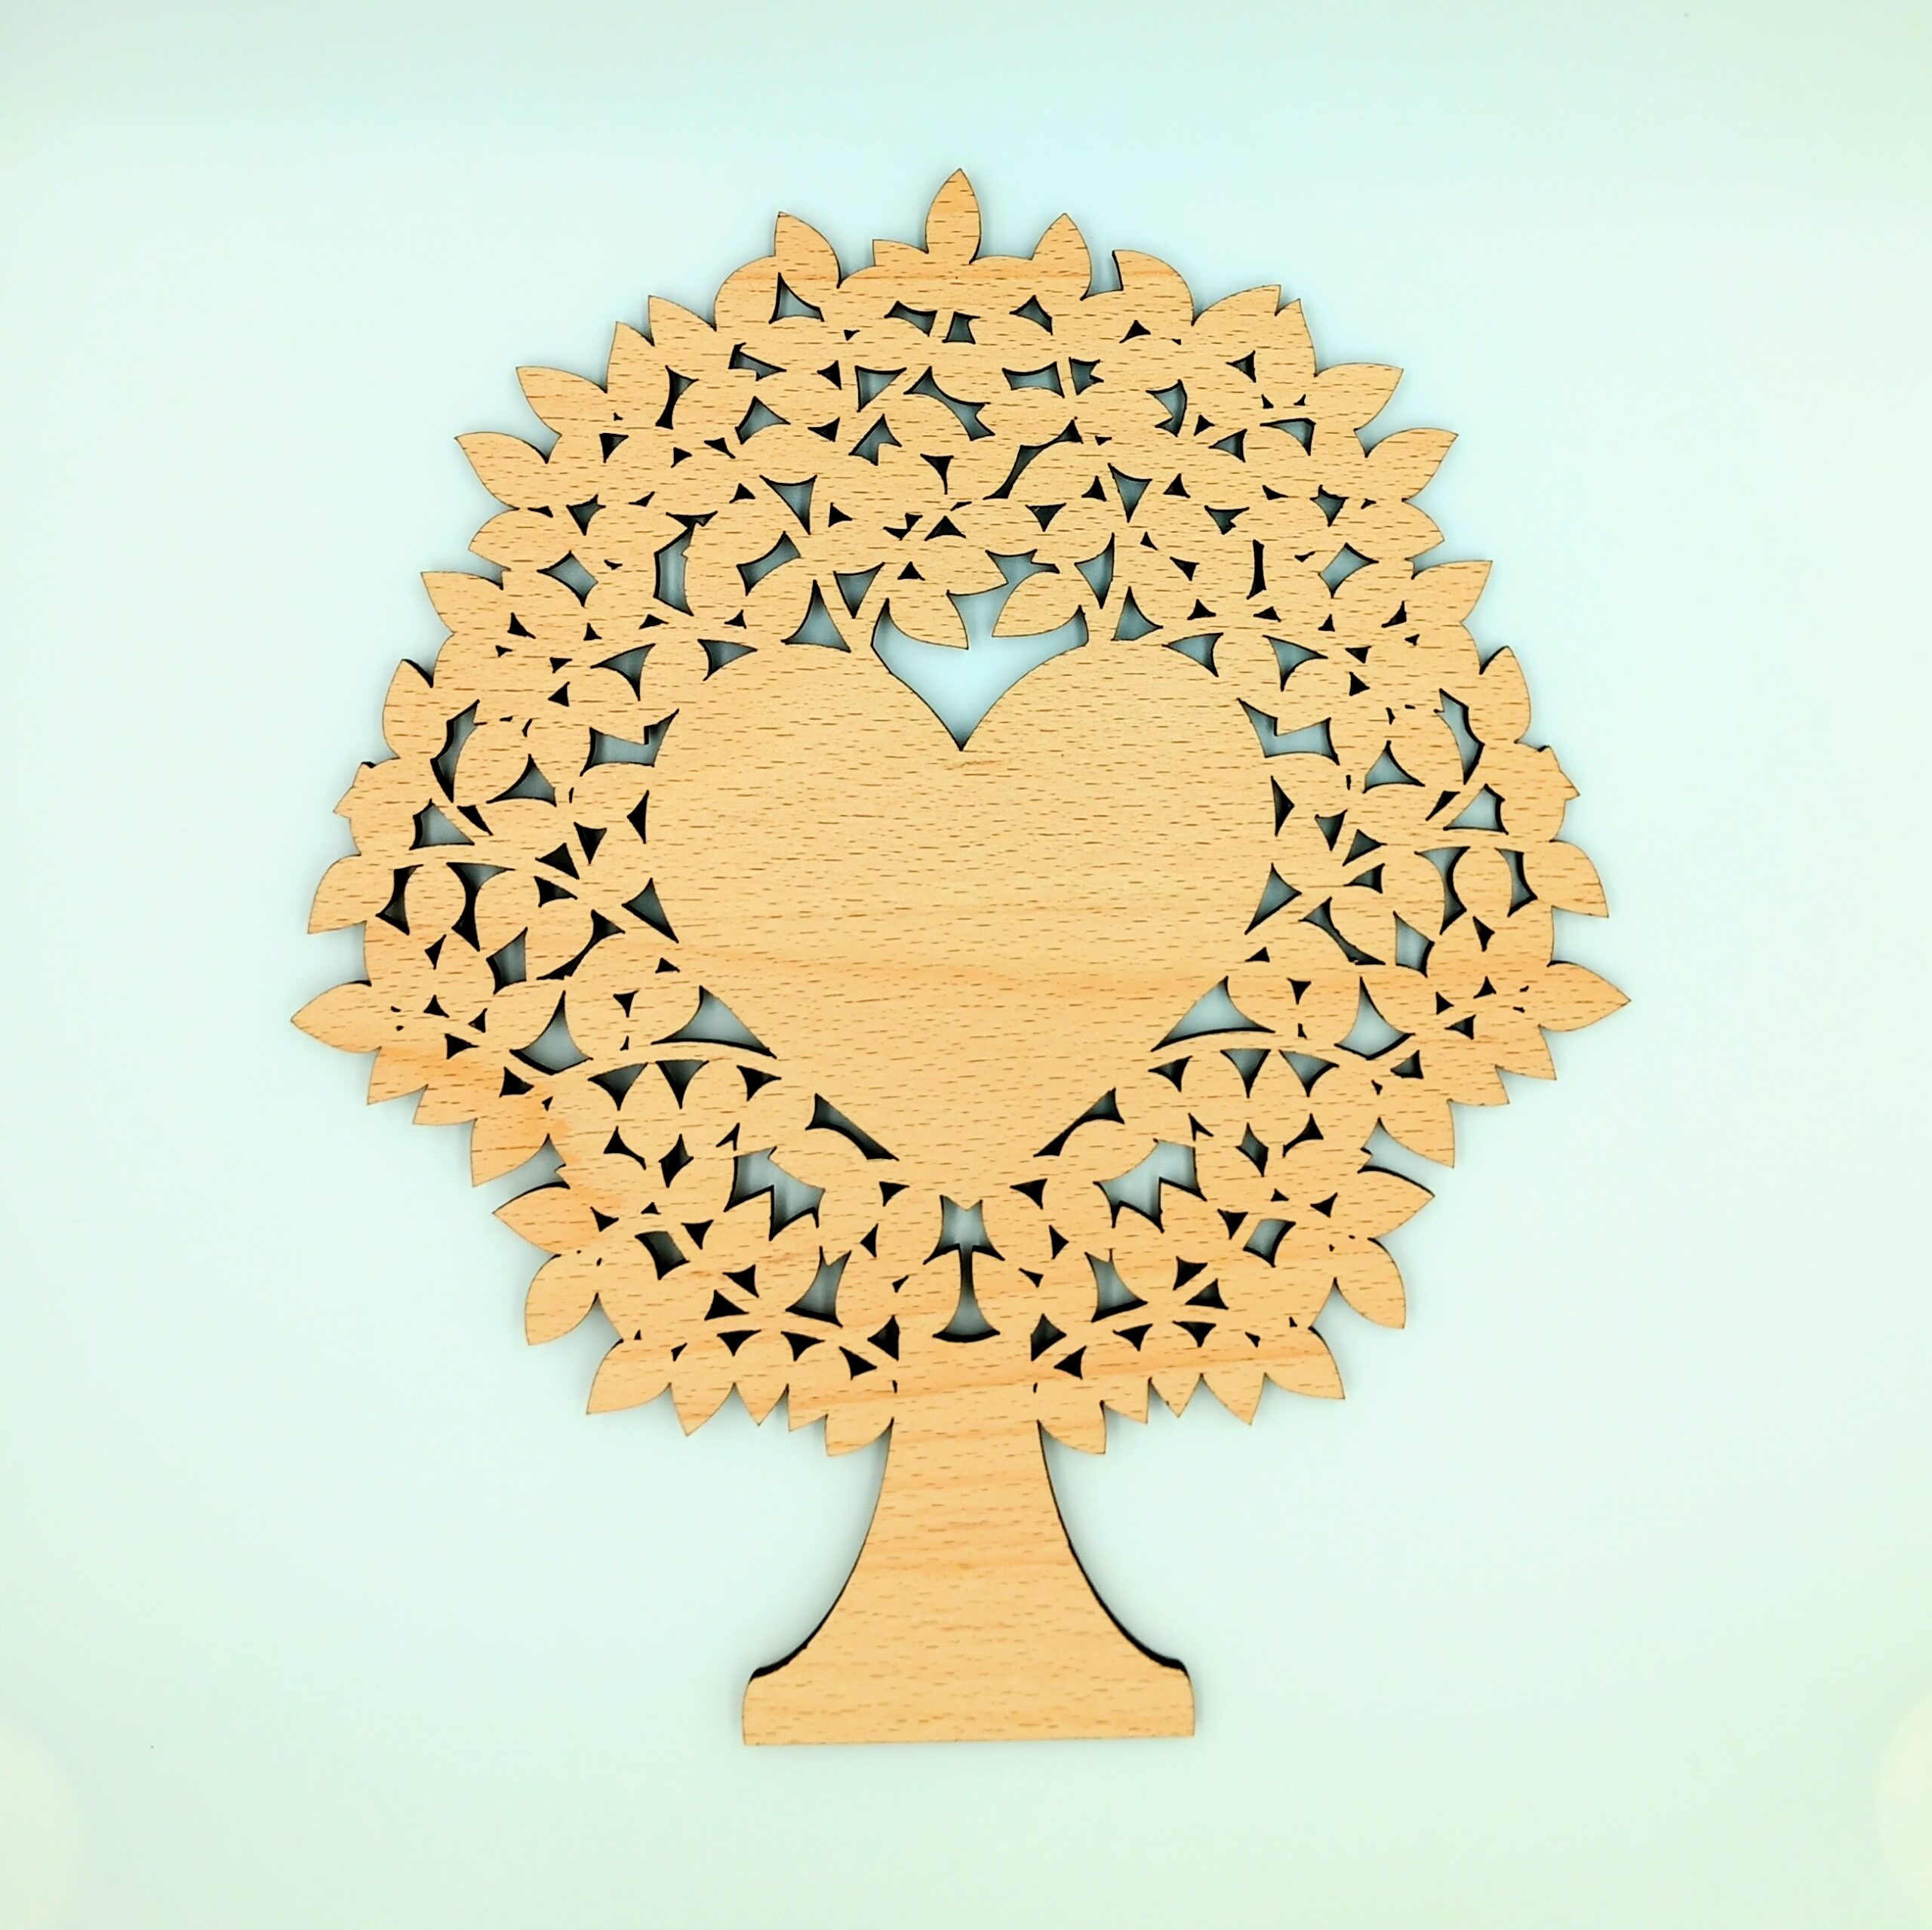
Today I’ve been making laser-cut blank family trees for pyrographers to customise, and this is the 1-heart blank pyrography family tree, below.
I’ve done the hard part (cutting out the fiddly shapes) so that pyrographers can do the fun part of burning names or messages into the heart in the middle.
Soon I’ll be putting them on sale, but this is just a sneak preview of what they look like. I didn’t put anything in the photo to show scale, but this one is about 20cm wide by 23cm tall. Here’s a video I put on TikTok, which has my hand in it for scale:
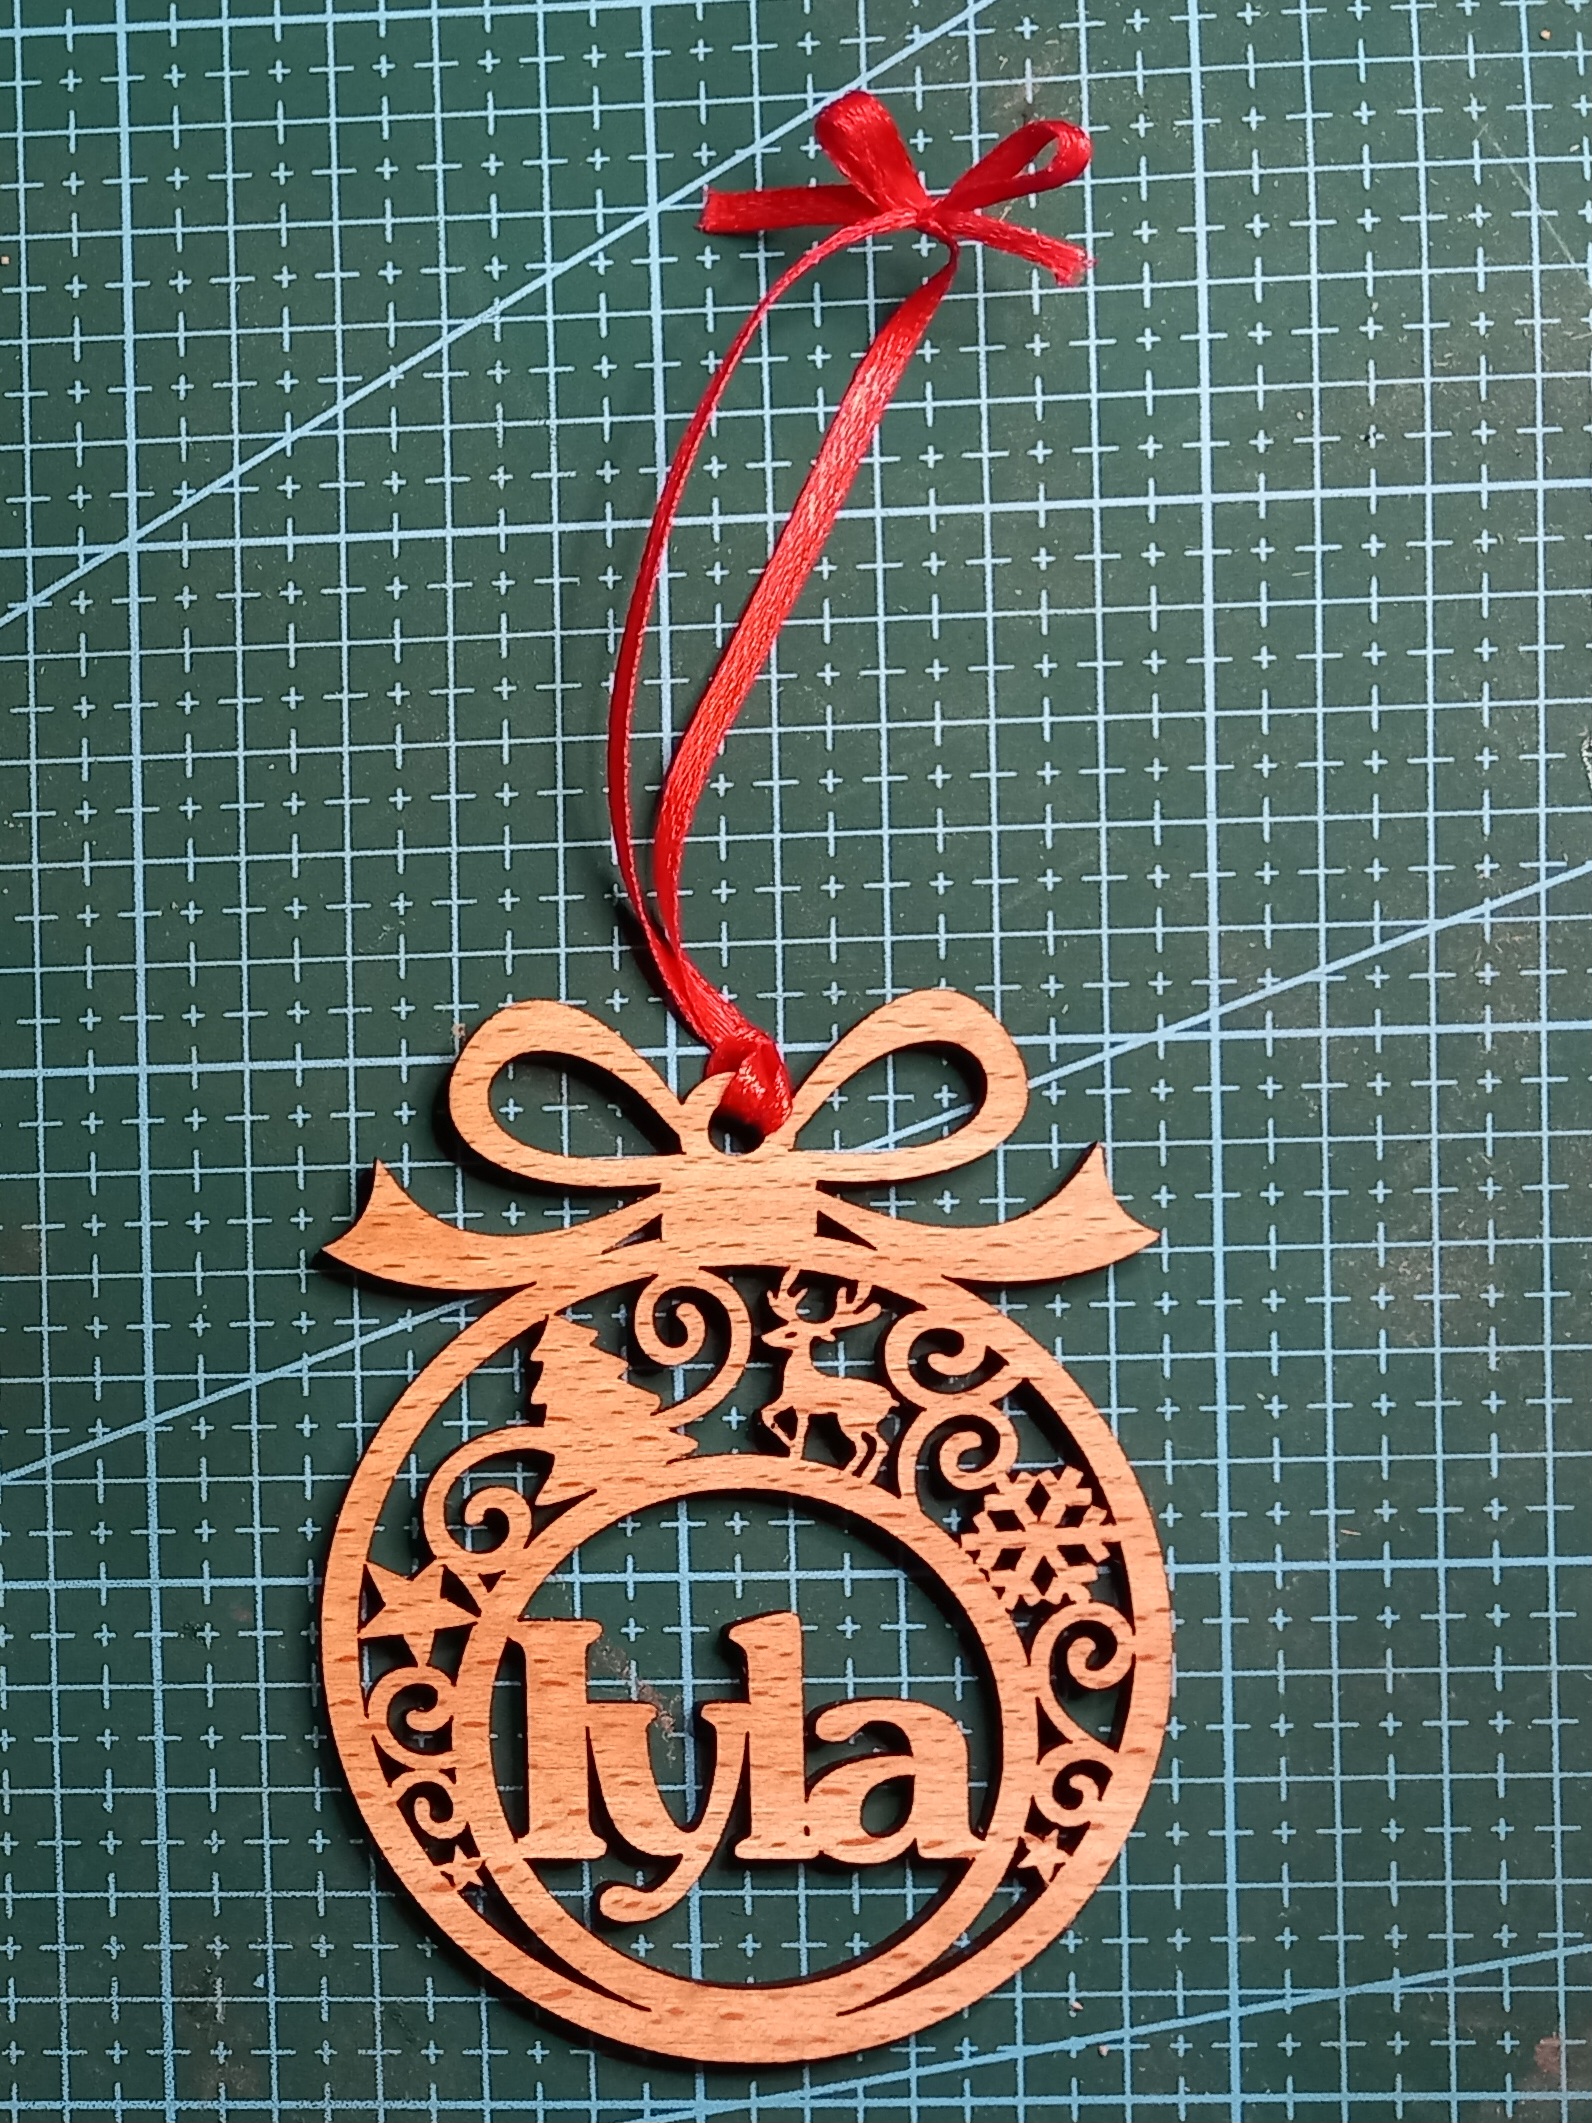
Many thanks to Barnsley College, for inviting me to have a stall at their Christmas fair this week. I met lots of lovely students and staff, and since then I’ve been working on getting orders ready for their personalised wooden Christmas baubles.
Here is the latest bauble that I’ve cut so far today:
… and this is me boxing it up, ready to send off this afternoon. (Woo, get me with my TikTok ‘boxing-up’ videos!)
This is the latest piece I’ve been commissioned to make – a ‘new baby’ keepsake gift. It’s a laser-cut wooden heart with the baby’s name and date of birth, and I’ve also spelled out the baby’s name in the little wooden blocks. The customer who commissioned it requested “NO STORKS!”, so I’ve created a stork-free design:
(No idea why there are fuzzy bits in the image. Maybe I need to clean the phone’s camera lenses. Anyway, you get the idea.)
I tried to incorporate lots of baby-themed elements but without being too sickly sweet. See how many you can spot! (Did I miss any traditional baby-related themes? You can use the comments section below to let me know what I should add next time.)
(And is it just me, or does that dummy look like it’s got eyes and a smiling mouth?!)
I like the filigree-type feel of this design. It feels a bit more special and delicate than just etching a design or message onto a solid sheet of wood.
I think it also has elements in common with some of my other work, like the wedding heart woodcut
That wedding heart is now on my TikTok shop, but I still need to upload the new baby keepsake gift woodcut to the TT shop.
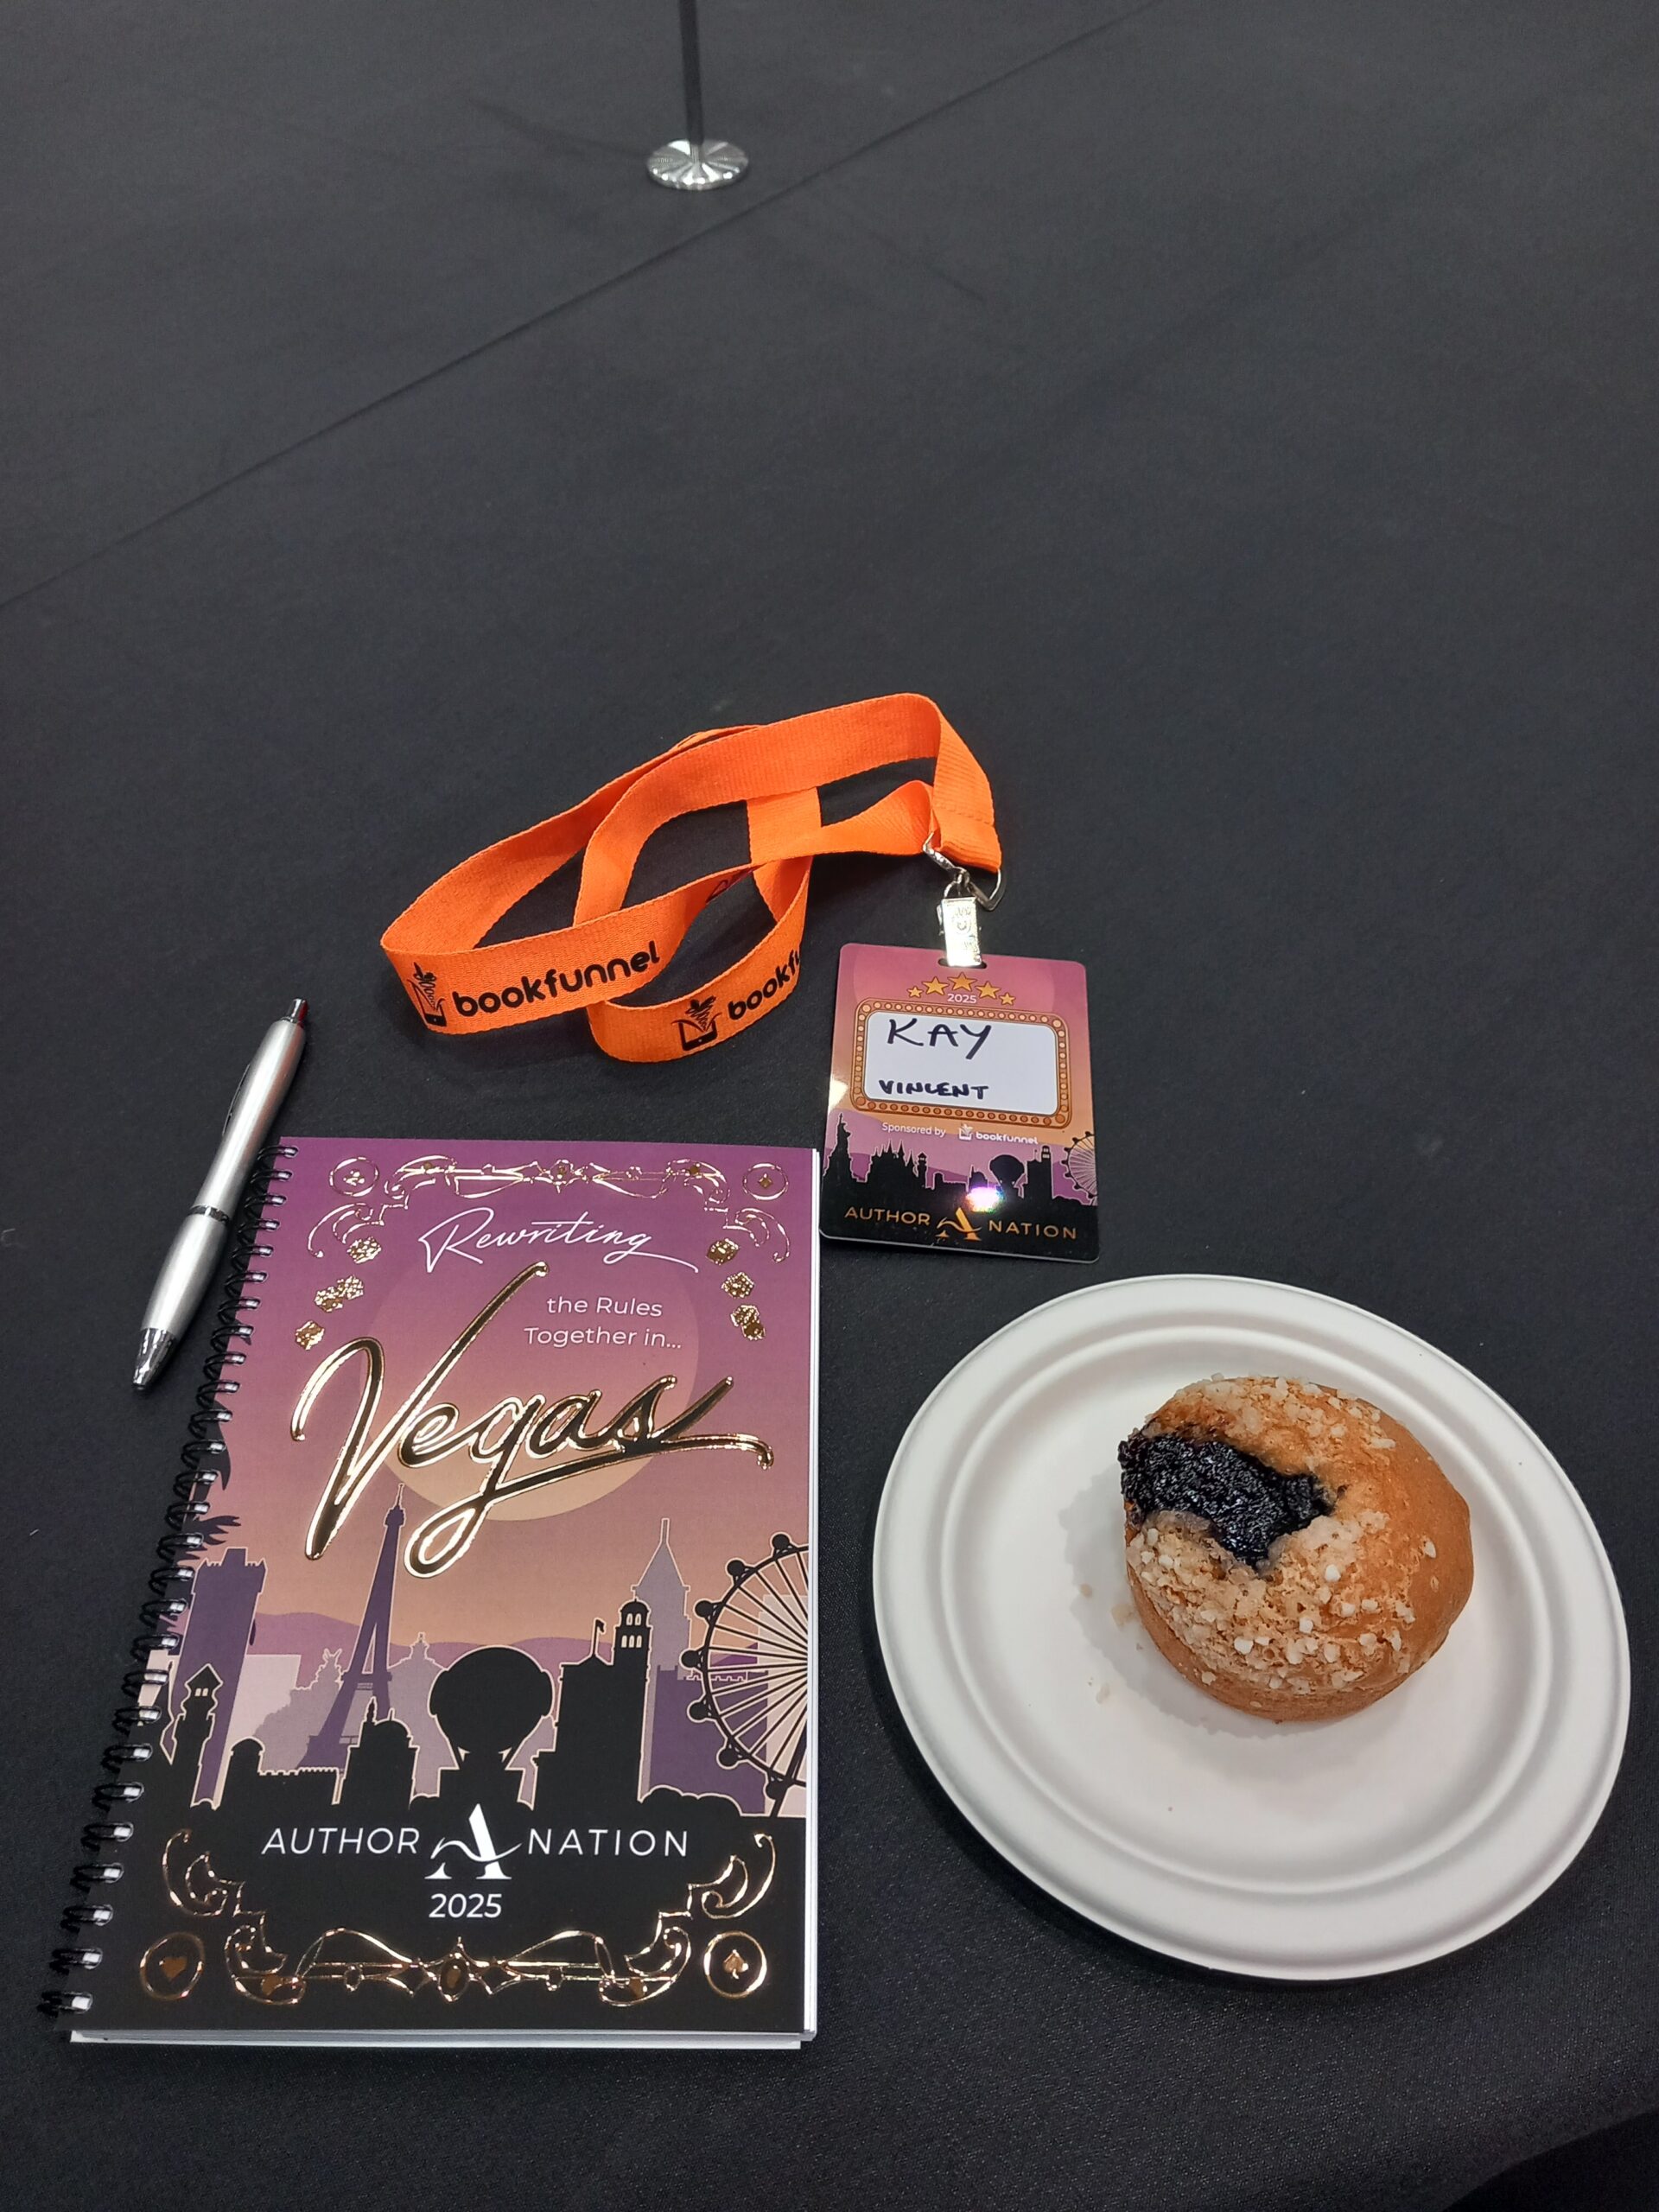
As mentioned yesterday, I am currently (03 November 2025) at the Author Nation conference in Las Vegas.
Today was a bit of a run-up to the actual event, so that provided a great chance to ease into it. I registered then snagged a pen, notebook, and a lovely blueberry muffin:
Then in the evening there was a drinks reception (no photos available, to protect the innocent).
During the day I also had my author headshot taken, so I’m looking forward to seeing the result when they email the photo later…
I’m in Las Vegas this week, for the Author Nation conference (which evolved from the ’20 Books to 50k’ conferences). This is from their ‘About Us’ page:
We believe successful authors are built, not born. Our mission is to empower writers to thrive in the golden age of content creation by fostering connections with industry experts, peers, and readers.
That fits exactly with what I need: to continue to build my business (both the writing and the craft sides of it), and to learn more about:
building my business brand
creating great products
advertising the great products
selling the products through various outlets
The conference hasn’t even started yet, but I know it’s going to be incredibly useful for me as an ‘indie creative’. Although my writing has had to take a back seat to many other life-y things over the last few years, I realised the other day that I’m actually a ‘five-figure creative’ already. (Thanks, Amazon Handmade!) I’m hoping that Author Nation 2025 will boost my knowledge and motivation so much that I’ll continue to creep toward 6-figure status.
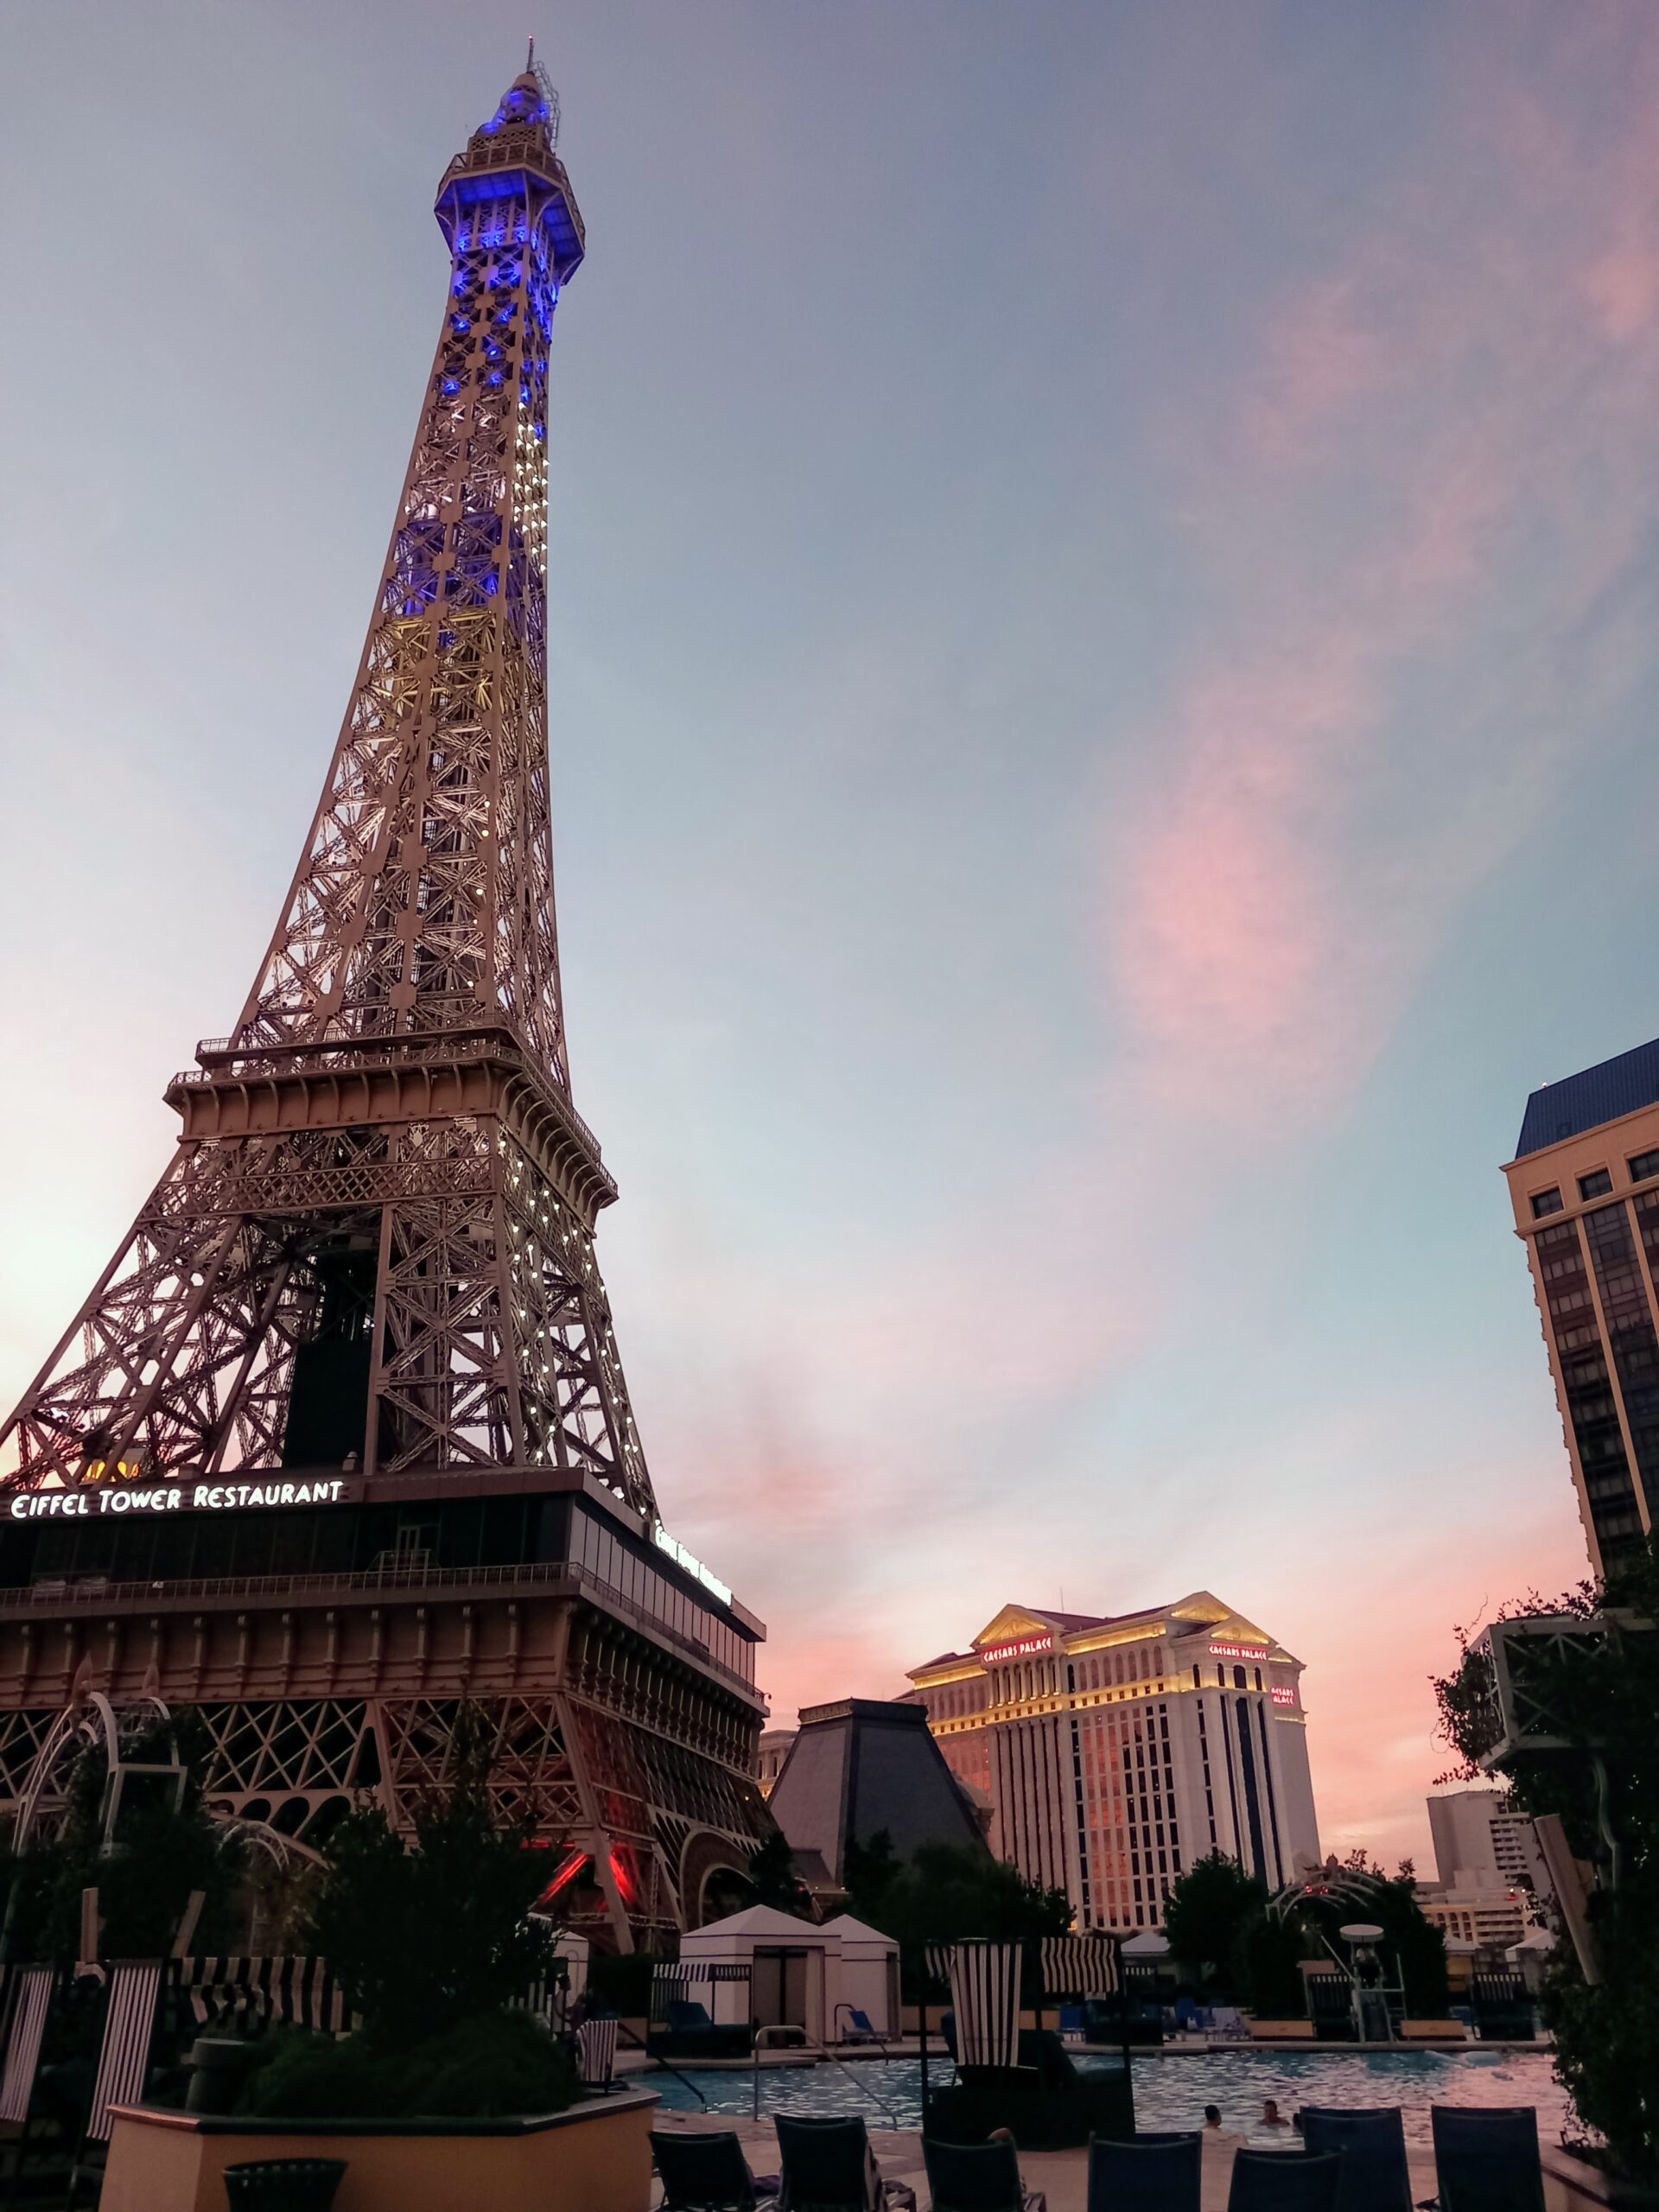
In the meantime I’ve been for a swim in the pool at the bottom of the Eiffel Tower!
Following on from yesterday’s papercut Valentine heart design, I have now cut the same design, to get a filigree Valentine heart woodcut:
Here is a YouTube video of me cutting it with the laser machine (an Epilog Fusion Edge).
I’m really pleased with how these look – either as papercuts or from wood, and at small or large scale.
In fact, I’m so pleased with the design that I’m going to put it for sale on my shop. Woohoo! Or rather, Woo Commerce!
While cutting this I was listening to the audiobook of Joanna Penn’s newly-released “How to Write Non-Fiction” (second edition). There are a LOT of useful tips in there, which I will hopefully be putting into practice later this year. I am feeling very creative at the moment, and so 2025 seems like I might be able to plan ahead far enough to actually start achieving some goals.
I’ve got loads of projects and designs that I’m working on, so I hope they all turn out as well as this design. This is what the filigree hearts look like when they’ve been cut out and are hanging up on a wall:
Do you like the design? Could I improve it? Let me know in the comments below!
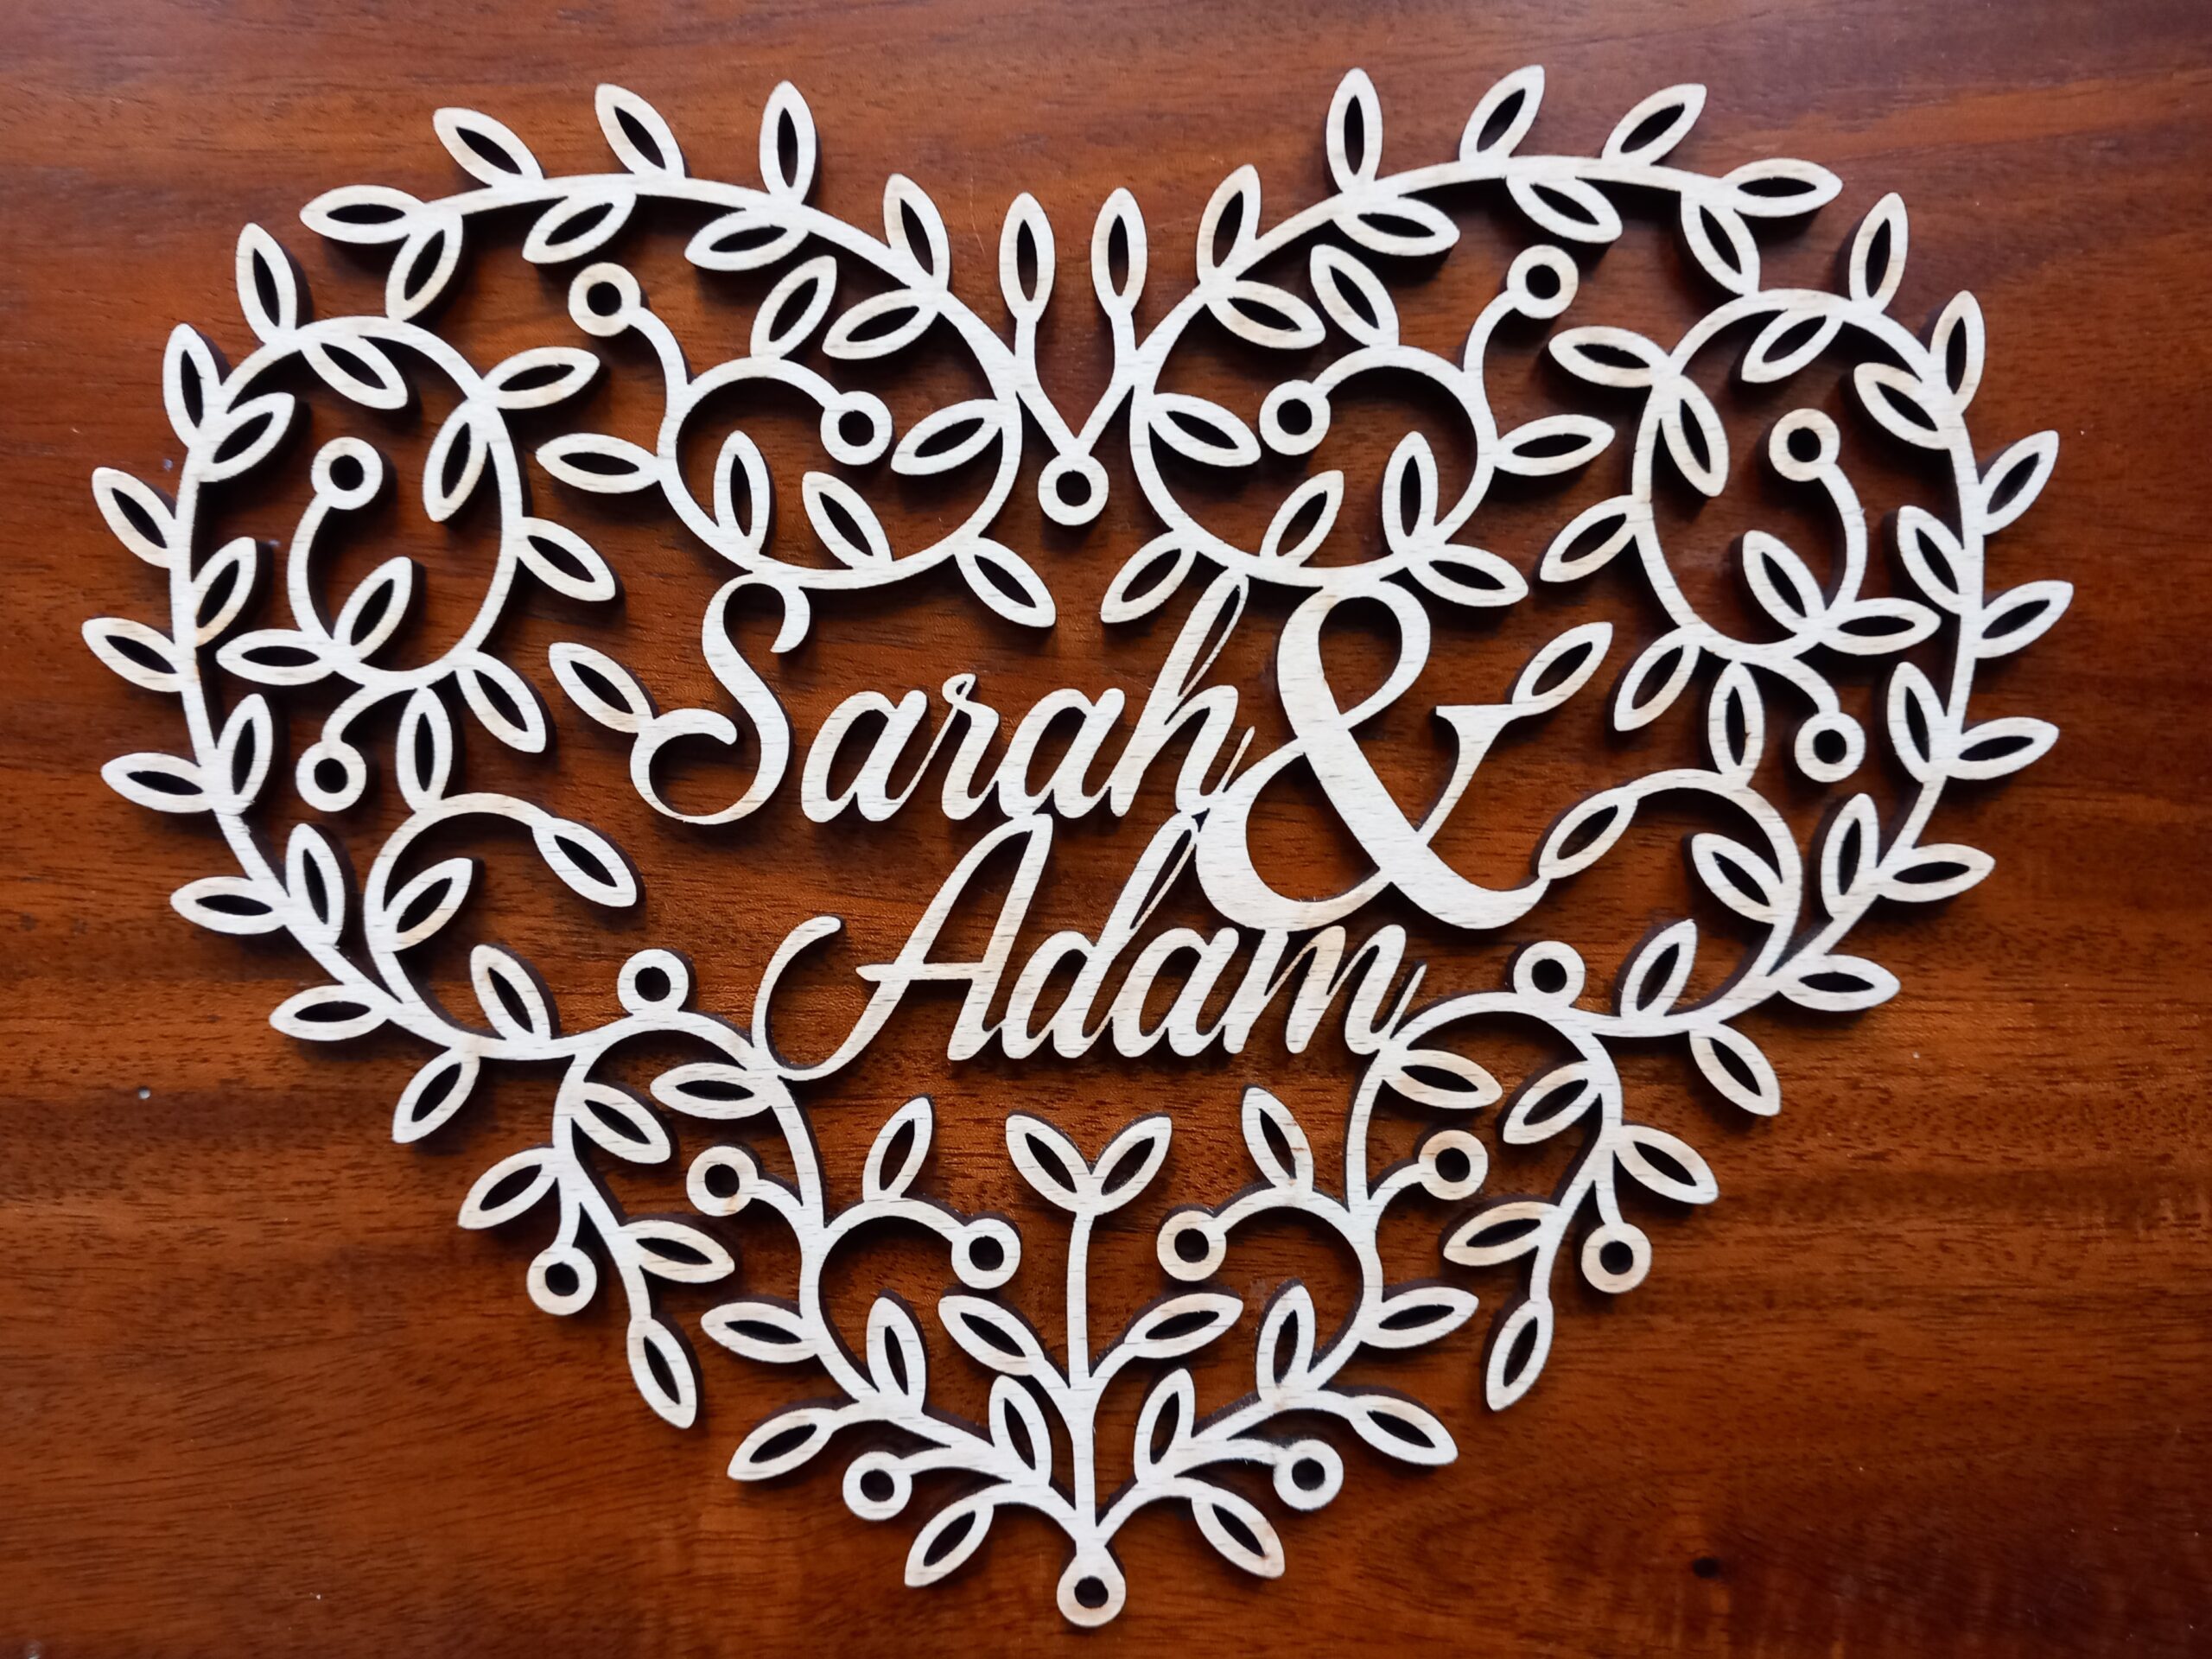
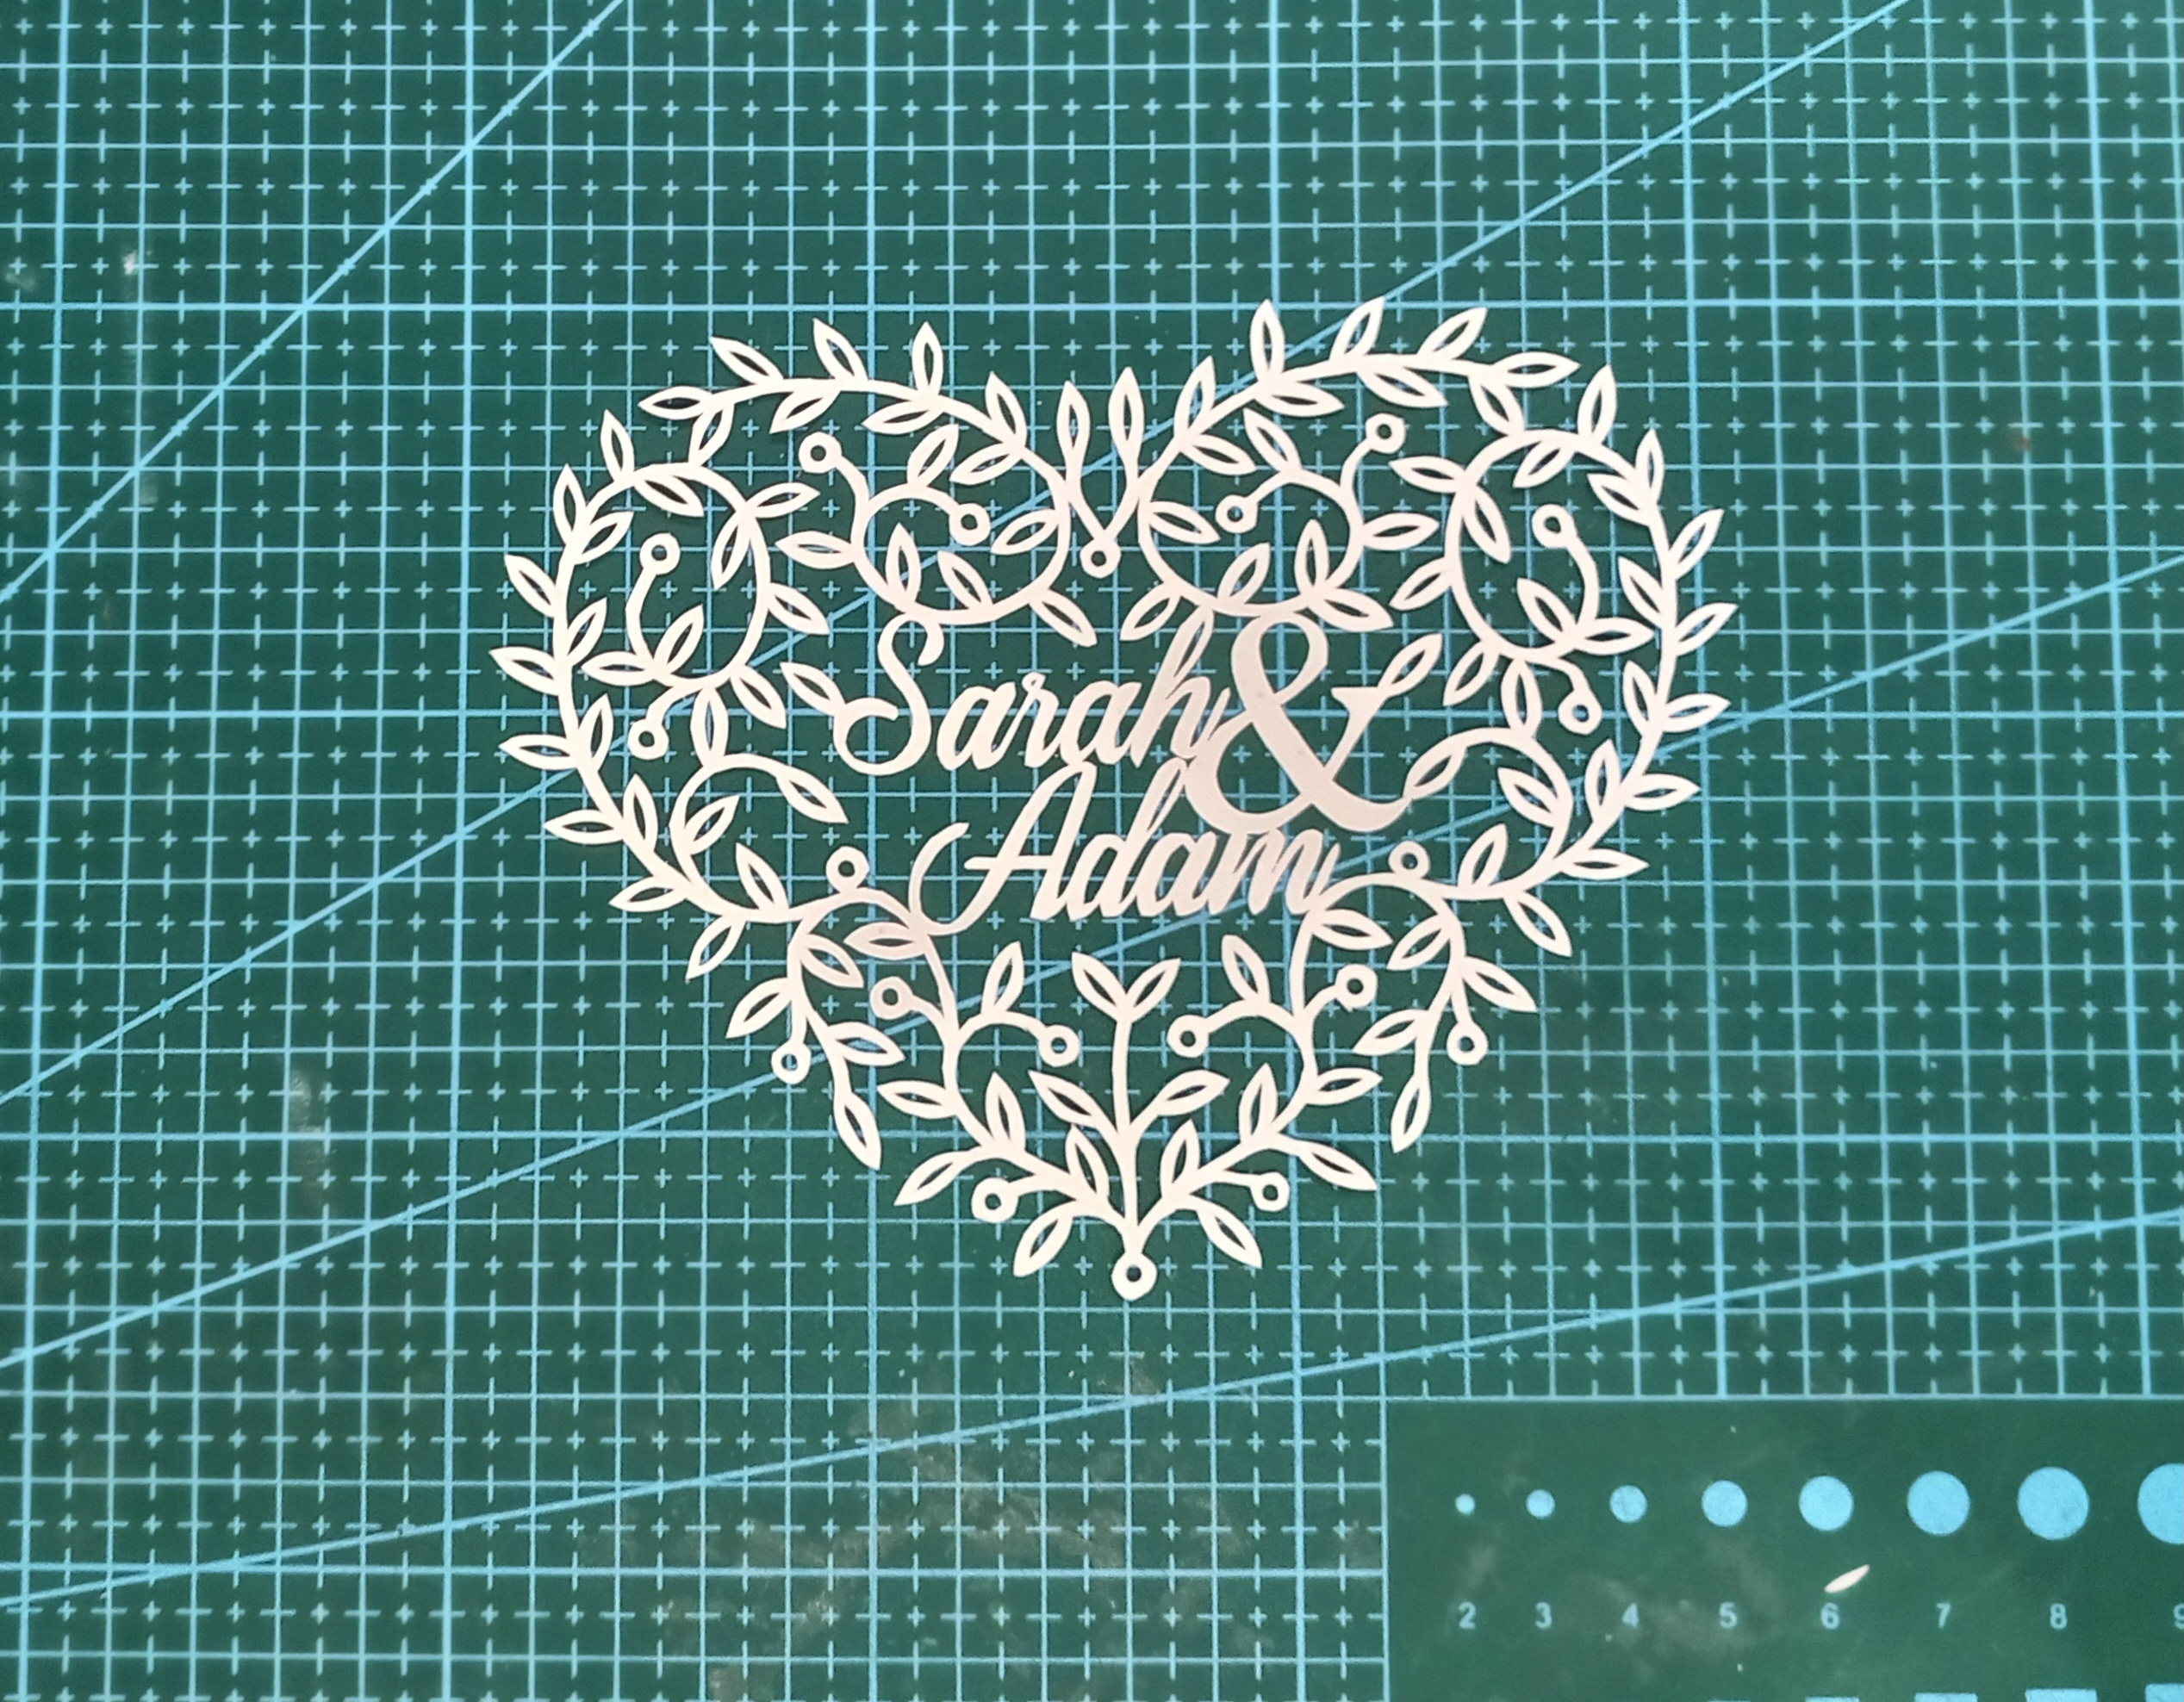
This is a hand-cut filigree Valentine heart papercut design I’ve been working on recently, so I can make it easier to fit the names and ‘&’ ampersand into the design:
I like this one because when it’s cut out the names don’t immeditely jump out. You have to concentrate on them a bit if you’re just looking at the overall design.
I’ve managed to cut it quite well, too – there are enough inconsistencies to made it obvious that it’s a hand-cut piece, but not so many mistakes that I’d rather have done it with the laser cutter. Having said that, I’m also going to try cutting it with the laser, to make sure that the design works at a slightly different scale. I’ll cut it from paper and then from wood. I think that on the laser it will be more successful in wood rather than paper. It might look quite delicate, but actually it seems to be surprisingly sturdy when you hang it up.
Hopefully it will be on my shop soon, or maybe on my Amazon Handmade shop. Just look out for ‘Filigree Valentine Heart papercut’. I’ll put a hand-cut and laser-cut version for sale. It takes me about 2 hours to cut by hand, so the hand-cut version will obviously be more expensive.
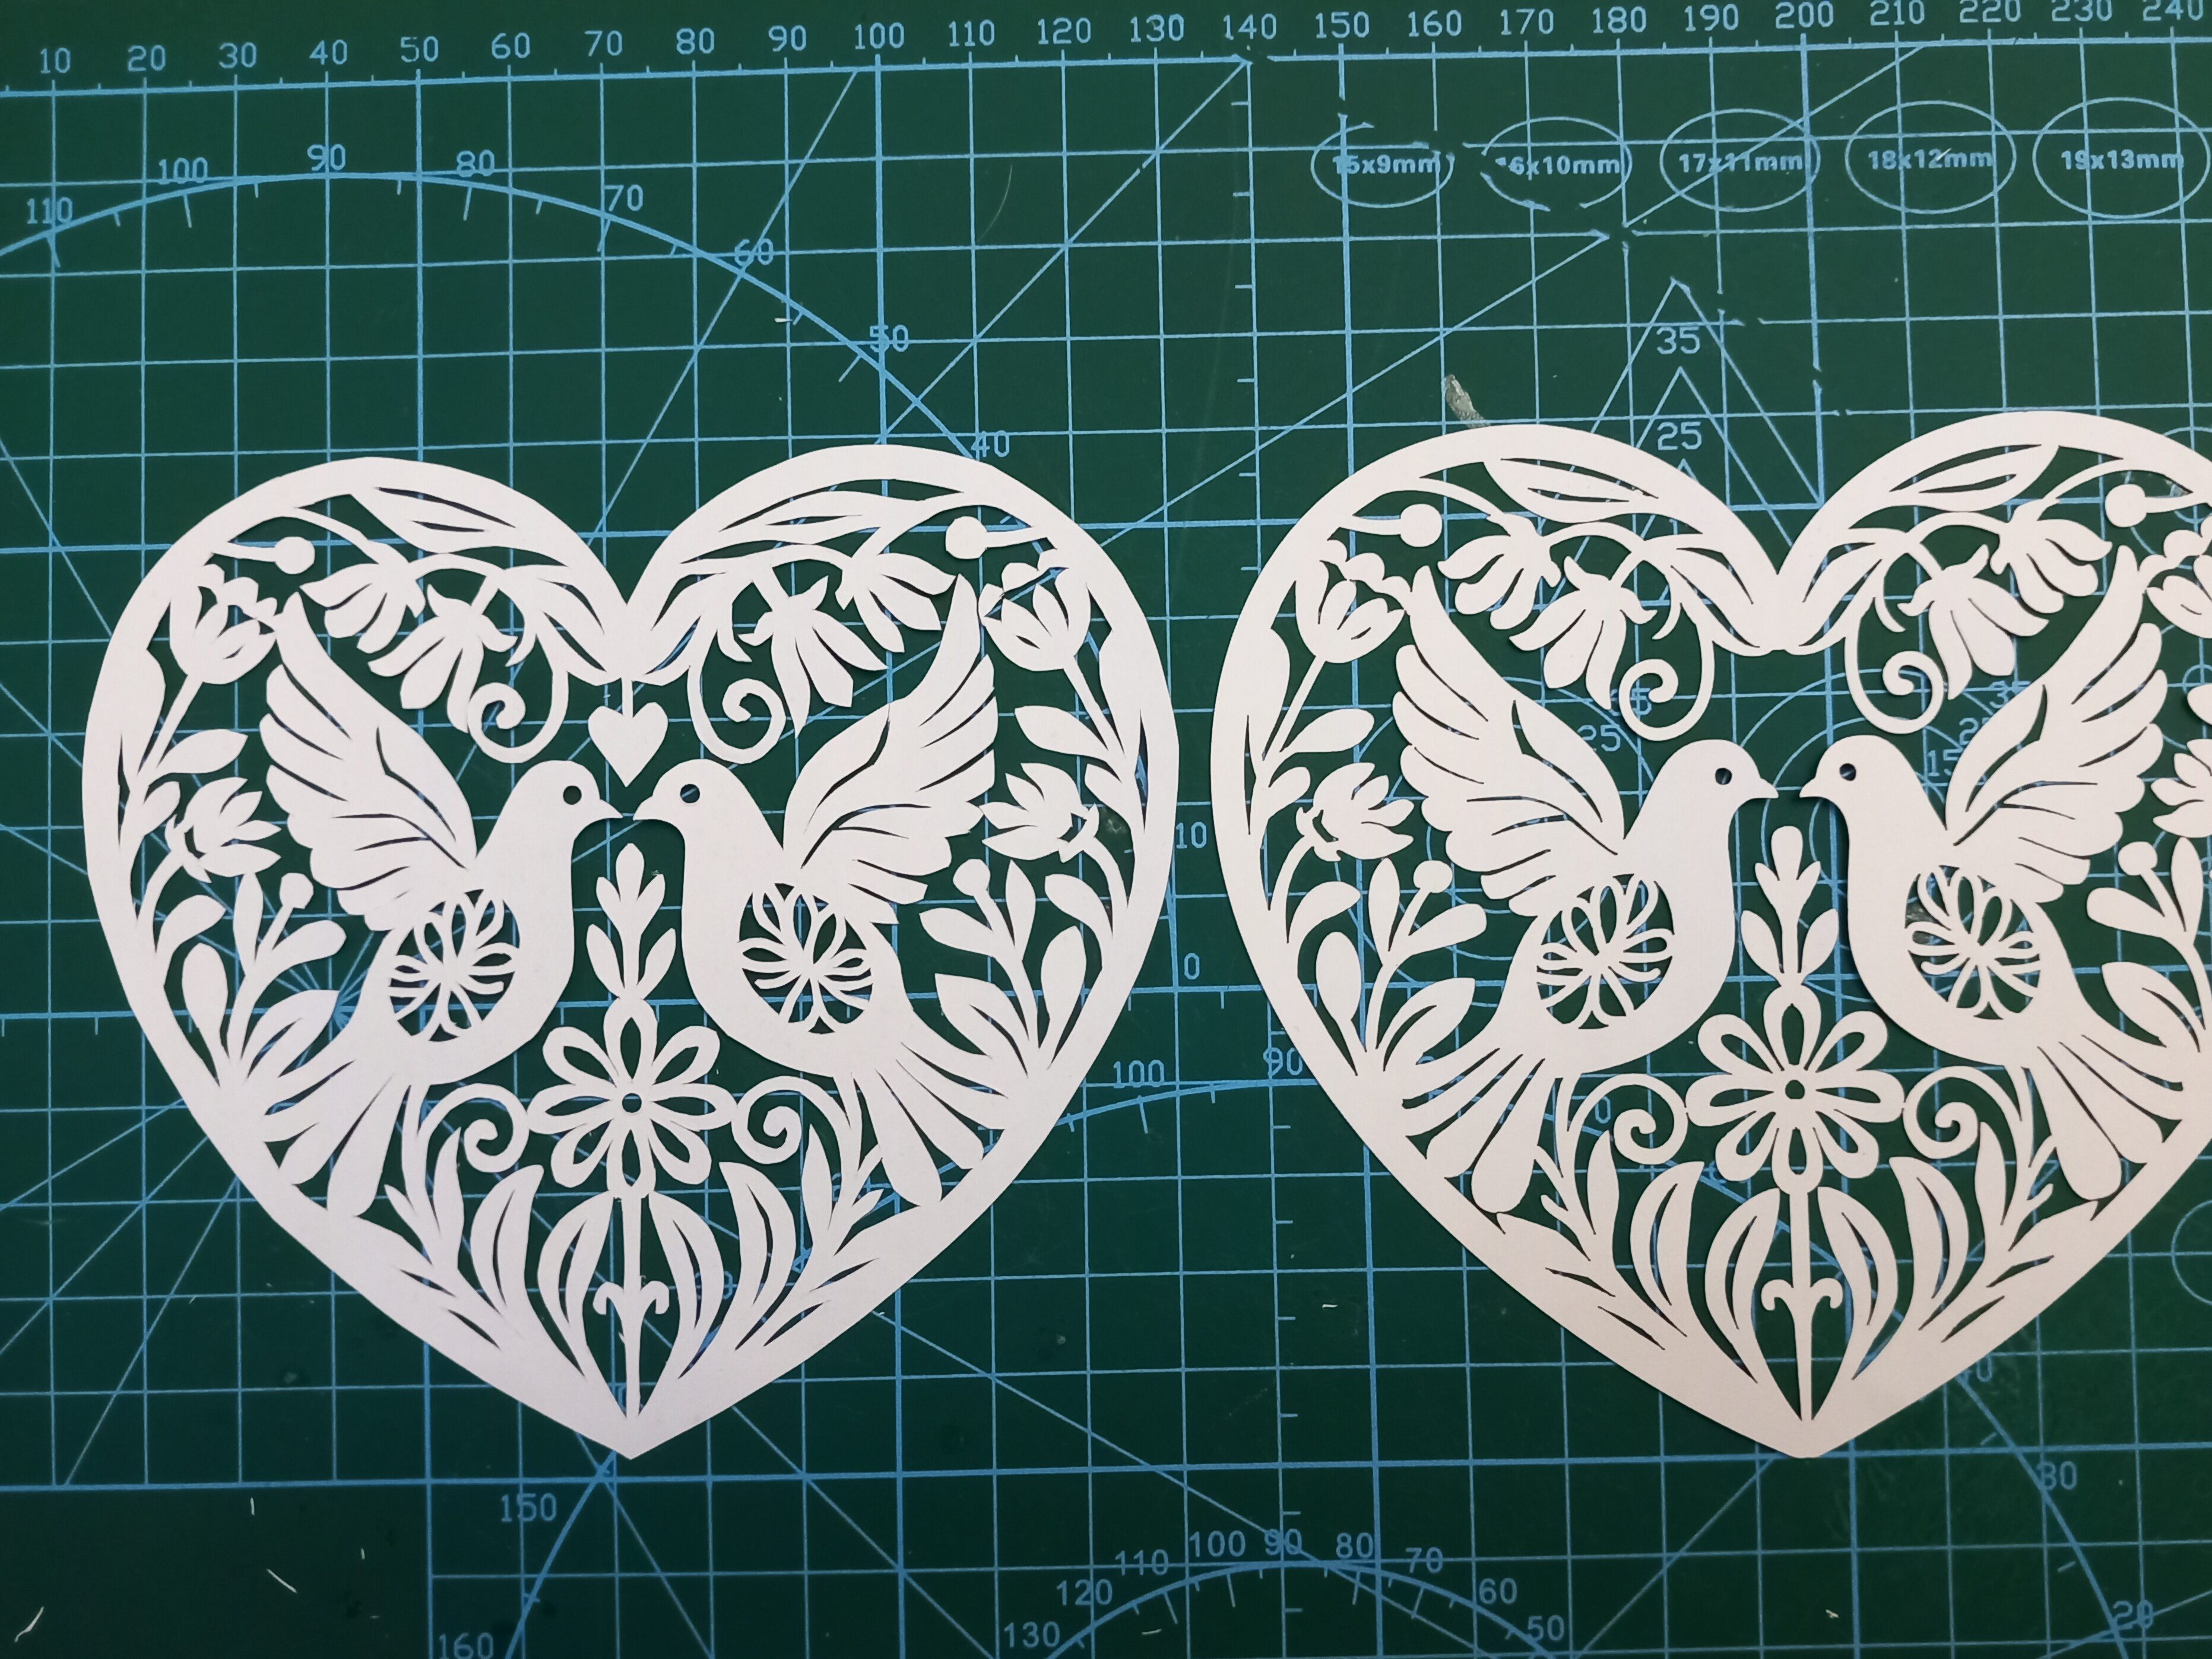
Today I put a short video on TikTok and YouTube (and a couple of other social media sites) comparing two papercuts. I asked, “Hand-Cut or Laser-Cut”? This is the design from a previous post, where I got ChatGPT/DALL-E to help me design a Valentine heart. I then cut it two different ways; by hand and by laser.
Here is a closer look at the two pieces. Can you tell which is which?:
(Before anyone mentions it – I realise I accidentally cut off the little heart above the doves’ heads in version 2. Oops!)
So…the one on the left is the hand-cut version:
…and here is the same section done by laser:
There is one easy way to tell them apart, without even having to look at detailed closeups. The stand-out difference is that the rightmost one is a tiny bit brown, due to smoke in the lasercutting machine. To successfully create a papercut with a laser machine, you quite often have to turn off the ‘air assist’. I might do a separate post one day on why, but the relevance here is that the smoke isn’t blown away as efficiently, so the paper goes a bit toasted.
The other main difference is usually only visible at closer range. It’s that the cutting is a bit more jagged or lumpy in some places. Having said that though, (1) it took me less than an hour to cut this one out by hand, so that explains why some parts aren’t as finished as they could be, (2) there’s nothing to stop me going back and tidying up the sharper angles if I need to.
At very close range it becomes even more obvious which is which. Lasercutting machines work by burning the paper away. So if you see (or smell!) a laser-cut piece of paper it will almost always have toasted edges. They often look like the edges of the cuts are slightly serrated, too, depending on the laser’s settings.
Compare the laser version above with the handmade version below. The image below doesn’t have the singed brown outlines on the shapes:
Which version is ‘better’?
I honestly can’t decide, because they both serve different purposes. If I want to do some relaxing, therapeutic papercutting as a hobby, then hand cutting is the way to go. But if I want to turn the artwork into a Valentine card, lasercutting is the best way to do that, otherwise I’d have to charge about £20 per card, which most people aren’t willing to pay. The laser gives me the ability to reproduce papercut artworks (in the same way that painters create prints of their works to put onto cards). So if someone wants one of my designs they can either go for the affordable version or the premium handmade version.
If you’d like to cut this design for yourself, I’ve adapted and created it as an SVG in my shop and Etsy shop.
My “An AI Made Me Do It” project continues, in 2025. This time I have used ChatGPT’s DALL-E to help me create an AI-designed Valentine heart.
Below is a link to the YouTube video below showing how I did it:
First I gave DALL-E a prompt:
“Please could you create a design for a papercut Valentine’s card? It should be made from a single sheet of white paper, with red paper in the background.”
They contain some great elements, but both are just a little bit too fiddly in some parts. So I asked the AI to make them simpler. After two more attempts of me giving it instructions, here is what ChatGPT / DALL-E came up with:
Not bad! But AI still has a problem understanding how to design for papercutting. If it’s creating a papercut then all of the design elements must be attached to at least one other element. Because of that, there are almost always a few ‘orphan’ pieces in the design. The most obvious one here is the little heart above the heads of the two doves. If I cut this design without making any changes, that heart would drop out because it’s not attached to anything.
The next stage was to convert the design to an SVG (scaled vector graphics) file. Here is an article about what SVG files are, but basically they’re an international standard of file that can be recognised by most cutting machines and printers. I usually use SVGs for my laser cutting, but in this case I was going to do a hand-cut version of the design, so why did I need to adapt it to an SVG instead of just printing out the .webp format?
Why use SVG format?
I knew I was going to try to cut it by laser after I’d cut it by hand, so would need the SVG lines to show the laser where to cut.
I wanted to make the file available to other people to download later. SVGs allow them to be able to cut it or print it on whatever printer or cutter they are using.
Even though I’d already noted that the little heart above the doves wasn’t connected to anything, unless I actually tweaked the design to show it linked to another element then there was a danger I’d forget to link it and it would then drop out of the design when I cut it.
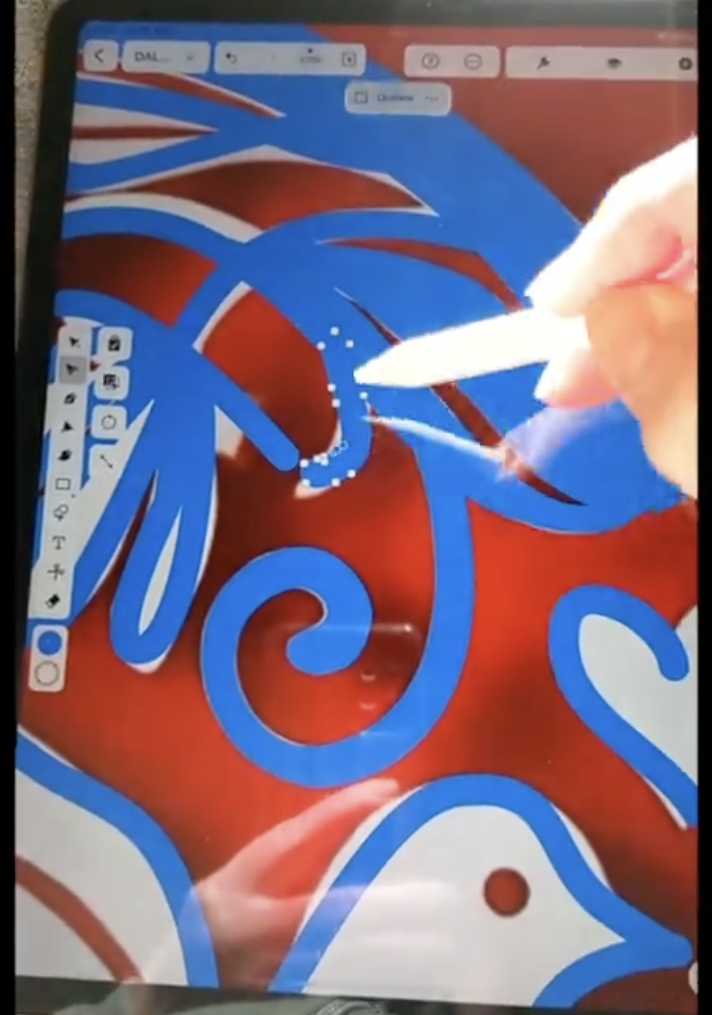
With vector files, you can manipulate the ‘nodes’ on the vector lines so that they look exactly how you want them. This makes the design really clear. In the example screenshot and video below, I am using a program on my iPad to move the nodes of the lines so that they look just as I want them:
Once I’d created the SVG file, I could then just print it out as a line drawing, and use the lines as guides for my knife.