Many thanks to Barnsley College, for inviting me to have a stall at their Christmas fair this week. I met lots of lovely students and staff, and since then I’ve been working on getting orders ready for their personalised wooden Christmas baubles.
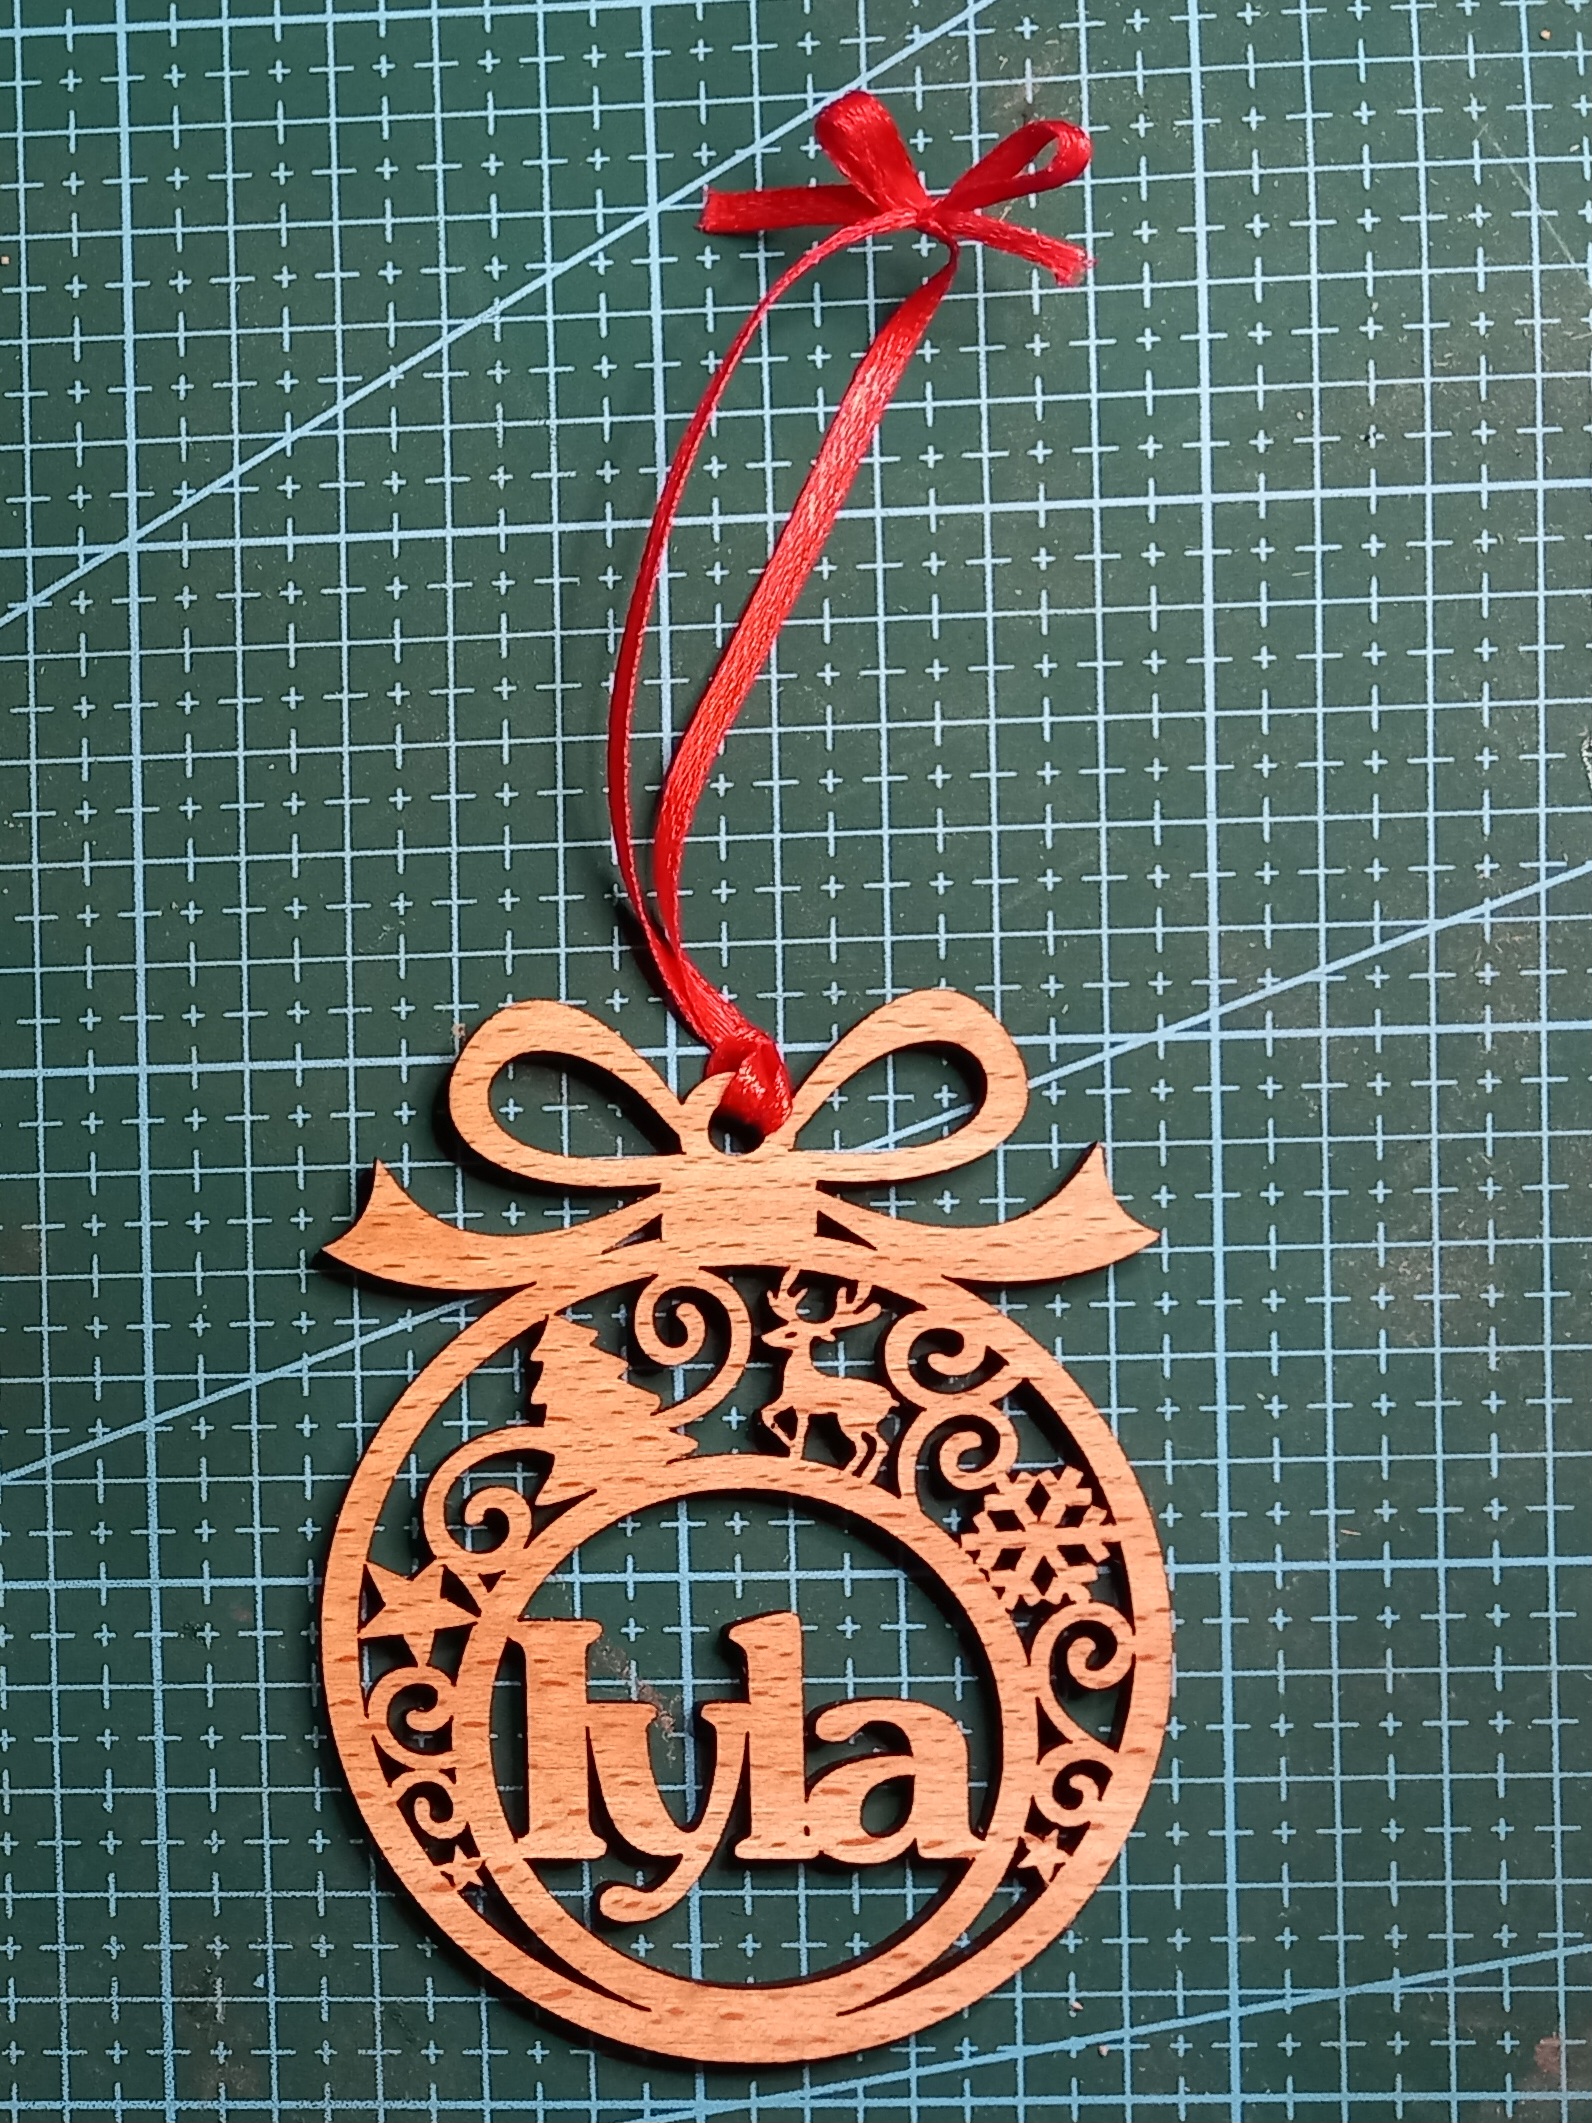
Here is the latest bauble that I’ve cut so far today:
… and this is me boxing it up, ready to send off this afternoon. (Woo, get me with my TikTok ‘boxing-up’ videos!)
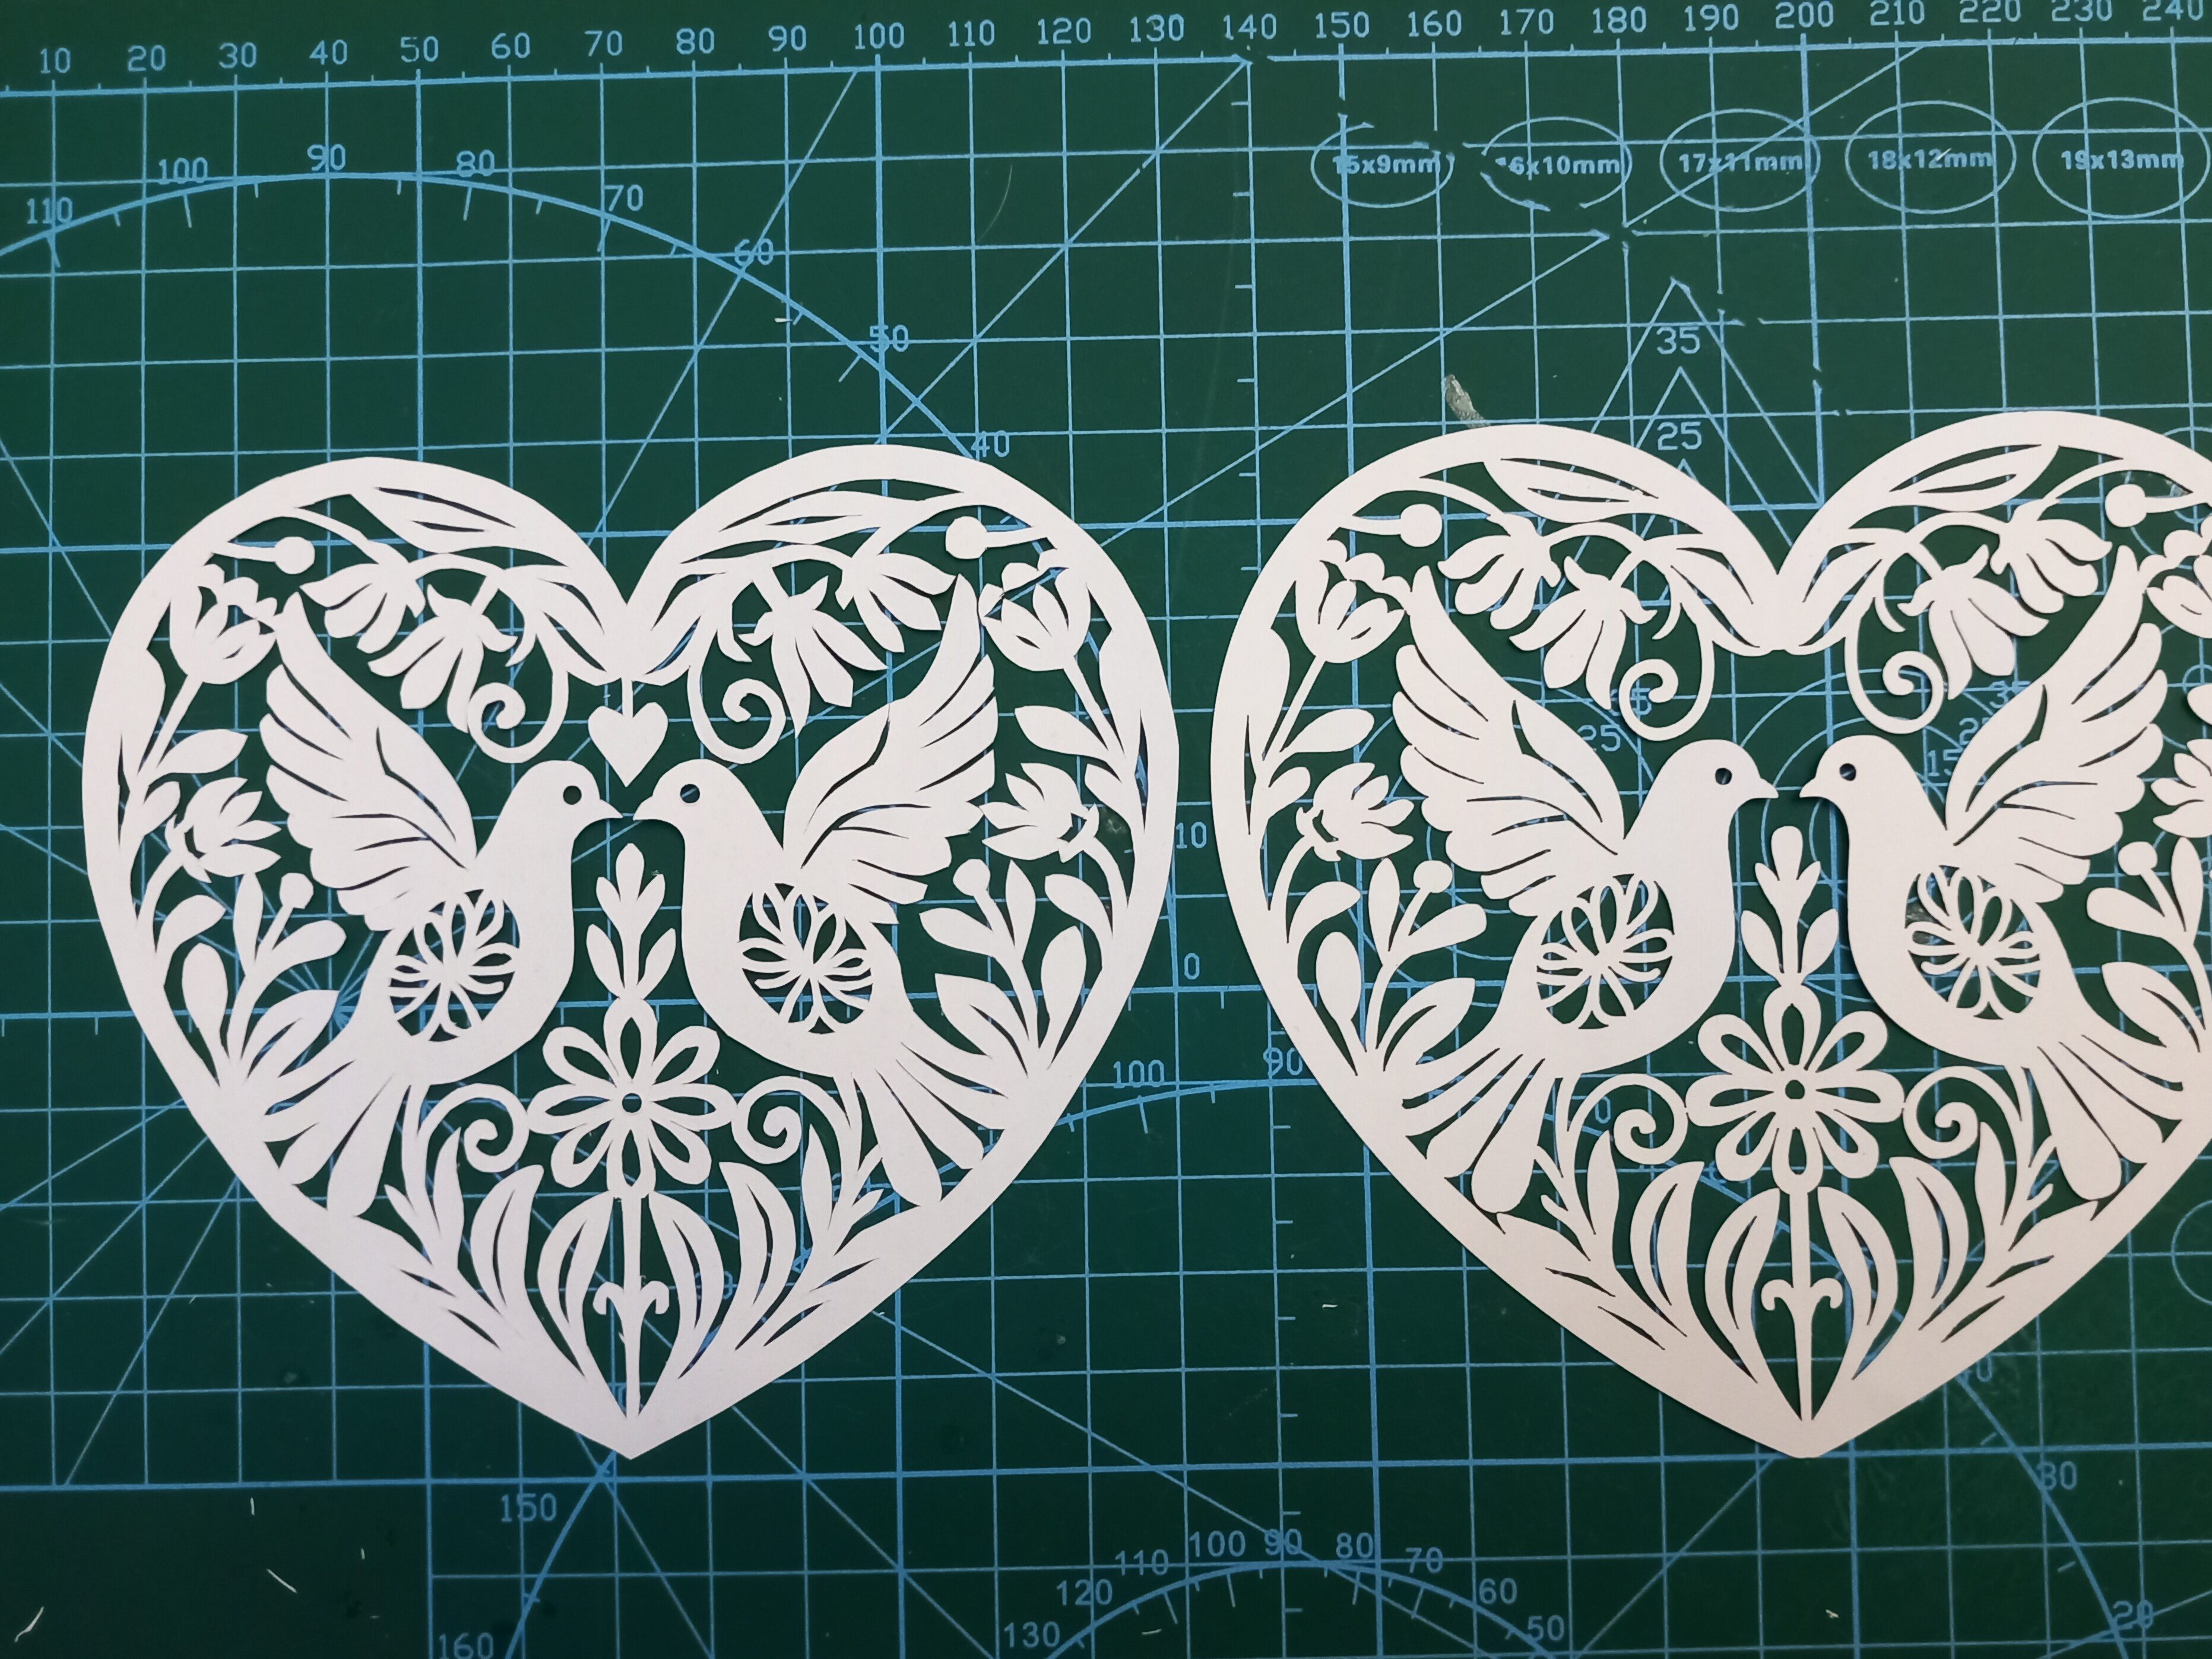
Today I put a short video on TikTok and YouTube (and a couple of other social media sites) comparing two papercuts. I asked, “Hand-Cut or Laser-Cut”? This is the design from a previous post, where I got ChatGPT/DALL-E to help me design a Valentine heart. I then cut it two different ways; by hand and by laser.
Here is a closer look at the two pieces. Can you tell which is which?:
(Before anyone mentions it – I realise I accidentally cut off the little heart above the doves’ heads in version 2. Oops!)
So…the one on the left is the hand-cut version:
…and here is the same section done by laser:
There is one easy way to tell them apart, without even having to look at detailed closeups. The stand-out difference is that the rightmost one is a tiny bit brown, due to smoke in the lasercutting machine. To successfully create a papercut with a laser machine, you quite often have to turn off the ‘air assist’. I might do a separate post one day on why, but the relevance here is that the smoke isn’t blown away as efficiently, so the paper goes a bit toasted.
The other main difference is usually only visible at closer range. It’s that the cutting is a bit more jagged or lumpy in some places. Having said that though, (1) it took me less than an hour to cut this one out by hand, so that explains why some parts aren’t as finished as they could be, (2) there’s nothing to stop me going back and tidying up the sharper angles if I need to.
At very close range it becomes even more obvious which is which. Lasercutting machines work by burning the paper away. So if you see (or smell!) a laser-cut piece of paper it will almost always have toasted edges. They often look like the edges of the cuts are slightly serrated, too, depending on the laser’s settings.
Compare the laser version above with the handmade version below. The image below doesn’t have the singed brown outlines on the shapes:
Which version is ‘better’?
I honestly can’t decide, because they both serve different purposes. If I want to do some relaxing, therapeutic papercutting as a hobby, then hand cutting is the way to go. But if I want to turn the artwork into a Valentine card, lasercutting is the best way to do that, otherwise I’d have to charge about £20 per card, which most people aren’t willing to pay. The laser gives me the ability to reproduce papercut artworks (in the same way that painters create prints of their works to put onto cards). So if someone wants one of my designs they can either go for the affordable version or the premium handmade version.
If you’d like to cut this design for yourself, I’ve adapted and created it as an SVG in my shop and Etsy shop.
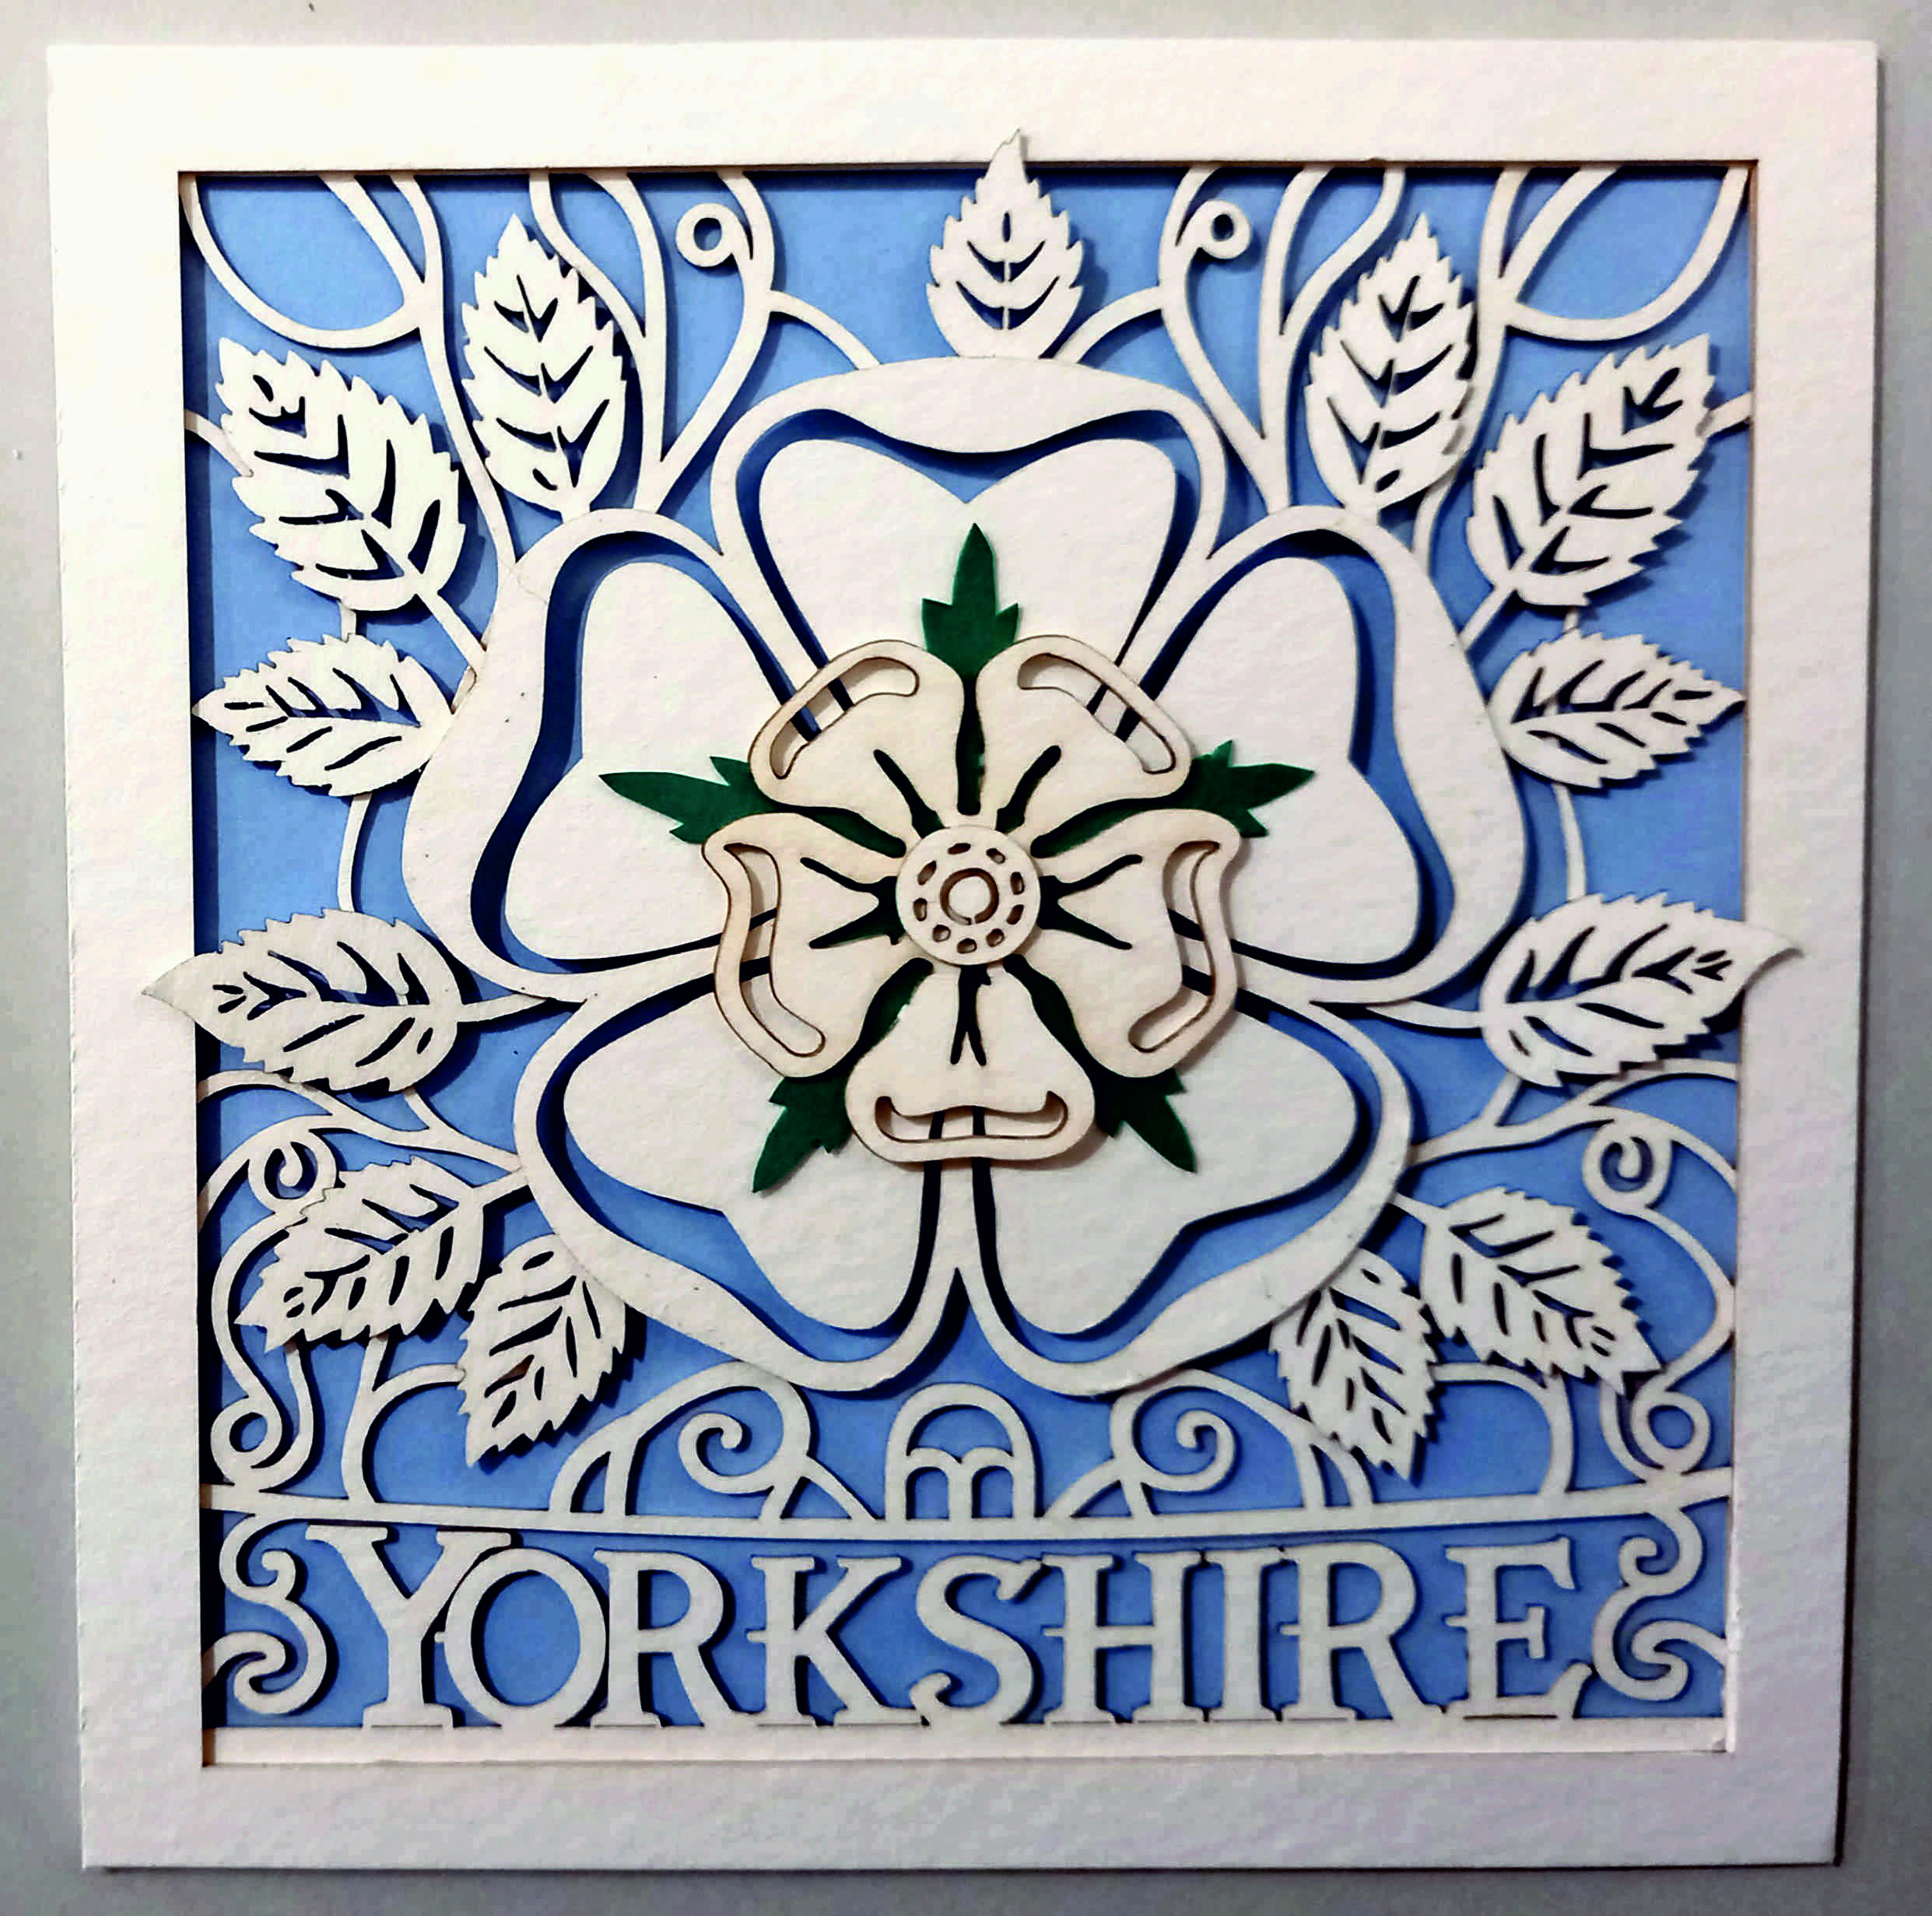
As mentioned previously, I’ve declared that one of my creative goals for 2024 is to create at least 52 AI assisted/inspired artworks this year, using AI-generated images as a prompt for actual physical creative pieces. My most recent piece is a Yorkshire Rose card.
Using ChatGPT’s DALL-E, I gave it a prompt:
Please try to create a papercut greetings card of a Yorkshire Rose.
This is what it came up with on the first attempt:
As usual, my first reaction was “WOW”. But then my follow-up reaction was the realisation that:
1) these designs wouldn’t be very easy to recreate as physical objects, and
2) they were just white roses, rather than actual Yorkshire roses.
…so I had to try to teach DALL-E what a Yorkshire Rose was:
Thanks – those are lovely but they are just white roses rather than specifically Yorkshire roses. The Yorkshire rose is a traditional emblem of Yorkshire in the UK. It is usually shown as having 5 white inner petals and 5 white outer petals – usually with leaves in between the 5 outer petals. It is similar to a Tudor rose, but with all-white petals instead of some petals being red.
Here are the results:
Now we were getting somewhere! For some reason I wanted to create a card that actually said “Yorkshire” on it. So I asked DALL-E to include “Yorkshire” under the rose emblem. This fifth attempt was OK, but again would have been difficult to directly create as a physical card…
…but the sixth attempt was excellent (with – of course – the exception being that DALL-E mis-spelled the only word I’d asked it to include):
Bingo! I instantly loved this design, but there was still a lot of work to do before I could cut it out:
Obviously I needed to correct the spelling.
Some areas wouldn’t work as papercuts because they weren’t attached to any other parts of the card, so I needed to adapt them.
Because of the shadows in the image, I would need to create the image as several layers.
Creating the physical design
This time I opened the Linearity Curve image software, and drew lines around the elements of the design so I could create an SVG file to cut with my laser cutter. I cut it with the laser because I thought I might not be accurate enough if I did it by hand.
Here is the original image on the left, with my physical version of the card on the right:
How well did DALL-E follow my prompts?
As mentioned above, the AI image generator initially didn’t know what a Yorkshire Rose was. However, once I’d explained the concept it did an amazing job… although then it let itself down again by mis-spelling a specific word. The papercut element was great, though. So on the whole I’ll give DALL-E 8/10.
How close is the physical version to the original AI design?
I’m going to give myself 83%. The differences are:
I changed “YORKSHHIRE” to “YORKSHIRE”
I had to link some of the ‘orphaned’ design elements to other parts of the design so that they wouldn’t fall out when I cut them.
I couldn’t get the shadows/lighting the same as in the original image. (Some of the shadows seem difficult/impossible to achieve in the physical version, so I didn’t make too much of an effort trying to get them exactly right.)
To get the right-looking thickness of paper I had to use watercolour card rather than paper, but that’s got a bit more of a creamy colour than the bright paper of the original image.
The laser made brown marks on the edges of the card, so again I haven’t been able to match the brightness of the original image.
Elements where I just left the AI design and didn’t make any changes:
The shapes of the leaves and the rose.
The shapes of the individual letters.
Lessons learned
When making a layered papercut, even if the pieces have already been cut out by laser it can still take a long time to position the pieces correctly so they can be glued into place.
(Solution to point (1) above:) If it’s tricky to position the layers of designs on top of each other, etch the positions onto the backs of the other paper pieces. For example, I etched the outline of the leafy piece onto the back of the large rose piece. This made it much quicker to accurately glue the leaves into place.
Things I still need to learn or improve
Is there a quicker way to automatically (but accurately) convert the JPG image into SVG shapes? I tried to use Curve’s ‘Autotrace’ function, but it wasn’t very accurate so I decided to draw around most of the shapes by hand (using an Apple pencil).
If I get chance later, I might try to match the shadows more accurately, and maybe also try to cut from a thinner, whiter paper or card.
Homework:
Create a specific Barnsley version of the card/artwork.
Create a version with no text.
Try to cut from thinner, whiter paper/card.
Thanks for reading this post. If you’ve got any suggestions of prompts or projects – or if you’ve been experimenting yourself with AI-assisted images – I’d love to hear about them. You can either comment below or send me a message via the Contact form.
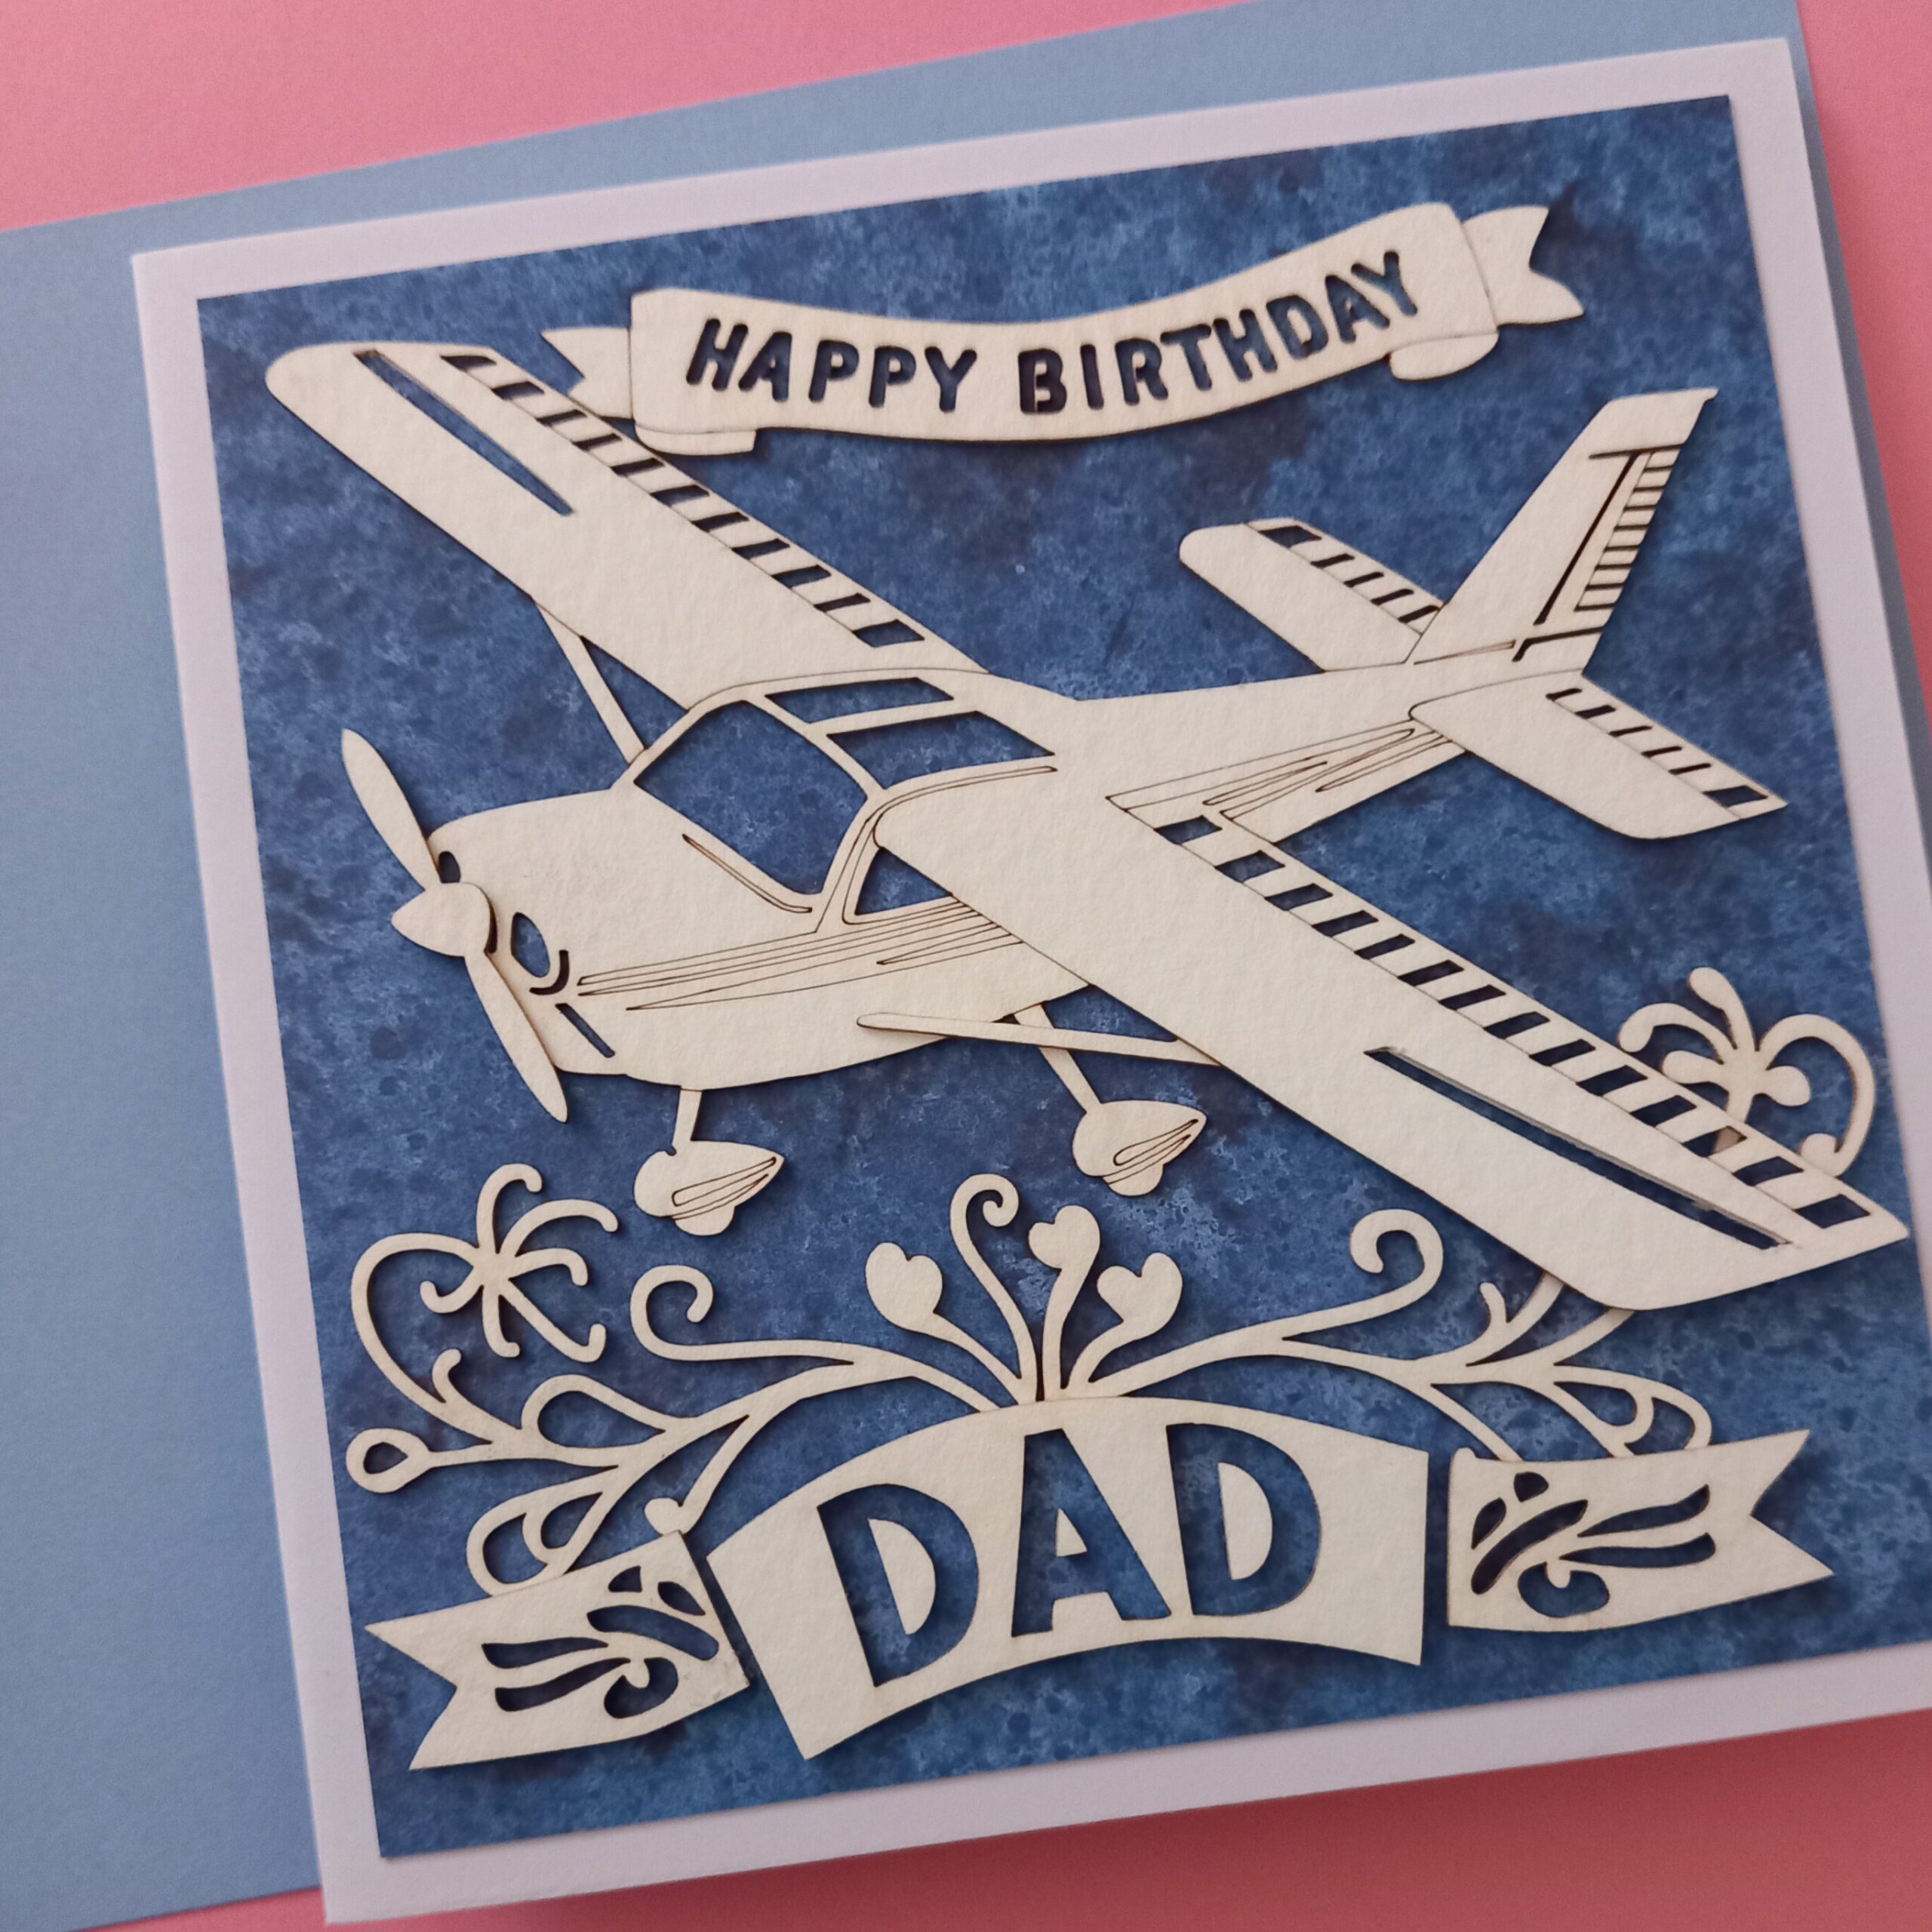
Continuing with my ongoing project of “An AI made me do it”, this latest mission was a great excuse to use AI to generate an image that I could then turn into a physical object. I needed a birthday card for my dad, and I wondered if AI would be able to help me. Normally I like to do papercut cards for family and friends, so this project became “Papercut birthday card for my dad”.
I logged into ChatGPT/DALL-E, and gave it the prompt:
As a first attempt, I thought this was amazing. DALL-E even added an envelope! I was impressed that most of the design could actually work as a papercut. There were very few isolated elements that would fall out if they were cut exactly as shown. However, there was a confusing section near the middle of the design where two elements were layered together (the snail or spiral on top of a flower shape).
At the same time, DALL-E also created this card…:
…which I would have immediately tried to cut out – if only it didn’t very clearly say “THUD” right in the middle. What on earth?!
So having discovered that DALL-E knew what a papercut birthday card looked like, I gave it another prompt:
“Great! Please could you include some little light aircraft in the image?”
At first sight these were amazing again, but:
they both had non-standard spellings of “Birthday”,
The left card was almost impossible to turn into a card without a lot of work,
Most of the planes didn’t look feasible as 2D paper objects.
Try, try again…
As usual, just when I thought that the AI was going to produce a fantastic result with the next image, we ended up having a fight instead. It either mis-spelled words (including “Dad”!), or presented the image at a sloping distorted angle, or came up with a design that would be impractical as a papercut.
Also as usual, the designs were nearly right, not really right. Here are some of the rejects:
In the end I just had to pick one that looked possible to cut without many adjustments:
I printed it out on a normal piece of printer paper, then used that printout as a cutting template.
Here is the hand-cut version that I produced first:
…but then I continued to work on a laser-cut version. To do that I used Linearity Curve, which has an ‘auto trace’ function. Auto trace converts JPG files (i.e. photos) into vector graphics (i.e. collections of flat shapes). Auto trace sometimes makes little errors with the shapes (but is still way faster than tracing around the images by hand), so afterwards I edited the nodes of the vector shapes to try to get them to match the original image a bit better:
(The little white dots on the plane are nodes that can be moved around.)
…and here is the physical laser-cut version (on the right), next to the original AI design:
How well did the AI follow my prompts?
I would say about 8/10, for this project. Very successful! Most of the designs looked like papercut birthday cards. And all of them (when requested) contained light aircraft. However – as mentioned several times before in this ongoing series of projects – creative spelling was the opposite of useful or helpful.
How close is the physical version to the original AI design?
I’m going to say it’s about 85%. The differences are:
I didn’t cut out all of the sections that were cut out in the original design – I just etched them instead.
I changed the tail section because if I’d cut it out then lots of the pieces would just have dropped out. (Also, the stripe extends forward from the tail, which doesn’t look quite right.)
Some of the swirly bits have been simplified.
I couldn’t find any dark green card or paper to mount the plane on, so I chose a speckled dark blue piece instead.
The letters in the “Happy Birthday” banner had to be converted into stencil-type letters (otherwise the central sections of the As, Ps, B, D and R would have dropped out).
The elements where I just left the AI design and didn’t make any changes:
The outline of the plane
The design of the banners.
Lessons learned
ChatGPT is great at papercut birthday card designs.
Things I still need to learn or improve
Actually I’m pretty pleased with this project. Even the ‘duds’ had lots of elements in them that I felt could be used in future projects.
Homework:
Convert at least three of the AI’s original designs into actual cards.
Thanks for reading this post. If you’ve got any suggestions of prompts – or if you’ve been experimenting yourself with AI-generated images – I’d love to hear about them. You can either comment below or send me a message via the Contact form.
As mentioned earlier, one of my creative goals for 2024 is to create at least 52 AI assisted/inspired artworks this year, (using AI-generated images as a prompt for actual physical creative pieces). My latest piece was for a commissioned artwork, of a wedding woodcut. The customer had seen my previous wedding heart papercut, but wanted a wooden heart instead of paper.
I suppose I could have just used the same design as the papercut…
Personalised papercutting
…but this seemed like a great opportunity to ask an AI to help me with a new design. This time I used ChatGPT / DALL-E. Here is the first prompt (I’m still in the habit of using “please” and “thank you” with the AI):
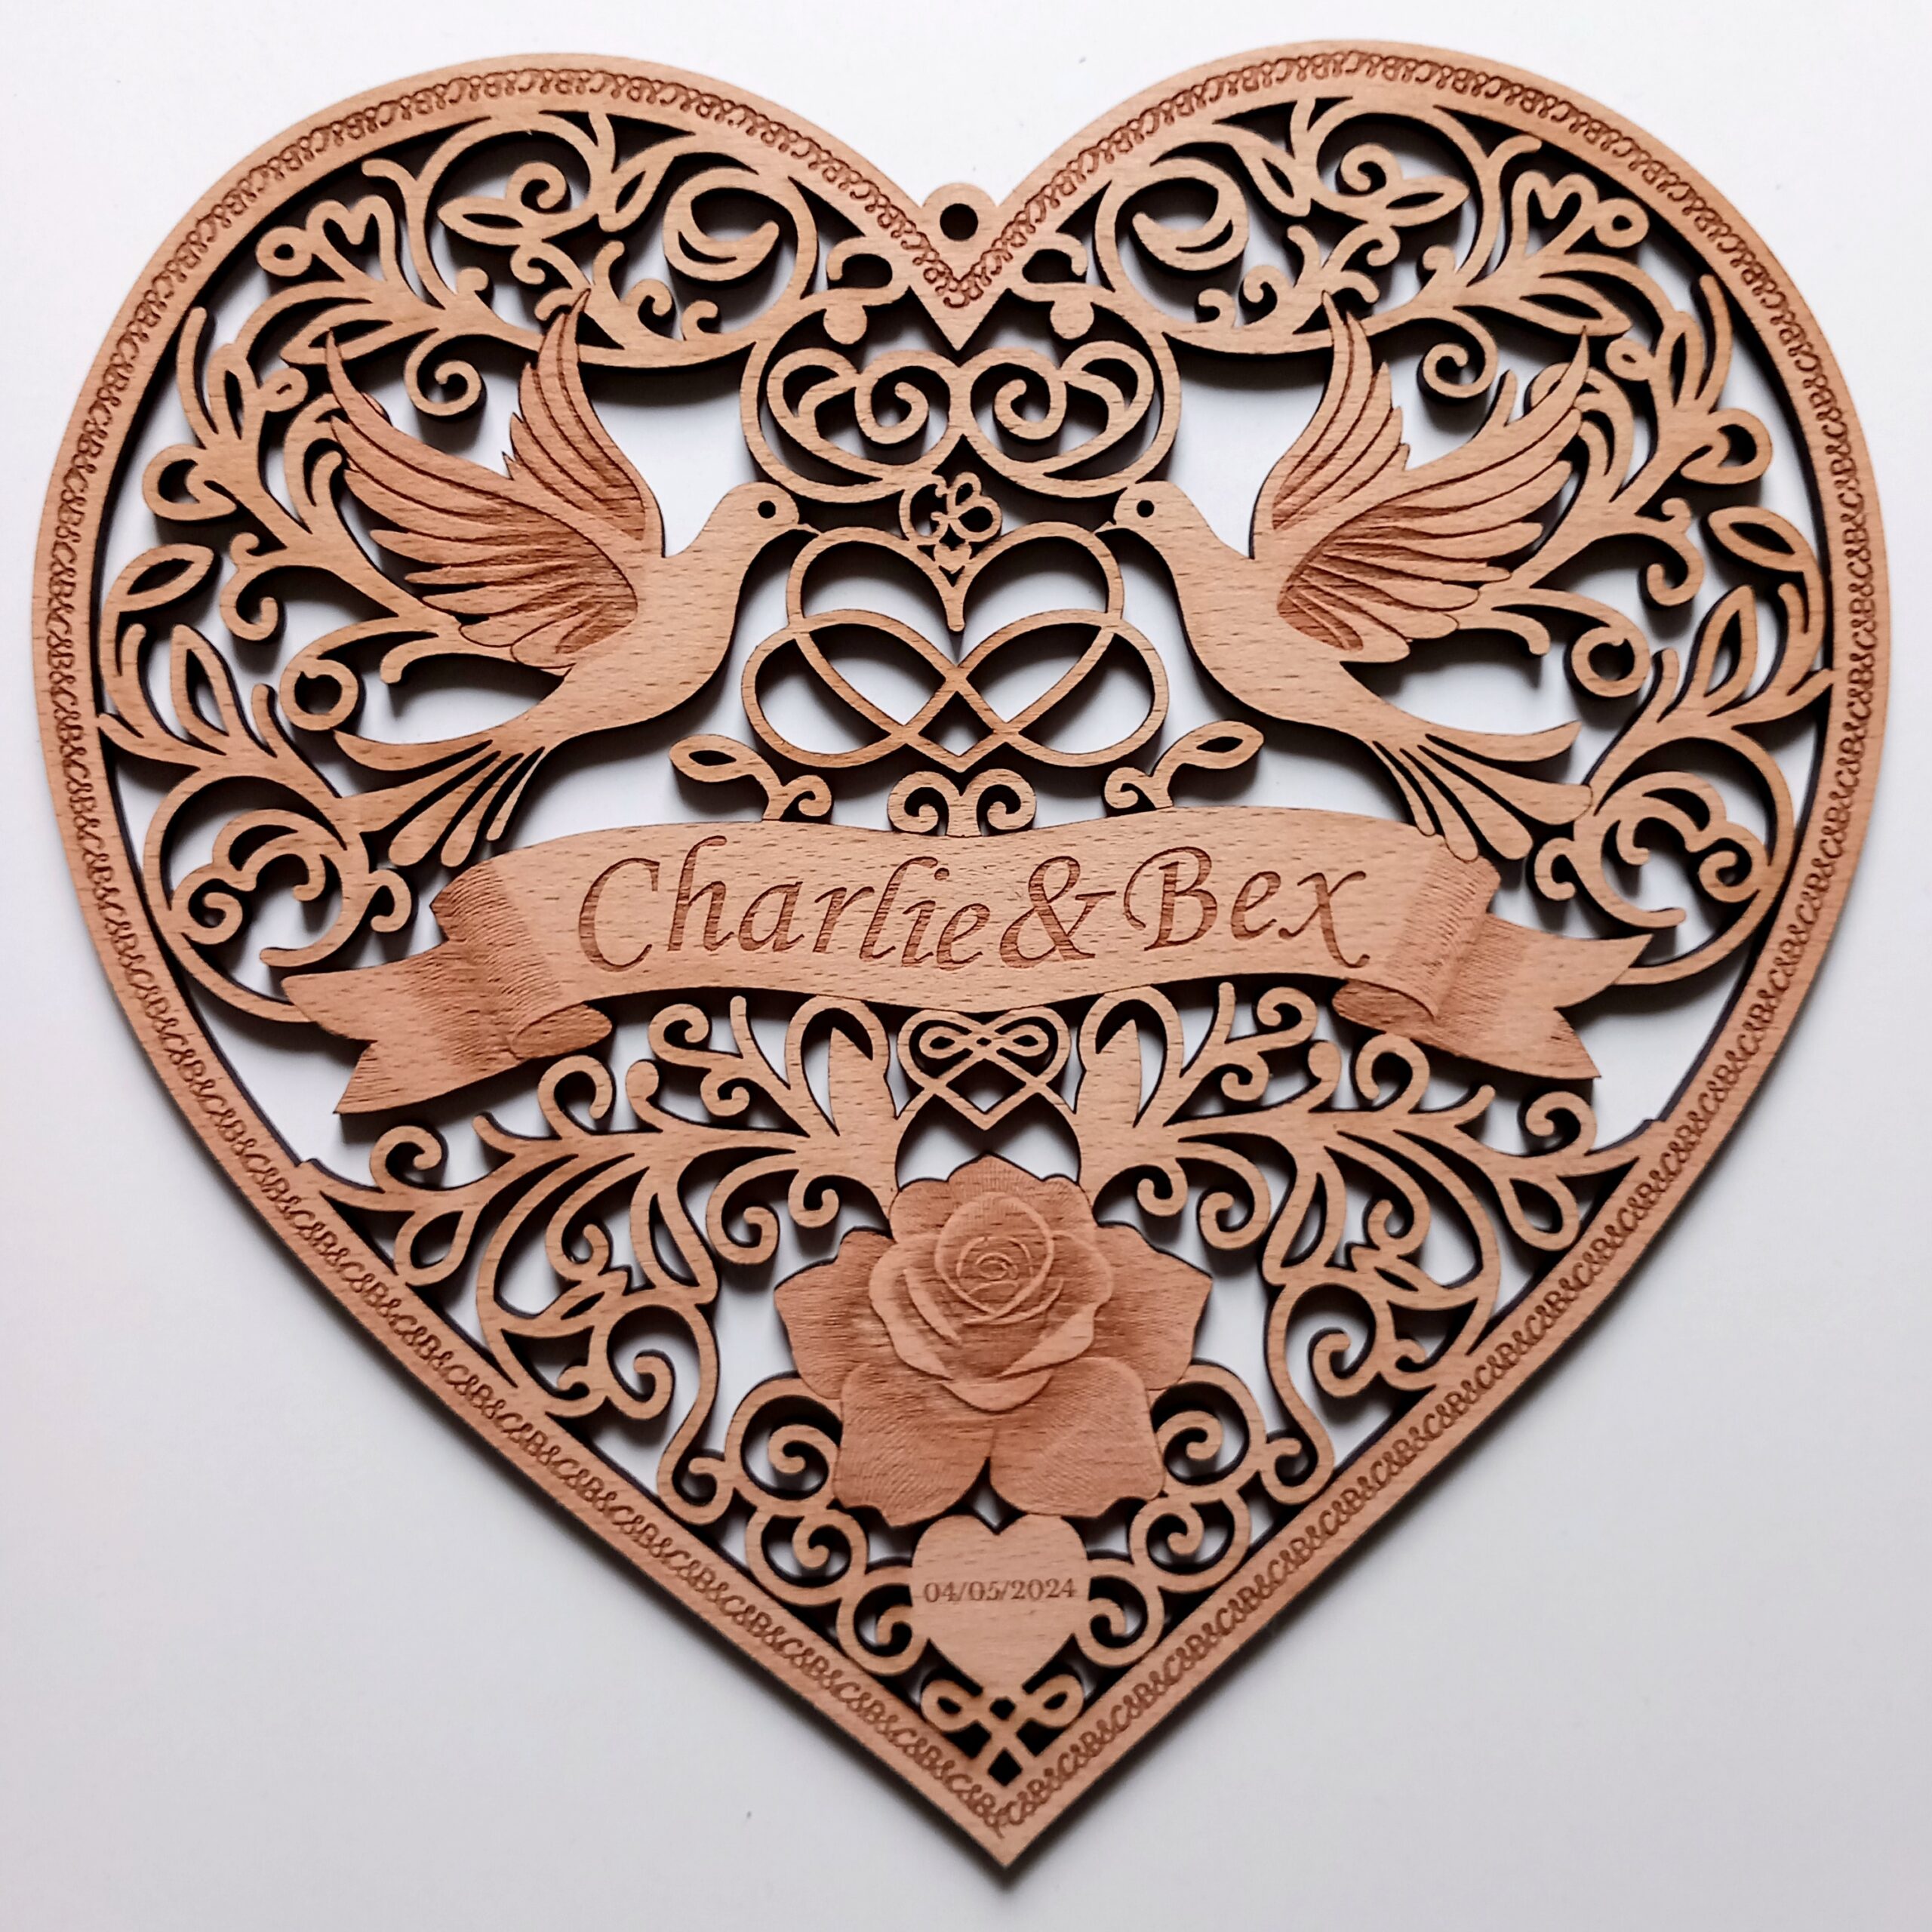
“please could you create a design for a heart-shaped piece of wooden wall art for a wedding? The wooden object should feature the names “Charlie & Bex.”
and this was the result:
Wow.
It was a lovely design, but it didn’t really scream ‘wedding’ at me, so I followed up with “Please could you try the same design, but with the design cut out using a fretsaw or scrollsaw (instead of carved into the wood)?” This is what came out next:
Wow again. For a start I was impressed that Dall-E actually knew what I meant by fretsaw or scrollsaw! But it still needed to be a bit more wedding-y (and what the heck was that “CERDDING” about?!)
This is why I really like the collaborative aspect of ChatGPT’s Dall-E. Having the interaction as a conversation allows the user to tweak the design in an iterative way, just changing one or two parts of the prompt at a time, instead of having to type out a giant long prompt with all of the required elements of the design. I felt that the second design still looked a bit too flowery, so I asked it to replace the large flowers with doves. Here is the result:
Fibber!
Again, that was a really nice design, but one of the things I’d liked about the previous versions was that the design had included a small blank heart near the bottom, which I thought would be a great place to write the date of the actual wedding. So I asked Dall-E to insert a small blank heart near the bottom.
Dall-E replied “Here’s the updated design with a small blank heart near the bottom, providing space for you to add text later.“
– but that was a big fat fib! Unfortunately, although ChatGPT / Dall-E is fantastic in a lot of ways, it often falsely claims that it has done what I asked. I actually really liked that design, but because it wasn’t 100% perfect I persevered and asked it to include roses or passion flowers. Again, it came up with a lovely design…
…but again it wasn’t quite right. I loved the birds and the overall look and the little banner with the names in, but there were a couple of problems:
There still wasn’t a blank heart for me to add a date later
Some of the lines were getting a bit too fine to cut out
I didn’t really like the big flower in the middle
Getting somewhere…
So I tried again, with this prompt: “Create a design for a heart-shaped piece of wooden wall art for a wedding, which looks like it has been cut out by a fretsaw or scrollsaw. The wooden object should feature: the names “Charlie & Bex”, two doves, a simplified passion flower, and a small heart-shaped area left blank for text.“
This time the GPT had done exactly what I asked…except that I’d changed my mind about putting in a lotus flower.
“Nice! Can you try another design like the one on the left, but with a rose or calla lily instead of the lotus flower?”
Frustration
This is where I started to get frustrated. I’d thought that the next image was going to be perfect, but it was getting worse. It had inserted a passion flower instead of a rose, had mis-spelled Charlie, and changed the doves into seagulls. Sigh. At the moment (April 2024) there always seems to be a point where the GPT turns into a complete arse, and deliberately does stuff to annoy me. We went through about twenty more iterations after that, where it was creating very nice designs, but they weren’t actually what I’d asked for. I swear it was deliberately ignoring my instructions.
After several days of fighting with DALL-E on and off, it finally created a design that I thought could work as a lasercut piece:
This fit the brief in most ways:
Heart shape wedding woodcut
Rose
Two doves
Correct names in a banner
Infinity symbol
Small blank heart (although it was too small to incorporate any text)
Looked like it had been (or could be) cut with a fretsaw or scrollsaw
Final Design
I made a few tweaks to the final design, by:
Making sure all of the elements connected to at least one other element, so no pieces dropped out.
Simplifying and/or thickening the swirling lines of the designs, to make the final piece less fragile.
Swapping the doves for two others from an earlier version.
Converting the squiggle above the heart-and-infinity-sign into a “CB” monogram.
Changing the typeface of the names.
Enlarging the blank heart so I could add text to it.
Changing the decorative edge to a repeating “C&B” design.
Adding a hanging loop.
Altering the squiggles above the rose so that they formed another heart.
Here they are next to each other:
I do love the original, but it just wasn’t practical to cut out exactly as it was (e.g. with some lines being too thin, and some elements not connected to the rest of the design). I might try etching it rather than cutting it, just so I have a version that’s more faithful to the original, but on the whole I’m really pleased with the way the wedding woodcut turned out.
The only real improvement that I feel I made is that I joined the top parts of the heart (above the infinity symbol). Most of the other changes were just compromises, to join up the disconnected or thin sections.
Lessons learned
ChatGPT / DALL-E is awesome. I can’t believe how aesthetically pleasing most of those designs are.
From a technical point of view, I’ve learned how to create ‘masked’ sections of images via the Linearity Curve app (i.e. sections of the design I can isolate, then copy and paste and/or export into other applications).
Things I still need to learn or improve
Why does it do that thing where it starts ignoring parts of my prompts? I need to try to find out if there’s a way to stop that happening.
Homework:
Try to create a specialist ‘Wedding Woodcut’ GPT, so I can design similar wedding hearts in the future.
Summary:
I felt like this was a really successful project. DALL-E helped me to create a design which combined the look of a traditional woodcut with the modern technology of lasercutting and AI image generation.
Thanks for reading this ‘Wedding Woodcut’ post. If you’ve got any suggestions of prompts or products – or if you’ve been experimenting yourself with AI-generated images – I’d love to hear about them. You can either comment below or send me a message via the Contact form.
I have just been to the 20Books Sevilla conference, and it was just as inspiring as I’d expected. Before I set off, I asked ChatGPT to come up with some ideas for “author merchandise” (because I’m still on my challenge of creating 52 AI-assisted artworks during 2024.) One of the ideas it suggested was “Author merchandise for recipe book authors”, which should include “A recipe book title etched onto a wooden spoon”. So here is my interpretation below. To be honest I’m nor sure this even counts as an artwork, but I thought that authors of recipe books could put their book title on one side…
…and then they could put a QR code for their website on the other side of the spoon:
As it happens, I didn’t actually meet any authors of recipe books at the 20Books conference so I couldn’t show them my spoon-based wares, but that doesn’t really matter because I’m just doing what the AI tells me to do.
I met lots of lovely writers (even though none of them were authors of recipe books), and I also made a drunken promise commitment to another author (which I will explain more about at a later date…)
As mentioned in an earlier blog post , I’ve declared that one of my creative goals for 2024 is to create at least 52 AI assisted/inspired artworks this year, using AI-generated images as a prompt for actual physical creative pieces. I was pleased with the first project, the heart-shaped wooden fridge magnet, but it was a relatively simple design and I also couldn’t think of a specific use for it in its original form. But I think this second artwork already shows a real evolution. For a start, the image itself is a much more complex and ambitious piece to laser etch. Secondly, I can think of several applications for the final object – especially for authors or other creatives. So welcome to the second experiment in my “An AI Made Me Do It” project: AI Assisted Artwork #2: Laser-Etched Wooden Book Cover.
[As usual, the links in this post aren’t affiliate links or sponsored products. They’re just for info.]
Where the idea came from:
I’ll be going to the “20Books Sevilla” authors’ conference in March 2024, and although I’m mainly attending with my author’s hat on, I’m also hoping to ask other authors what they think about the possibility of creating some book-related laser artworks.
With that trip in mind I was using one of the ChatGPT AI tools last week, to help me brainstorm a list of ideas for physical items that authors could offer to their readers and fans. That list ended up as a separate blog post, but as a side-product the AI image generator created a mockup illustration of book-related merchandise which might be useful to authors:
This is how ChatGPT described the image that DALL-E had created:
“a variety of laser-cut products designed for authors. This includes a decorative acrylic book cover, intricate paper invitations for a book launch, and character figurines, all set against the backdrop of a cozy writer’s studio.”
I’m not sure what I think about the orange figurine with squid legs, but the central etched wooden book cover immediately jumped out at me. It reminded me of the Aztec calendars that laser machine vendors send out as samples if you’re thinking about buying a laser cutter.
Because I’ve seen those calendars being etched by lasers like mine, I was inspired to see if I could get an AI to create an image for me that I could use as a physical book cover. I gave DALL-E a prompt of:
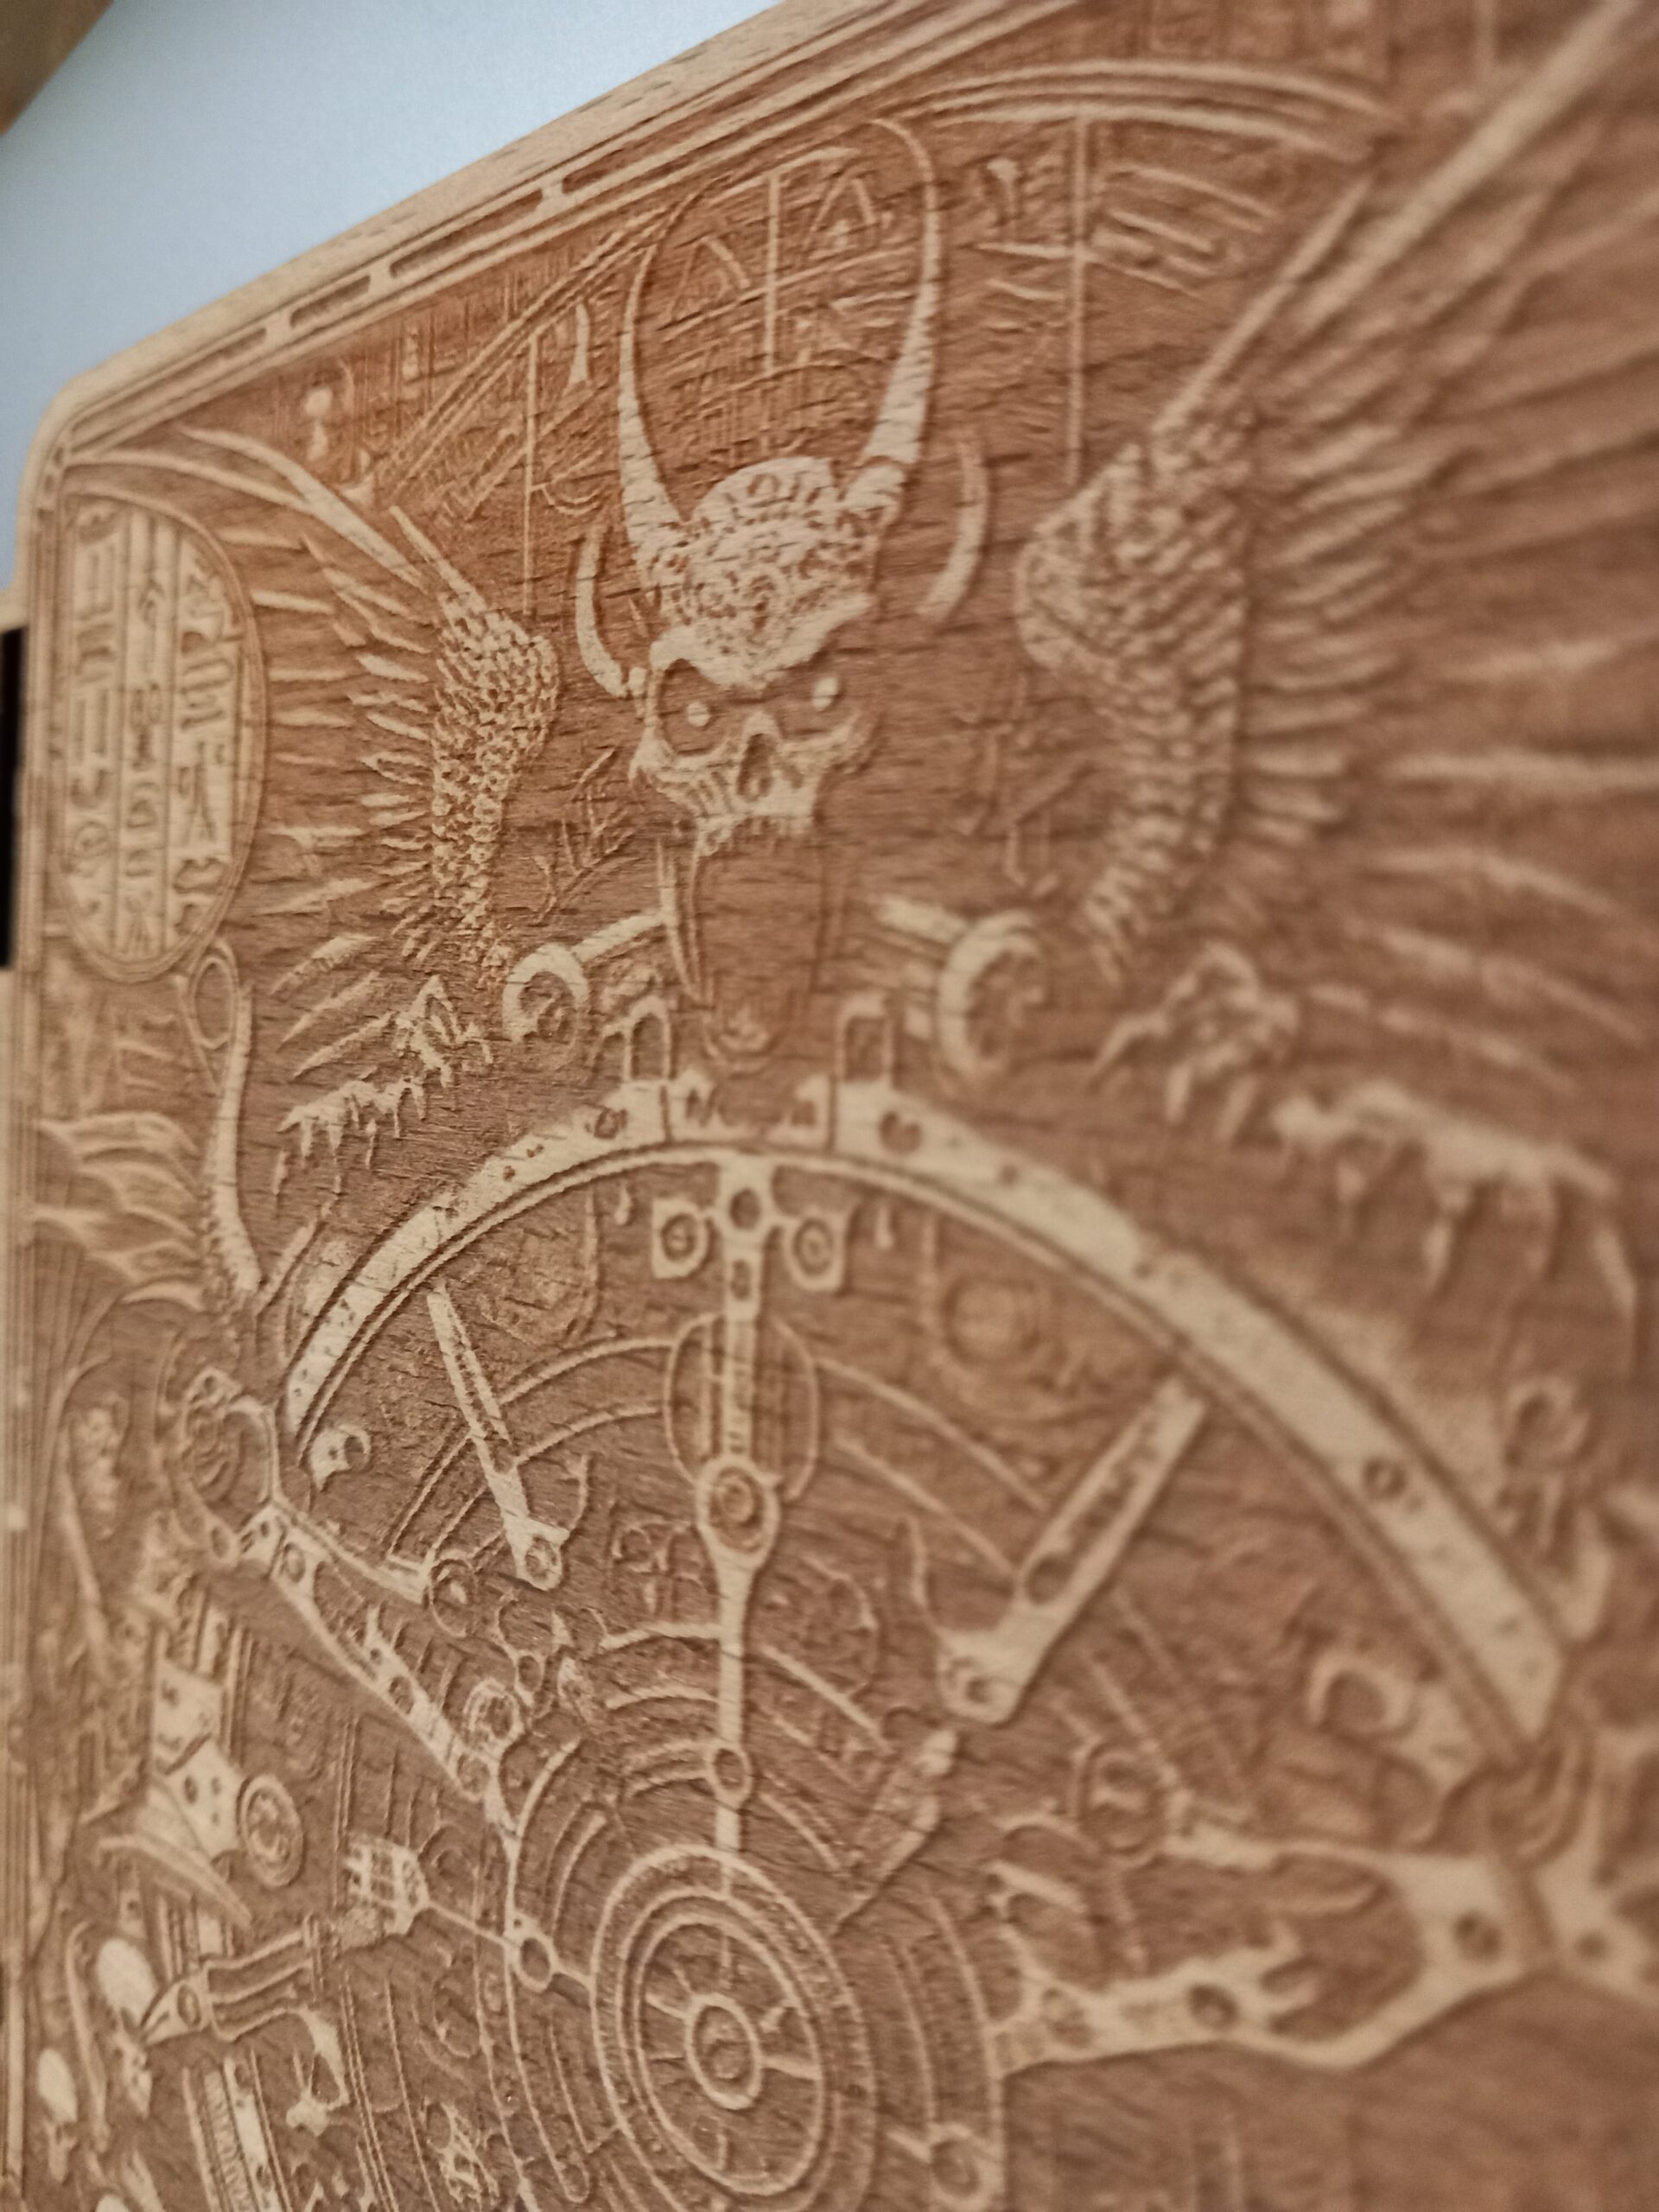
“a literal design for a laser-etched wooden book cover, featuring a complex steampunk lock, surrounded by demons and hieroglyphs”
This is what came out:
COOL! (and the image generator also spontaneously produced a creepy pen/syringe as a bonus)
How well did the image fit the prompt?
I must say that for me this fit the prompt perfectly:
It’s certainly got demons
There’s a great big steampunk lock mechanism in the middle of it
It features some hieroglyphic-looking symbols
It looks like a piece of etched wood.
I was so excited that I had to immediately go and try to etch it. This was my first effort (on a piece of beech-veneered MDF sheet):
Woo – not bad for a first effort, although I do need to play with the settings. Some parts (especially the main demon’s mouth) need to be etched more deeply.
(Detail of the laser-etched wooden book cover)
Here is a (speeded up) video of me etching and cutting the piece:
…and here are the original image and the physical object next to each other for comparison:
As I mentioned, I want to etch some parts of the image more deeply, but on the whole I’m very pleased with this first attempt at a laser-etched wooden book cover. I even managed to get the metallic grey background to look a bit like the one in DALL-E’s image (by resting the book cover on my laptop).
Summary
AI engine used:
The text-to-image generator “DALL-E”, which is part of the paid version of ChatGPT.
Lessons learned
DALL-E did a great job of understanding what I wanted. At the moment I definitely feel like it is worth paying for this version of ChatGPT.
This style of monochrome image converts very easily into a laser-etchable format.
The settings that I used for the laser etching weren’t quite right on this first attempt, because the demon’s mouth in particular was disappointingly shallow.
Things I still need to learn or improve
I need to find a way to make the etching deeper in some places.
Homework:
Find out how to etch the demon’s mouth more deeply. (Convert to greyscale and tinker with the contrast or brightness? Not sure yet, but I’m going to have a play with it to find out.)
Now I have to find a way to turn this into an actual book cover!
Additional AI thoughts:
Last week someone in my local writing group mentioned an article in the Guardian newspaper, which featured an interview with the artist Ai Weiwei about AI-generated images. He apparently said, “Art that can be copied is meaningless”, and that “even Pablo Picasso and Henri Matisse would have had to rethink their approach if AI had existed in their era”. At first glance this seemed like an argument that “AI must be bad because it can imitate famous artists’ styles” [and therefore they would just give up making art]. However I’m not convinced that Ai Weiwei is against using AI – mainly because of his forthcoming playfully-titled project “Ai vs AI”.
So on second glance, what is he saying about Picasso and Matisse? It looks like he’s implying that those other artists’ work is meaningless because an AI could imitate them, whereas his work is meaningful because he doesn’t have a style that an AI could reproduce?!
One of the great things about AI reaching the mainstream news is that it has stirred up so many conversations about the nature and meaning and value (or not) of art. I’m really enjoying all of the questions emerging from this topic. I myself am currently pondering what artists from previous eras would have thought about the work of a man whose examples include 200,000 broken spouts from teapots or jugs 😉
Thanks for reading this post. If you’ve got any suggestions of prompts or products – or if you’ve been experimenting yourself with AI-generated images (or laser-cut art) – I’d love to hear about them. You can either comment below or send me a message via the Contact form.