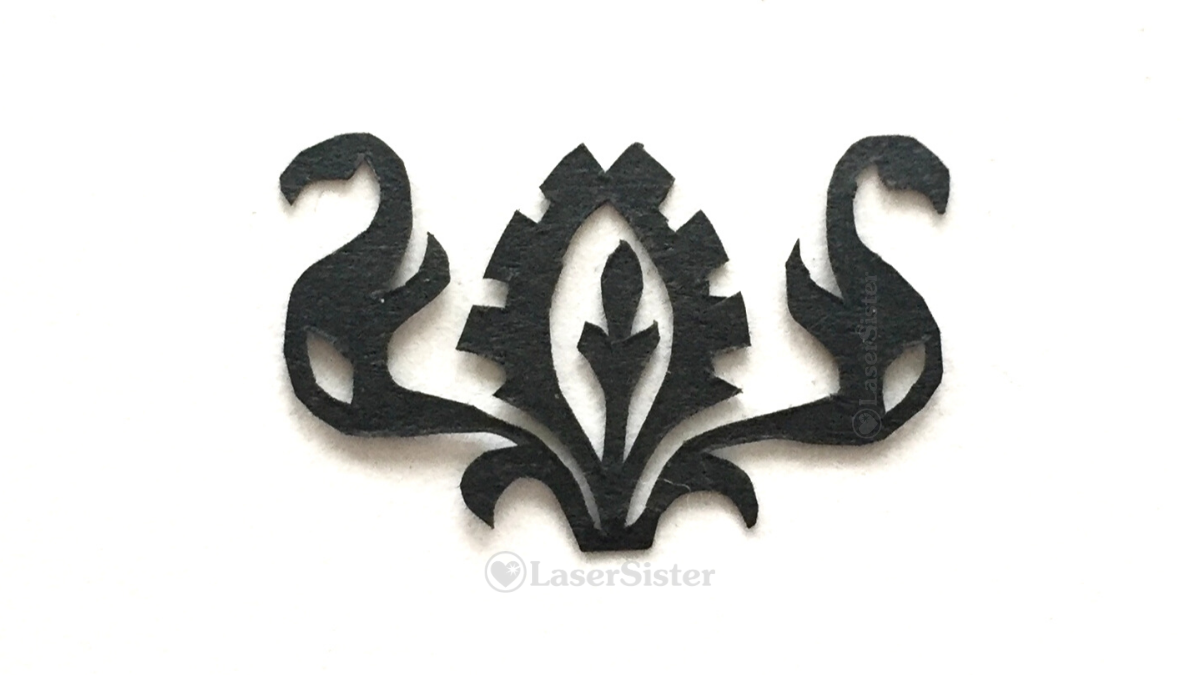
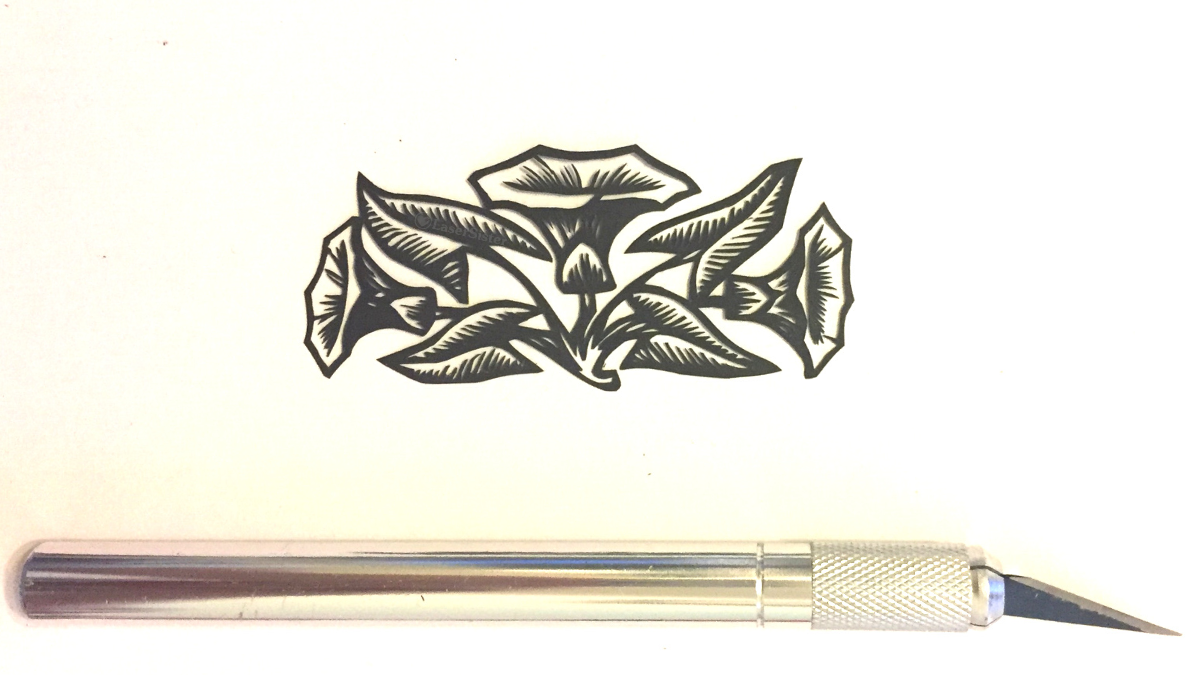
Posted on Leave a comment

Lockdown Papercutting Project Day 5: Cornucopia

papercut 519 horizontal cornucopia - watermarked - LaserSister - KayVincent

Cornucopia #519

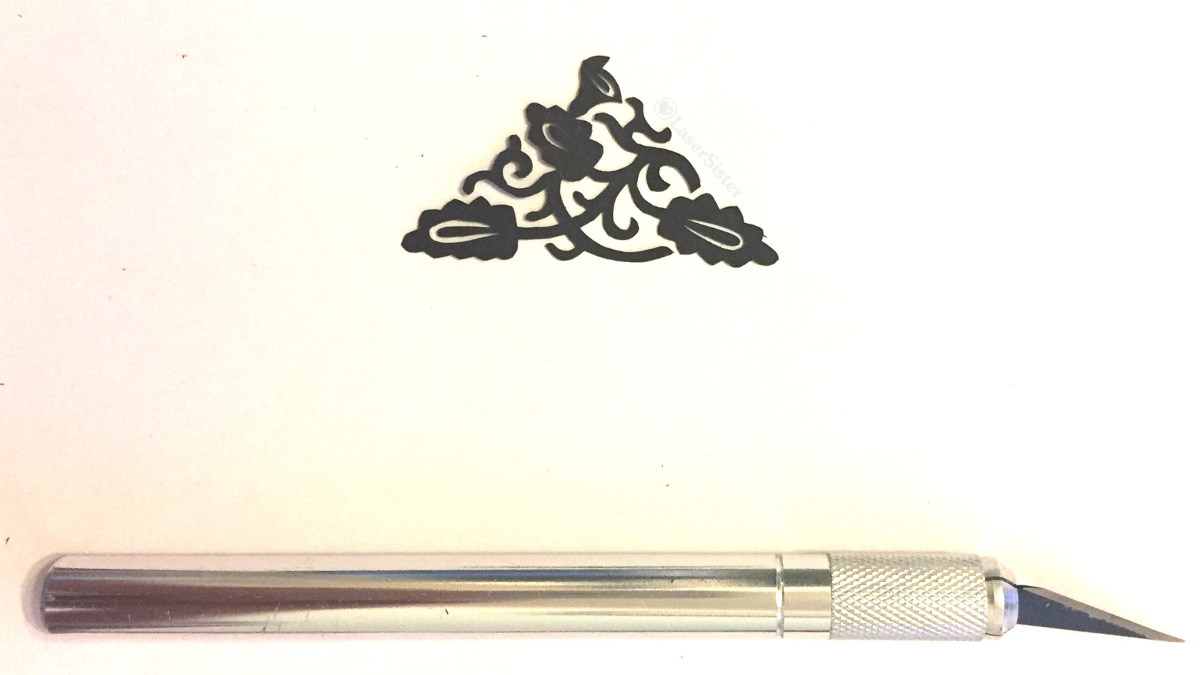
This “Cornucopia” design is from my extended papercutting project, where I’m trying to adapt all 922 images from the book “922 Decorative Vector Ornaments“, to make them into papercutting designs, and then cut them out by hand. This one is design #519 in the book.
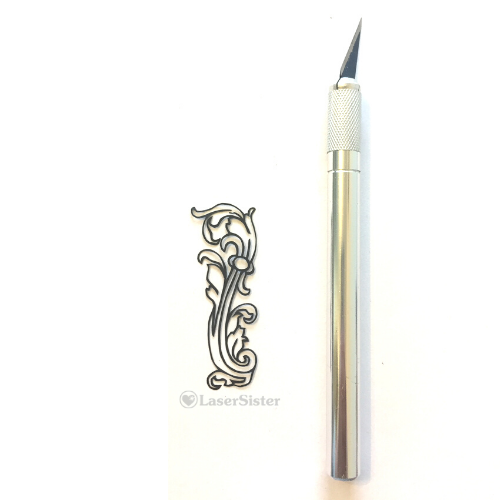
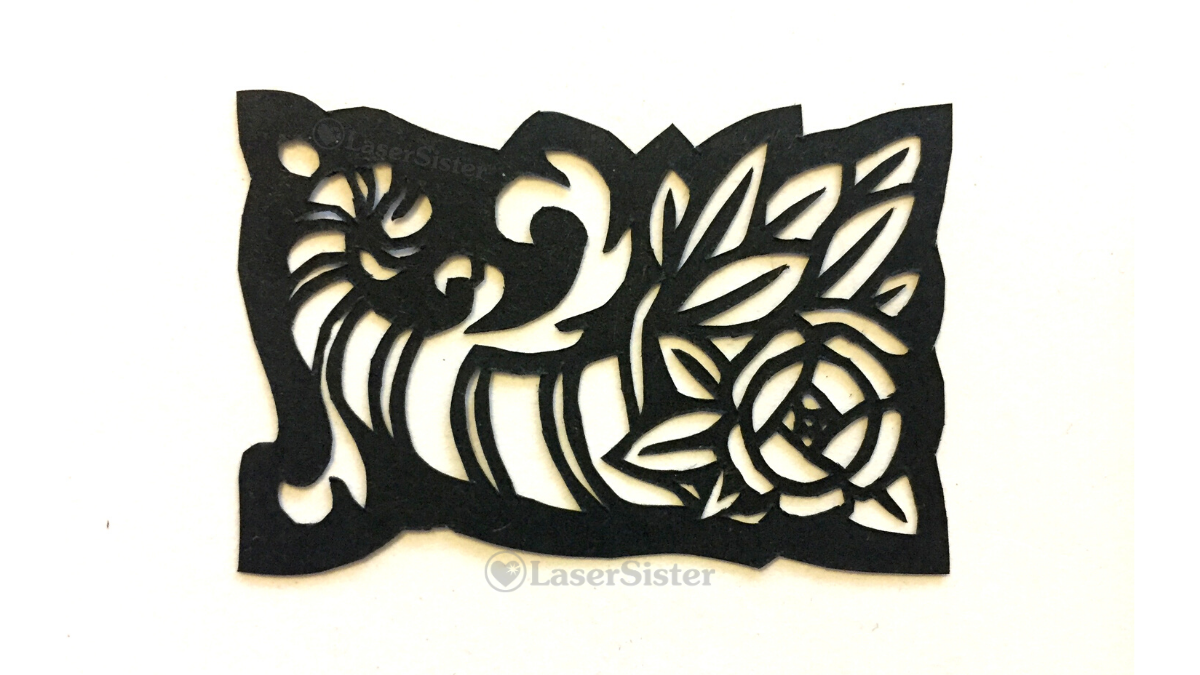
papercut 519 vertical with scalpel - LaserSister - KayVincent

Closer up:

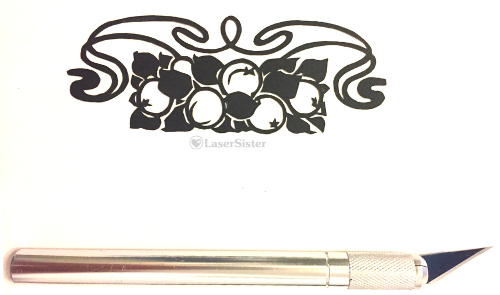
This is another one that I really like – even up close:

papercut 519 close up square watermarked - LaserSister - KayVincent

There are only a few shaky lines, and the rest seem fairly competently executed – even the really thin ones. And the outside edges don’t look too ‘lumpy’.

As with so many of these designs though, I’m not sure whether I’ll ever find a ‘real’ project to use it in. Especially since the current Covid19 lockdown period doesn’t really make me think of overflowing cornucopias or abundance at the moment…

While I was cutting it I was still listening to Mansfield Park by Jane Austen. Ugh. Thank goodness it was an audiobook borrowed free via the library, instead of using credits or actual money – that would have made it even more disappointing to listen to.

Any comments about the design or the cutting? (or indeed, Mansfield Park?) You can chip in via the comments page, or Facebook, Twitter, LinkedIn or Instagram.

Posted on Leave a comment

Lockdown Papercutting Project Day 4: Tiny Papercut Design Element

papercut 522 horizontal - watermarked - LaserSister - KayVincent

Tiny Papercut Design Element #522

My ongoing papercutting project continues, where I’m trying to adapt all 922 images from the book “922 Decorative Vector Ornaments“, to make them into papercutting designs, and then cut them out by hand, using scissors and scalpel. This one is design #522 in the book, and I’m running out of ideas so I’ve called it “Tiny Papercut Design Element”.

It is so small that it wouldn’t surprise me if this turned out to be another one of the designs in the book that comes from one of the larger designs. Oh well, in the meantime it was a nice quick one to cut:

Papercut 522 vertical - LaserSister - KayVincent

Closer up:

This design might be tiny, but the shapes in it were very pleasing to cut. Looking at the closeup version I guess I could have worked on making the curves a little bit more curvy and flowing. But it’s such a small piece that to the naked eye the ‘lumpy’ curves aren’t as obvious.

papercut 522 horizontal - watermarked - LaserSister - KayVincent

I don’t even mind that it’s not-quite-symmetrical. That just makes it another case that shows it’s hand-cut and not laser-cut.

While I was cutting it I was listening to Mansfield Park by Jane Austen. What a disappointment! She seems to have blatantly plagiarised herself by doing an olden-days version of copying & pasting loads of dialogue from Pride and Prejudice into this one. Plus the plot is like one of those awful semi-scripted TV shows, where all the people in it never fancy the person they’re going out with because they’ve got their eye on someone else. And then [sorry for the spoiler, but the book has been out for a couple of hundred years, so you’ve had time to read it by now] the main character ends up with her cousin. Eew.

Any better suggestions about what I should call this design? You can chip in via the comments page, or Facebook, Twitter, LinkedIn or Instagram.

Posted on Leave a comment

Lockdown Papercutting Project Day 3: Art Nouveau Design Papercut

Papercut 530 square with scalpel - LaserSister - KayVincent

Art Nouveau Design #530

This ‘Art Nouveau Design’ papercut is part of my ongoing papercutting project, where I’m adapting designs from the book “922 Decorative Vector Ornaments” to turn them into papercutting designs. This one is design #530 from the book.

Papercut 530 square with scalpel - LaserSister - KayVincent

Closer up:

I love this one! For a start the design is right up my street; it reminds me of William Morris and Arts & Crafts Movement designs:

Papercut 530 square with scalpel - LaserSister - KayVincent

But for this one in particular the thin lines turned out really well. I don’t think I accidentally ripped any of them, for a change, and even close up they seem OK.

This is a design that I can definitely see myself using in a ‘real’ project, one day.

While I was cutting I was listening to Tim Ferriss’s “4-Hour Work Week” audiobook. The world has changed a lot since it was released in 2008! Off the top of my head I can think of three things that have become extinct since then: faxes, Blackberries, and MySpace. The advice was still interesting and useful, but hopefully the companion website keeps readers/listeners up to date with new developments.

Any comments or advice about the ‘Art Nouveau design papercut’ or the cutting? You can chip in via the comments page, or Facebook, Twitter, LinkedIn or Instagram.

Posted on Leave a comment

Lockdown Papercutting Project Day 2: Oranges and Ribbon

papercut 651 with scalpel square watermarked - LaserSister - KayVincent

Oranges and ribbon #651

Day 2 of the continuing papercutting project, where I’m adapting designs from the book “922 Decorative Vector Ornaments” so they can be turned into papercuts via scissors and/or scalpel. (And so that my sanity will remain intact during the Covid-19 lockdown, because I find papercutting to be very relaxing and therapeutic.) This is design #651 from the book, and I’ve called it “Oranges and Ribbon” papercutting.

papercut 651 with scalpel square watermarked - LaserSister - KayVincent

Closer up:

Maybe they’re not oranges? But I don’t think they’re tomatoes, because the leaves look more citrus-y than tomato-y. And I didn’t know how else to describe the swirly thing, so that’s why I just called it a ribbon. I like that the papercutting is sort-of-but-not-exactly symmetrical.

papercut 651 close up square watermarked - LaserSister - KayVincent

To me the design looks half Art Nouveau and half Art Deco (ribbon and oranges, respectively). Close up some of the lines do look a bit ‘lumpy’ because I didn’t go back and tidy them up, but that was because I was fairly satisfied with it to begin with. Unlike yesterday’s design at least the lines are nice and thick, so I wasn’t afraid of stretching the paper and accidentally ripping it as I went along. To be honest I don’t think I’d make any changes if I had to cut it again.

I’m not sure I will ever be able to find a real-life project where I’ll be able to incorporate this design (unless I end up sending someone a card one day that says something like “Orange you glad it’s your birthday?”) but in the meantime I enjoyed cutting this one.

Any comments about the design or the cutting? You can chip in via the comments page, or Facebook, Twitter, LinkedIn or Instagram.

Posted on Leave a comment

Lockdown Papercutting Project: Day 1 – Tangly Rose

papercut 534 horizontal with scalpel - watermarked - LaserSister - KayVincent

Tangly rose papercutting design: #534

A couple of years ago I set myself a papercutting project, where I adapted 100 papercutting designs (from the book “922 Decorative Vector Ornaments“), and then cut them out with a scalpel and scissors over 100 days. Since then I’ve carried on with the project, cutting about one design per week, but since we’re currently in the “2020 Covid-19 Lockdown”, I need a bit of occupational therapy to keep me calm, so I’m starting another 100-day project. Today’s design #534 from the book, and I’ve called it “tangly rose”.

Papercut 534 with scalpel square watermarked - LaserSister - KayVincent

Closer up:

This design seems like a bit of a strange mixture, to me. Those definitely aren’t rose leaves that the rose is sitting in. They remind me of seaweed or snakes…

Papercut 534 close up square watermarked - LaserSister - KayVincent

But it was definitely a good exercise in terms of adapting and cutting the design. The rose was fairly straightforward to cut, but the tangly leaf/snake things were really tricky. The lines are very very fine. But my accidentally-bent scissors did a good job of helping me with a lot of the difficult bits.

Any comments about the design or the cutting? You can chip in via the comments page, or Facebook, Twitter, LinkedIn or Instagram.

Posted on Leave a comment

Papercutting project (continued): leafy corner sprig

papercut leafy corner sprig 686 square watermarked - LaserSister - KayVincent

Leafy corner sprig #686

This ‘leafy corner sprig’ papercut is part of my ongoing papercutting project, where I’m adapting lots of designs for papercutting from the book “922 Decorative Vector Ornaments“, and am then cutting them with a scalpel. This one is design #686 from the book.

(Some of the links in this article might be ‘affiliate links’. If you’d like to know more, please check out the small print page…)

papercut leafy corner sprig 686 vertical with scalpel - LaserSister - KayVincent

Closer up:

Are they leaves, or are they flowers? I’m not sure. But I like the overall effect of the swirly vine-y pattern. I think it would look really nice as a repeated decoration in the four corners of a larger design:

papercut leafy corner sprig 686 watermarked vertical - LaserSister - KayVincent

Now that I’m a couple of years into this project, I can definitely see that my cutting skills have improved. The cuts seem to look a lot cleaner and more accurate than they used to.

However, I must admit that the reason is due to a bit of a cheat, really. I cut each piece out … but then leave it aside for a few days or weeks. Then when I come back to it again I ‘edit’ it by snipping at it a bit more and smoothing and neatening lines. Each piece usually only needs a few tweaks, but those little tweaks really do make a big difference, overall.

Before, I used to just keep cutting until I either ran out of leisure time, or my eyes got tired, or I got frustrated with all of the mistakes that I was making. But now I’ve realised that if I’m making mistakes and ripping the designs then it’s either because I’m tired, or because the scalpel blade is getting dull. Both of those causes are easy to fix – I either need to stop and have a rest, or to change the blade.

I can’t remember exactly where I bought my replacement scalpel blades the last time, but it must have been either Ebay or Amazon. I bought a pack of 100 and I’m still using them, over two years later. These are the sort of blades that I searched for when I was looking at buying the replacements.

Any comments about the design or the cutting? You can chip in via the comments page, or Facebook, Twitter, LinkedIn or Instagram.

Posted on Leave a comment

Papercutting project (continued): triangular flower and leaf sprig

papercut triangular flower and leaf sprig 722 - watermarked - LaserSister - KayVincent

Triangular flower and leaf sprig 722

My ongoing papercutting project continues, where I’m trying to adapt all 922 images from the book “922 Decorative Vector Ornaments“, to make them into papercutting designs, and then cut them out by hand. This one is design #722 in the book, and I’ve called it “triangular flower and leaf sprig”.

You might think that if I’ve got to #722 out of 922 designs that I might ‘only’ have 200 designs to go before I finish the project. But I’m not cutting them in any particular order. Maybe I should check how many I have cut, so far. I don’t even know if I’m halfway yet!

(Some of the links in this article might be ‘affiliate links’. If you’d like to know more, please check out the small print page…)

papercut triangular flower and leaf sprig 722 with scalpel - LaserSister - KayVincent

Closer up:

This design reminds me of 1960s Chinese papercuts. This Wikipedia page calls the style “chuāng huā (窗花), window flowers or window paper-cuts.”

papercut triangular flower and leaf sprig 722 close up watermarked - LaserSister - KayVincent

I like the way the elements of this triangular flower and leaf sprig join together. I’ve tried to make the joins between the pieces flow into each other and look fairly natural.

And the actual cutting of the piece is fairly ‘clean’ as well, with only a few lumps and bumps in it when you look at it up close.

While I was cutting it I was listening to “Blood’s Pride”, by Evie Manieri:

Any comments about the design or the cutting? You can chip in via the comments page, or Facebook, Twitter, LinkedIn or Instagram.

Posted on Leave a comment

Papercutting project (continued): convolvulus flower

papercut convolvulus flower 525 with scalpel - watermarked - LaserSister - KayVincent

Convolvulus flower #525

My ongoing papercutting project continues (where I’m trying to adapt 922 images from the book “922 Decorative Vector Ornaments“, to make them into papercutting designs, and then cut them out by hand). This one is design #525 in the book, and it looks like a convolvulus flower, so that’s what I’ve called it.

(Some of the links in this article might be ‘affiliate links’. If you’d like to know more, please check out the small print page…)

papercut convolvulus flower 525 vertical with scalpel - LaserSister - KayVincent

Closer up:

This design reminds me of 1960s Chinese papercuts. (Wikipedia calls the style “chuāng huā (窗花), window flowers or window paper-cuts“, because the finished papercuts were often displayed in windows.)

papercut convolvulus flower 525 close up - watermarked - LaserSister - KayVincent

It appeals to me because it’s sort-of-symmetrical-but-also-not-symmetrical.

The design was a fairly ‘forgiving’ piece to cut, because the cuts are mostly angular and jagged. And the lines that are curved tend to make nice sweeping lines rather than fiddly little shapes. So yes, overall it was very satisfying to cut, and even close-up I’m pretty happy with it.

While I was cutting it I was listening to “Blood’s Pride”, by Evie Manieri:

Any comments about the design or the cutting? You can chip in via the comments page, or Facebook, Twitter, LinkedIn or Instagram.

Posted on Leave a comment

Papercutting Project (Continued): K116 – Compass Leaves Papercut

compass leaves papercut 116 - watermarked - LaserSister - KayVincent

Compass Leaves Papercut

My ongoing papercutting project continues. This design looks a bit like a compass, but with leaves instead of compass points. So I’ve called it “Compass Leaves” papercut. (It is design #116 in the book “922 Decorative Vector Ornaments“.)

(Some of the links in this article might be ‘affiliate links’. If you’d like to know more, please check out the small print page…)

Compass Leaves design – with scalpel for scale

compass leaves papercut 116 - watermarked - LaserSister - KayVincent

Closer up:

Here it is much closer up:

papercut 116 closeup watermarked - LaserSister - KayVincent

Although the outer circle might look a bit lumpy up close, I’m still quite please with it because that line is actually less than a millimetre wide.

While I was cutting it I was listening to the audiobook of Arthur C. Clarke’s A Fall of Moondust. It goes a bit like this:

“Oh no! We’re trapped in a tourist bus on the moon, under metres of moondust. Hey, all you lady passengers – go and help the stewardess to hand out food and drinks. That will stop you from getting hysterical while we intelligent men help the captain figure out what to do.”

Any comments about the design or the cutting? You can chip in via the comments page, or Facebook, Twitter, LinkedIn or Instagram.

Posted on Leave a comment

Papercutting Project (Continued): K695 – New Leaf Papercut

new leaf K695 with pen for scale

New Leaf! Papercut (Design 695)

Happy New Year! My ongoing papercutting project is now stretching into another year. And because the new year is often associated with ‘turning over a new leaf’ (in other words, starting again), I chose a leaf design for today’s papercutting theme, and called it “New Leaf” papercut. (It is design #695 in the book “922 Decorative Vector Ornaments“.)

(Some of the links in this article might be ‘affiliate links’. If you’d like to know more, please check out the small print page…)

Leaf – with pen for scale

new leaf K695 with pen for scale

Closer up:

Here it is much closer up:

new leaf K695

I really like this ‘new leaf’ papercut design because it’s Art Nouveau-style, so it’s right up my street. And I managed to cut all of those teeny weeny curly lines without accidentally breaking any of them.

While I was cutting it I was listening to an audiobook. This time it was Victor Hugo’s The Hunchback of Notre Dame. I must admit that the book has a very slow start, as far as I’m concerned. There doesn’t seem to be any clue about who the main character will be, yet, let alone an “inciting incident”. I’m guessing that at some point a man called Quasimodo might appear, but so far the story seems to be about a crowd of people waiting for a play to start.

Any comments about the design or the cutting? You can chip in via the comments page, or Facebook, Twitter, LinkedIn or Instagram.