We got back from holiday last week and only just finished unpacking today – and I’d forgotten that while I was on holiday my eye had been caught by several laser-cut souvenirs.
This one is a laser cut souvenir fridge magnet from Belogradchik Rocks, in Bulgaria. Mmmm, laser-y!
I like the way that it has two layers to it. But whoever made it has left quite a bit of scorching/smoke-marking on the front, and I’d be really disappointed if I sold a piece like that. On the other hand, I’m too much of a perfectionist. Weird how it didn’t stop me buying a piece, but it would stop me selling one. Maybe I’ve got things the wrong way round?!
Laser cutters are so versatile that sometimes it’s really easy to get sidetracked, and think “I wonder if I could…” and then start on a whole new series of experiments. That’s how I ended up the other day wondering if I could create a birthday card with fairies on it. I’m not brilliant at drawing though, so I needed to try to find some royalty-free images that I could use as a basis for the designs, where I wouldn’t be infringing copyright and/or stealing someone else’s idea. At times like this, I usually turn to the brilliant Dover Books. They might just as well have “Royalty-Free Laser Cutting Resources” written all over them.
These books are absolutely great to use with art and design projects, including (of course) laser-cut and laser-etched projects. The books are specifically created for artists and craftspeople, to allow them to use the designs in their own projects. Once you have bought the book you may use the designs without having to pay royalties, and – more importantly – without breaking copyright laws.
As it says in the front of most of their books, “You may use them for graphics and crafts applications, free and without special permission, provided that you include no more than ten in the same publication or project…However, republication or reproduction of any illustration by any other graphic service, whether it be in a book, electronic, or in any other design resource is strictly prohibited.”
In other words, you can make artworks which include these images, but you can’t (e.g.) copy the images and sell them as stock images yourself.
The books used to just be in physical format, but in recent years they have included CD-ROMs with the artwork on them digitised as vector images and ready for you to incorporate in your own projects. (And now an increasing number of the books are available in eBook format.)
This week I’ve been developing William Morris-style laser cut birthday cards.
After a couple of days’ tinkering, I ended up with some really nice filigree designs of card toppers:
Birthday card design: E
Testing a gold “F” design
Where to find images and inspiration for your laser cutter
For the letters shown above, I bought the extended licence from Dreamstime, which is a website where you can buy royalty-free photos and vector-based illustrations.
Here are the art nouveau alphabet images that I used. Alternatively, you can enter your own search terms in the box below, to look for specific resources. For example, type “Art nouveau”, or “William Morris alphabet” in the box, and then click the ‘search’ button.
Another great resource that I’ve found for royalty-free designs is Vectorstock.com. They seem to have forgotten to use an apostrophe in the link/banner below, but they still do a brilliant range of illustrations. And because their files are all vector-based graphics, that means that they are usually very straightforward to cut with a laser cutter:
And at the moment (April 2018) both sites are even more useful if you have your own laser cutting business, because they can provide a little bit of extra income on top of your actual laser-cut products. You can either upload some of your own original designs and allow people to buy licences to use them, or can sign up as an ‘affiliate’.
For example, with Vectorstock I uploaded my elephant design so that other people with laser cutters can use it in their own designs. Then every time someone purchases a licence for the elephant, I receive a few cents, but there is no extra cost to the purchaser. Win/win!
Similarly, with affiliate links and referral schemes, you can also receive small payments just for pointing people towards something that they are already interested in. As another example, if you include the banners/ads for these services (like the ones shown above) you could receive a small payment each time someone signs up and/or purchases a licence.
Hope you enjoyed this post. Don’t forget to say ‘hi’ via the contact us page, or to tweet me @LaserSister if you’ve tried any of the above ideas or if you’ve got comments or questions.
(This post was originally on my KayVincent.com website, but now that I’ve got the LaserSister.com site I am moving or copying a lot of the laser-related articles over here. That way I should end up with a website full of posts relevant to laser-cutting, and can leave the other website/blog as a more general source of info.)
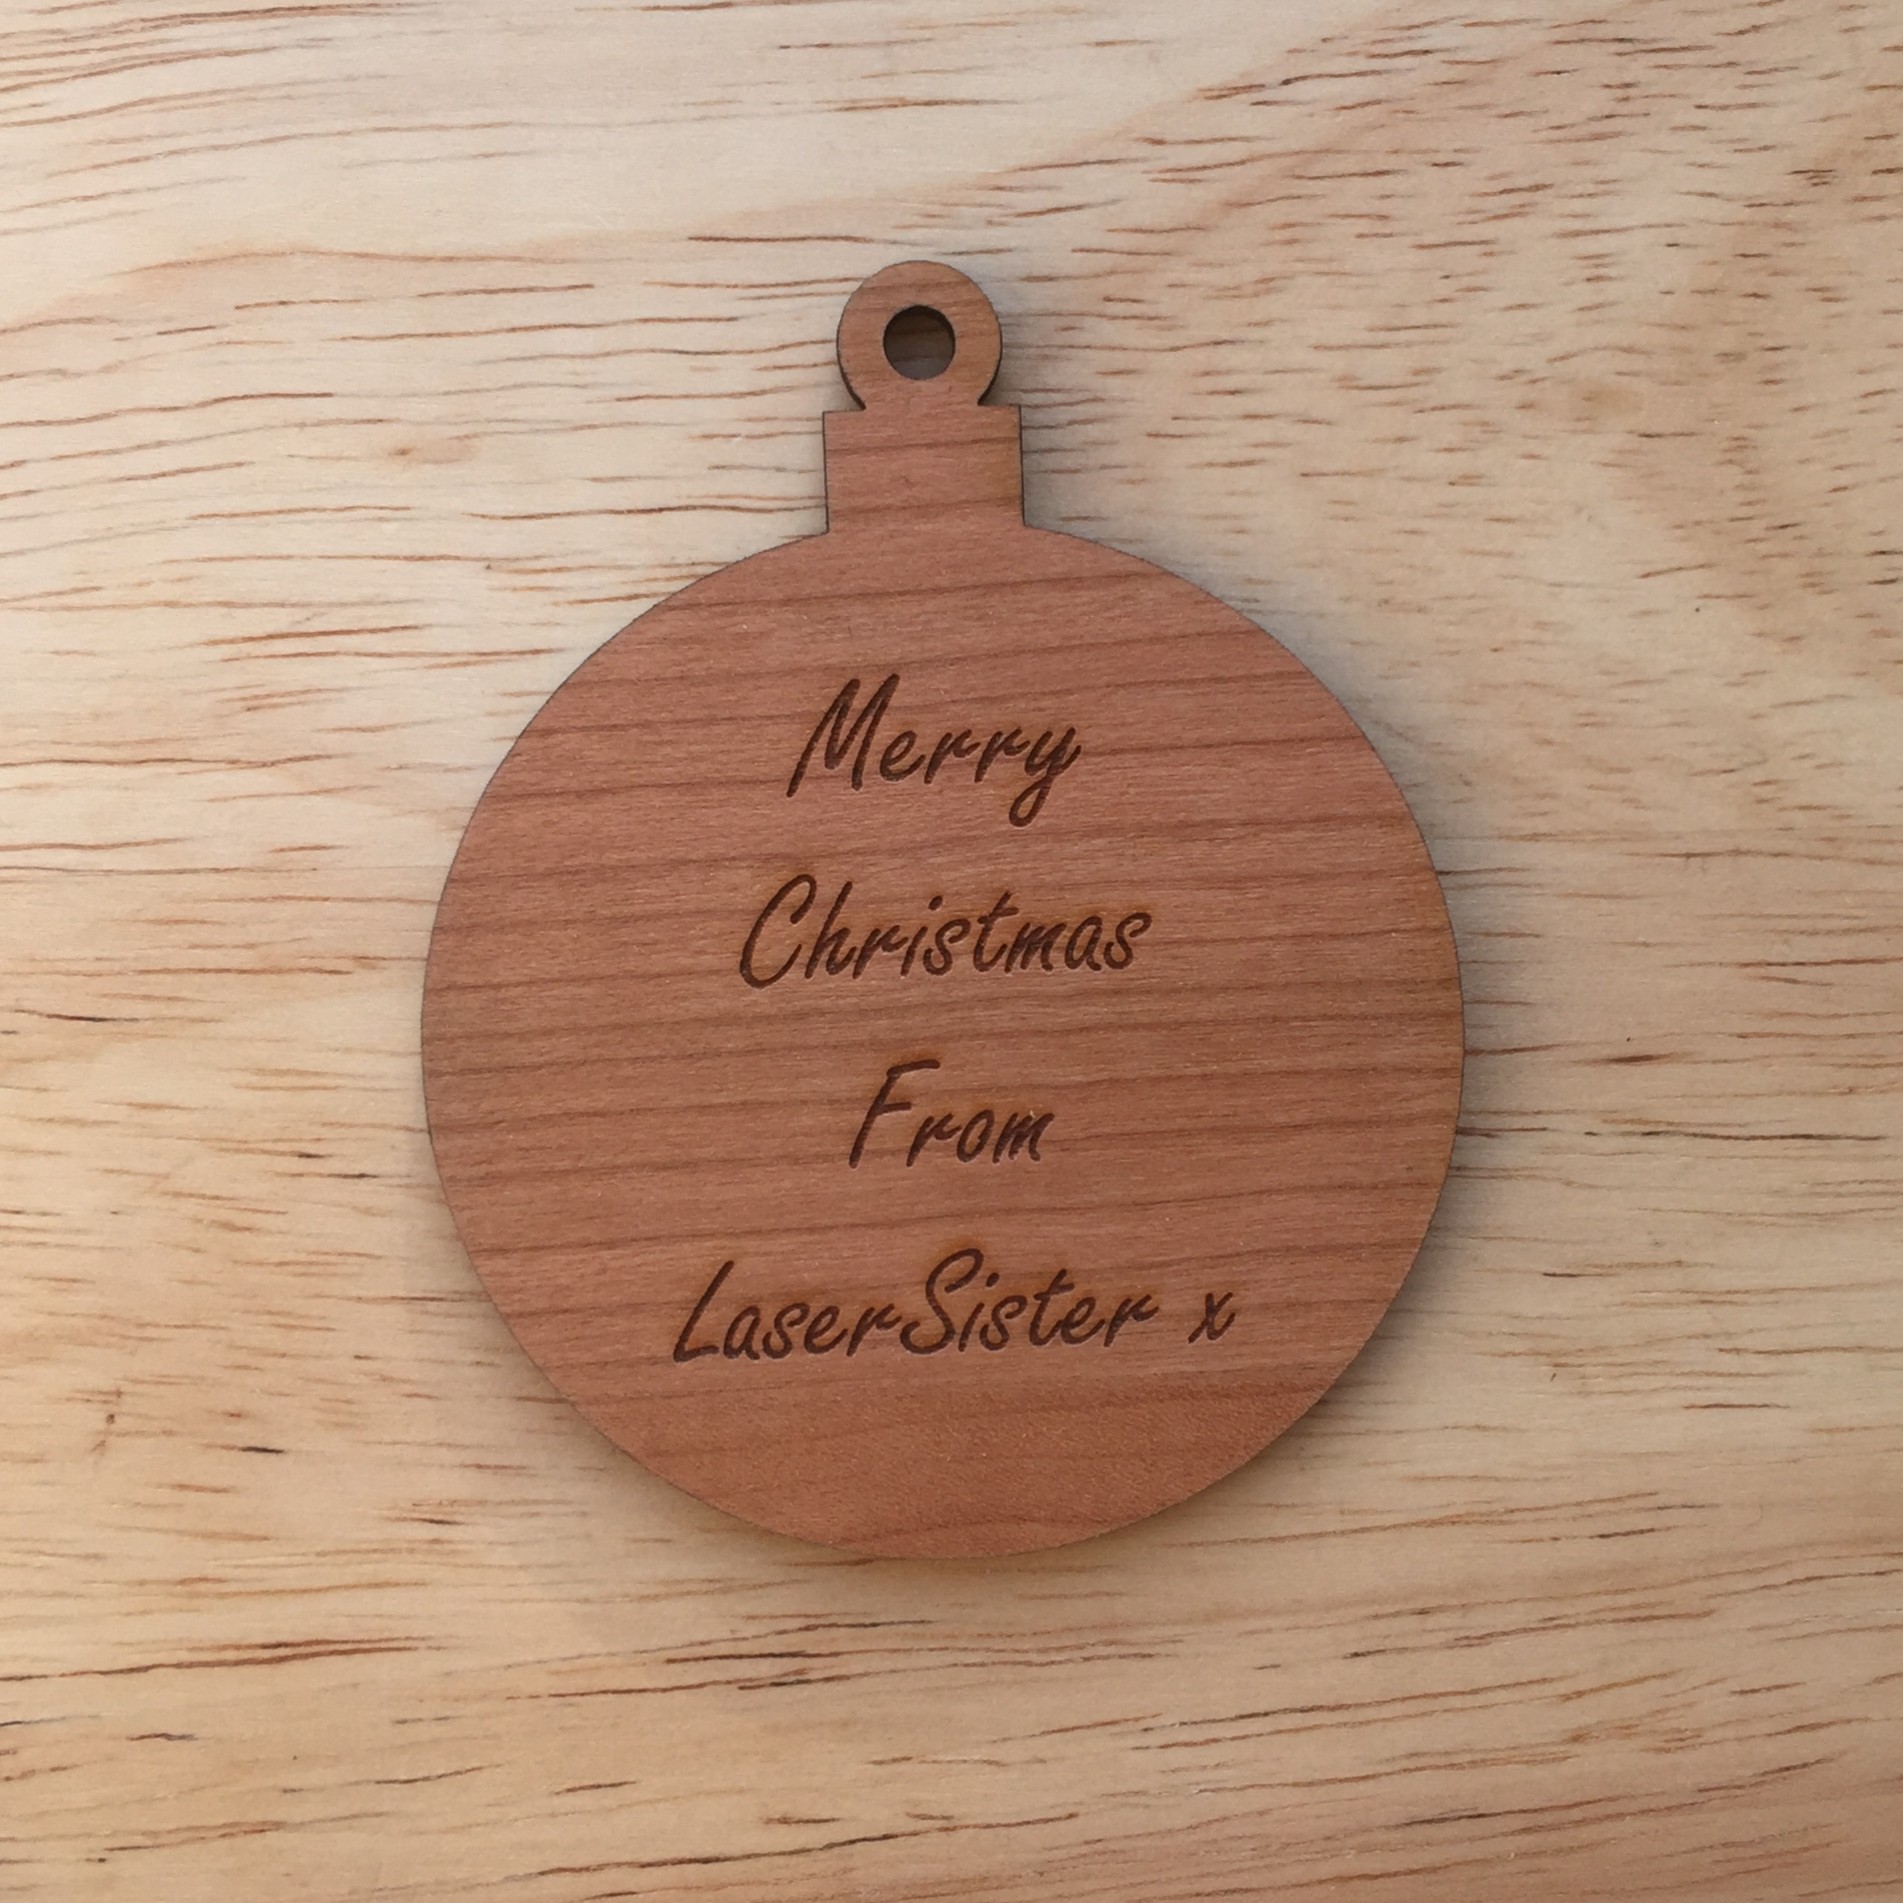
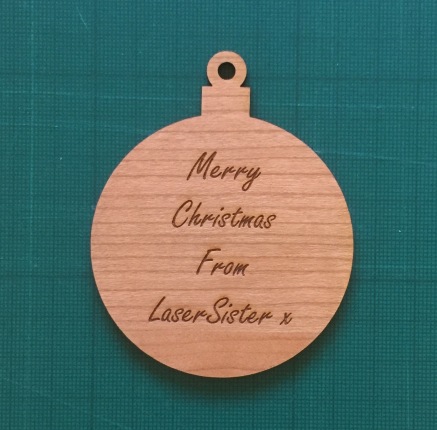
How to Make Quick and Easy Personalised Christmas Tree Ornaments Using a Laser Cutter
Here is a step-by-step tutorial on how to make quick and easy personalised Christmas tree ornaments with a laser cutter. It shows how to create a really simple round bauble shape that you can then etch with a message or image. Alternatively, you could decorate it by hand (or give/sell it to someone else so that they can decorate it by hand). If you’ve got access to a laser cutter then this could be a great (fast!) boost to your Christmas income.
If you don’t have time (or can’t be bothered) to go through the steps learning how to create the shape yourself, just click on the button below and it will take you to a (free) pre-made version of the design so that you can immediately start using it and cutting your own personalised Christmas baubles with your laser cutter. The vector design is done for you, so all you have to do is put your own text on there and it should be ready to cut.
The reason I’m using CorelDraw is because that is the recommended software for my particular laser machine, but most other vector-drawing software has similar commands and effects (although the tools and menus might be called something slightly different).
Step-by-Step: How to Make a Simple Christmas Bauble Shape With a Laser Cutter
1) Start a new blank document in CorelDraw. Mine uses millimetres as the measuring unit. If you want to change that, just click anywhere in the blank document and the “Units” dropdown should appear along the top somewhere:
2) Use the Ellipse Tool to create a circle 80mm wide (Tip: Hold down the Ctrl key at the same time as you are drawing, to make sure you end up with a circle instead of an oval)
If the circle didn’t come out at exactly 80mm, you can change it. Make sure that the ‘Lock Ratio’ button is selected, then type “80″ into the width for “x:”
3) Use the Rectangle tool to create a rectangle 15mm wide by 9mm tall
If you don’t get exactly that size it doesn’t matter, but if you want to use precisely those dimenstions then:
Use the Pick Tool to select the rectangle
Un-select the ‘Lock ratio’ button so that the x and y measurements can be changed separately to each other
Type in “15″ for the x measurement, and “9″ for the y measurement
(then it’s usually best to go back and re-select the ‘Lock ratio’ button)
4) Align the two objects on the same central line
Use the Pick tool to select the circle and rectangle. Then press “C” on the keyboard. This will make sure both objects are lined up vertically with each other.
(You can also go via the menu: Arrange> Align and Distribute> Align centers vertically)
5) Position the rectangle on the top of the circle
Use the Pick Tool to select just the rectangle.
Then either use the ‘down’ key on the keyboard to move the rectangle, or hold down the ‘Ctrl’ key and drag the rectangle downwards.
Aim to get the bottom corners of the rectangle just inside the circle:
6) Create a 5mm circle for the ‘hanging loop’
Use the Ellipse tool to create a circle with a 5mm diameter. (Remember to hold down Ctrl + C to make it a perfect circle instead of an oval.)
7) Create a 12.5mm circle as the outside part of the ‘hanging loop’
Use the Pick Tool to select the 5mm circle, then duplicate or copy it*.
Then change the second circle so that it is 12.5mm across:
*To make a copy of any shape, you can do this by selecting the shape then:
using the shortcut of Ctrl + D
… or by copying and pasting (Ctrl + C then Ctrl + V)
…or by using the Step and Repeat menu and clicking ‘Apply’. (If you can’t see the Step and Repeat menu go to Edit > Step and Repeat)
8) Link the two circles to convert them into just one object
Use the Pick Tool to select both circles. Then press Ctrl + L to link the two objects together to make them into one doughnut-shaped hanging loop (this is important for a Step 12 later, when the ring is ‘welded’ to the rectangle shape).
9) Align the hanging loop and rectangle
Use the Pick Tool and highlight the bauble and the rectangle at the same time (e.g. either draw a box around them both, or select one shape then hold down the Shift key while selecting the other shape.) Then press “C” on the keyboard to align them both on the same central line.
10) Reposition the hanging loop
Use the Pick Tool to select the hanging loop, then move it down (using the cursor key, or hold down “Ctrl” button at the same time as dragging the object down) until the bottom of the loop overlaps the top of the rectangle:
11) Use the Boundary tool to combine the rectangle and large circle
Use the Pick Tool (and hold down the “Shift” key) to select the rectangle and large circle at the same time.
…then use the Shaping Tool to create a boundary. This will now be the main bauble shape.
You can find this tool via Arrange > Shaping > Boundary (make sure that you un-select “Place Behind selected” and “Leave Original Object(s)”):
12) Weld the hanging loop and main bauble shape together
Use the Pick Tool to select the hanging loop, then click the “Weld to” button (If you can’t see the Weld To button, you can find it in Arrange > Shaping > Weld.)
Then click on the outline of the main bauble shape, and the two shapes should then weld together.
You should now have a simple bauble shape, ready for cutting!
Now you can use the Text Tool to add a personal message for etching onto the ornament, which will make a really quick and easy gift for someone.
Speaking of Christmas – here is a gift for you! I’ve created a free downloadable file for you to use with your own laser cutter, if you like. Just click the button below and it will take you to the downloadable resource.
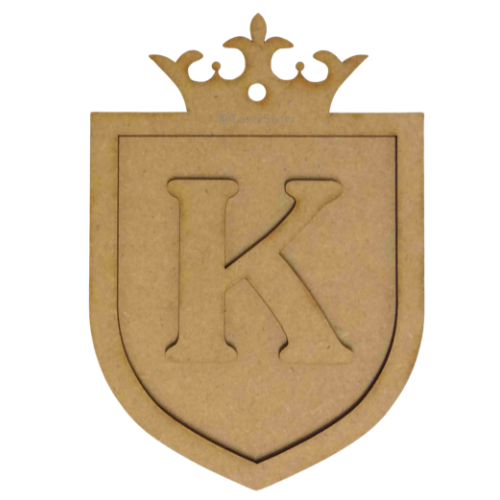
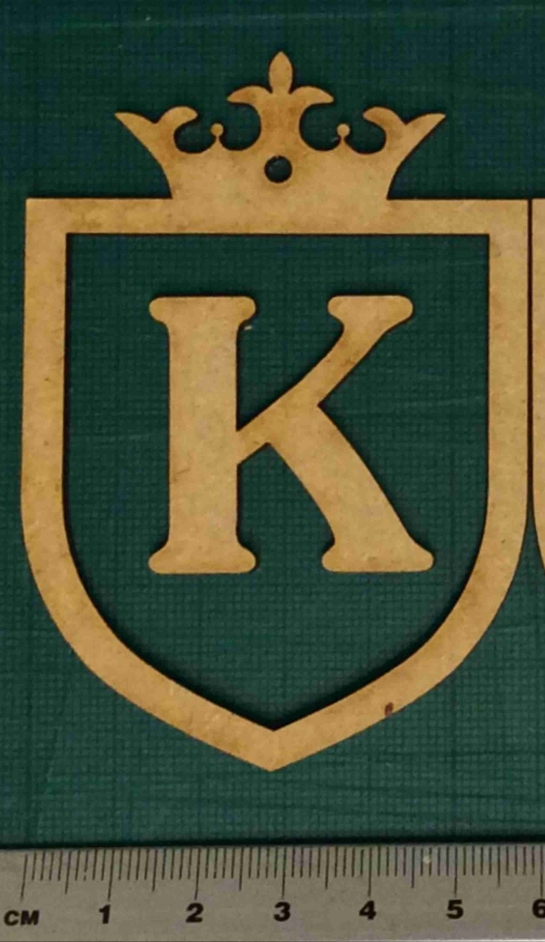
This is a quick and easy way to make a personalised door plaque for children (or yourself!).
As mentioned previously in an earlier post, this is the start of an “A-Z” resource of laser-cutting business tips and information. We’re starting with ‘Alphabet’ because there are so many ways to personalise objects with a laser cutter, and this is a great way to start earning money with your laser machine.
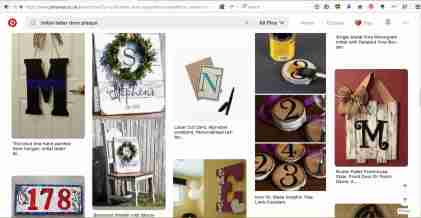
If you’re interested in creating your own designs then Pinterest is great for picking up inspiration from the different types of door plaques …
Pinterest search results
… but in the meantime here is a quick project if you are looking for instant gratification 🙂
Basically,
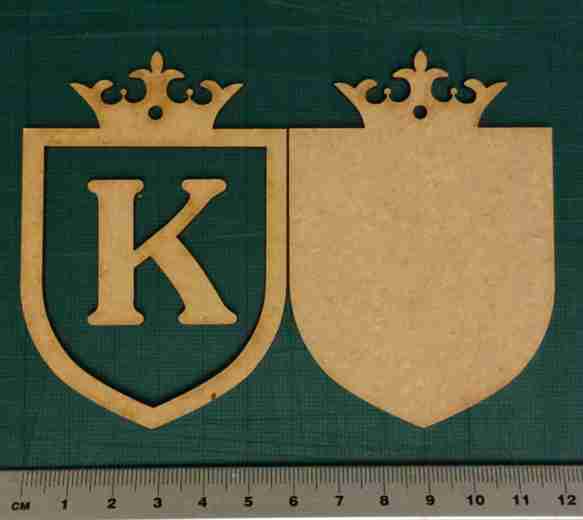
1) Download the free .pdf file below, of “Alphabet Door Plaque”. (If necessary, copy or import the designs into your blank file ready for cutting.)
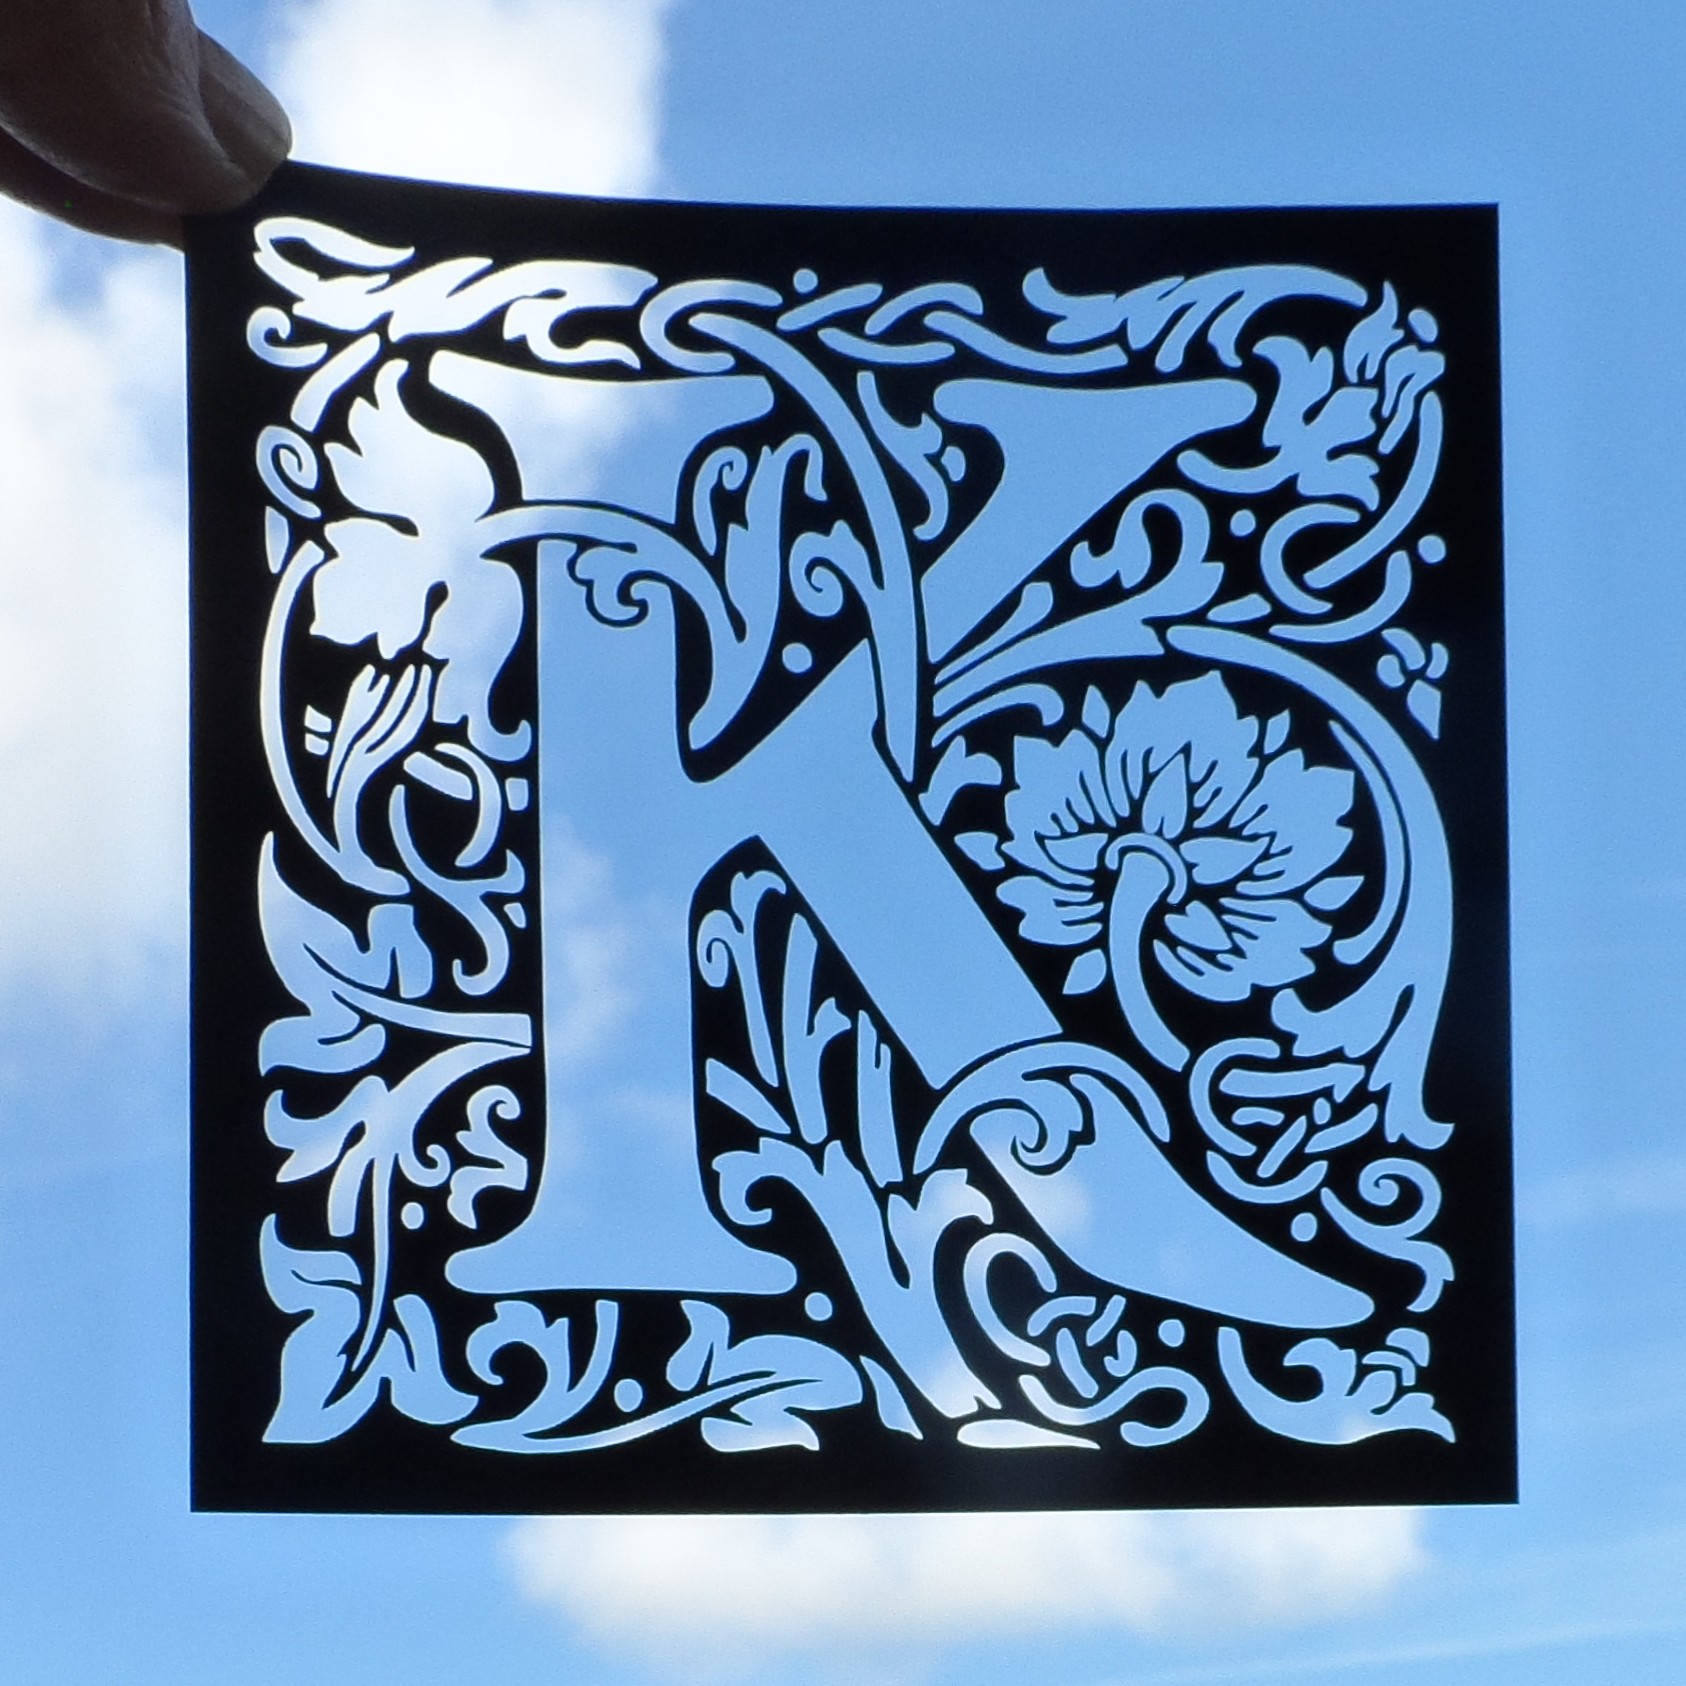
2) Create your required (capital) letter of the alphabet in whichever font you prefer. (The “K” in the sample file happens to be in a Jasmine font, but please do experiment with your own; maybe the child you have in mind deserves a more delicate, refined-looking font, or perhaps they are more of a straightforward sans-serif person?)
e.g. of selecting different letter and font
3) Make sure the letter you just created has got a “hairline” width of outline, and preferably no colour filling (this is a lesson I’ve learned from accidentally etching a lot of items instead of just cutting them…)
“S” with hairline outline and no colour fill.
4) Check that the initial letter will fit inside the frame of the plaque. (This is down to personal preference, really, but as a guide the inside of the frame on the .pdf design is 50mm wide, and the “K” example letter is 35mm wide so it fits nicely inside the frame.)
trying out different font sizes
5) Decide how big you would like the whole plaque to be. The example in the .pdf sample file is 60mm across, but you might like a bigger or smaller version. (Remember to change the size of the backing piece as well as the frame piece, if you are making the design larger or smaller.)
Small laser cut door plaque
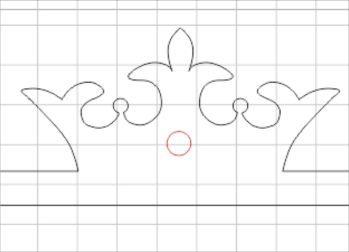
6) Decide whether you would like to include a hole in the piece, for hanging it on the door. If so, then keep the red circles in the cutting design. Otherwise, remove the red circles before you cut the pieces out.
red circle/hole is optional
7) (Optional) Cut out the blue circle as a test piece, to make sure you have the correct settings for the laser.
Optional: cut out test piece
8) Cut out the plaque pieces
Individual pieces cut out
9) Glue the frame and letter onto the backing.
Assembled plaque
10) Paint/spray/decorate/sell the plaque.
If you have found this useful (or if you’ve got any suggestions for making the resources better), or if you’ve created a door plaque yourself, please comment, tweet @LaserSister, or share your photos on instagram.
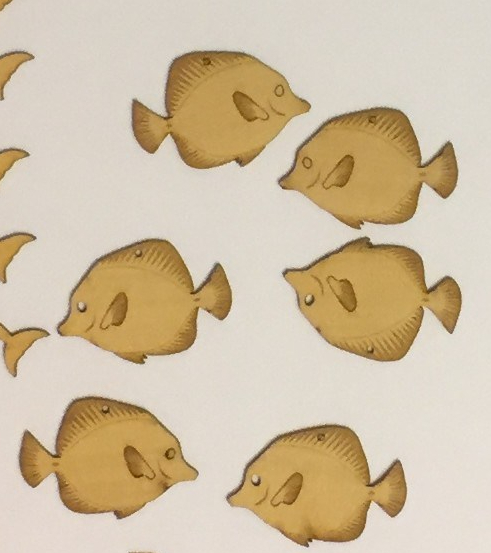
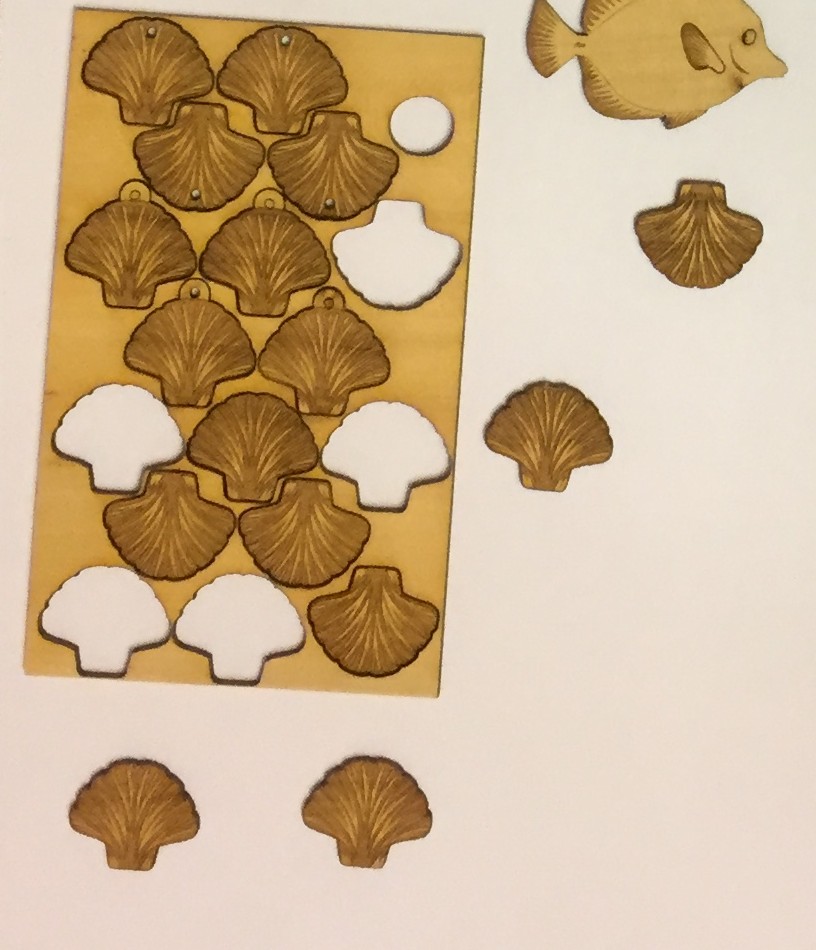
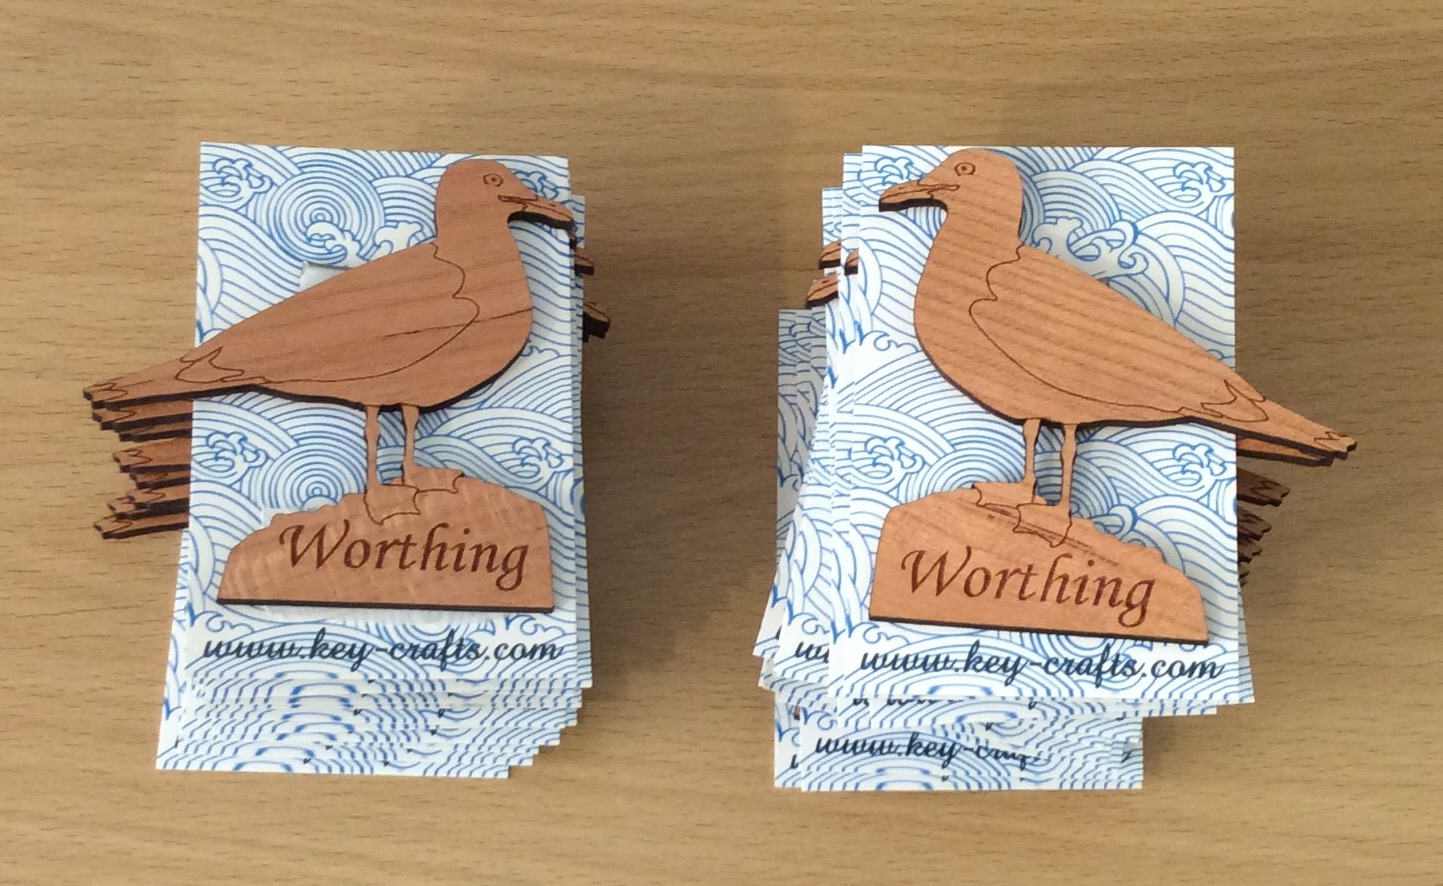
I’ve had a VERY busy couple of months, since attending Autumn Fair! Here are some of the most recent items I’ve made:
Recent work: seagull fridge magnets
But now November has sneaked up on us, and that means the Christmas rush is about to start…
I’ve got several orders that I need to work on this week, but in the meantime I need to also think about re-stocking my etsy, ebay and folksy shops. And ordering some new business cards. And re-stocking actual physical shops and galleries where I sell my work. And approaching other shops and galleries where I’d like to sell things. And taking photos of products. And updating my website.
In the meantime, it’s NaNoWriMo (National Novel Writing Month). The idea is to spend 30 days writing a 50,000 word novel. But rather than write a novel, I might use the time (and words) to update this blog, instead.
As well as NaNo, I’ve decided to participate in Jeff Goins’s “500 Words” challenge, where the idea is to write 500 words per day, no matter what. So with the combination of NaNo and “500 Words”, I’m looking forward to writing a lot more about lasercutting in future.
Jeff Goins’ 500words challenge
Over time I’m aiming to create a resource for myself and others, where I can collect as many laser-cutting-business-related links as possible.
Some of the posts will have an alphabetical theme, and will focus a lot on products that can be created with a laser cutter. And some posts will contain a mixture of tips on saving time, saving money, and getting the most (and best) out of a laser cutter.
It’s not just all about me, though! I would really appreciate your help in creating the ‘library’ of resources. So if you’ve found a great article or technique or business/time/design hack, then please share it by leaving a comment, or tweeting @LaserSister. I’ll also look into setting up various other wiki-type resources, that can be added to by the lasercutting community as we all learn from each other.
Along the way I’ll try to create tutorials or articles on how to make money via a laser-cutting business. If you’d like to receive the articles and tutorials via email to make sure that you don’t miss any of them, please subscribe or sign up for the newsletter. That way you’ll be the first to hear about any new tutorials, tips, or downloadable files etc.
Screenshot from LaserSister tutorial
In the meantime it’s time for me to go and work on some more designs for customers. This week I will mostly be working on family trees for people who have ordered them as Christmas presents. Next week – who knows? 🙂
Following on from yesterday when I was excited to find my blog in the top 40 of laser cutting blogs, I have been checking out other blogs on the list and here is a digest of my own favourites (along with the country they are in, in case you are looking for laser cutting services):
Gypsy Soul Laser Cuts (USA) is a lovely blog, with regular updates and lots of craft ideas. They sell laser-cut craft items.
Dragon Powered (UK) has got laser cutting files for sale, to save you having to spend hours designing your own. The blog includes interesting and original information, and technical advice.
Nice Cuts (UK) provide a laser cutting service, and have ideas about how you can use laser cut designs for your own business. They also occasionally have guest bloggers, who share their own experiences of using a laser cutting service.
CUT-TEC (UK) are a laser cutting service and they create really varied laser cut items – including in metal.
Mekkit.com (UK) are another company who produce really varied laser cut products, and have some great photos of their work.
The Altered State (UK) have got at least one great big laser and can cut and etch reeeeally big items.
LaserSister (UK) That’s me! I provide a laser cutting and etching service, but the blog also has technical information about laser cutting, plus news and trends from the lasery world. And will shortly include links to cutting files.
MBJD Laser (USA) seem to pick a different font colour and overall style for every blog post, but I forgive them because they are real people and giving real news about their laser cutting service and products.
Laser Flair (UK) have a laser cutting service and look like they can etch metal and giant pieces of wood for you.
Dot Laser (UK) produce really nice-looking and varied work for clients.
Bespoke Laser UK also produce great looking products, and do an especially nice line in laser-etched bespoke rubber stamps.
LASERCUTIT (UK) have a laser cutting service, for wood, acrylic, paper and card.
Just Add Sharks (UK) have got an article on making a totally mind-blowing ‘phenakistiscope’.
CutLaserCut (UK) work with artists and other businesses to make some really original pieces.
Ponoko (USA, NZ) allow you to upload your artwork, get an instant quote, and then cut and ship the item on the same day. WOW.
Reddit (www) has a thriving laser cutting community and this is a great place to browse and/or ask questions. It does contain quite a bit of spam, but you can easily lose hours just browsing if you are really into laser cutting.
MLC (AUS) have a laser cutting service in Australia, and the blog includes latest trends and news from the lasery world.
Able Engraving (UK) have a traditional engraving service as well as laser engraving, and are experts in signs and awards.
Google News (www) chews up and spits out laser-related news for your information and delight.
(OK, there are only 19 in my current Top 20 list. But the Top 40 list only had 33, so I win!)
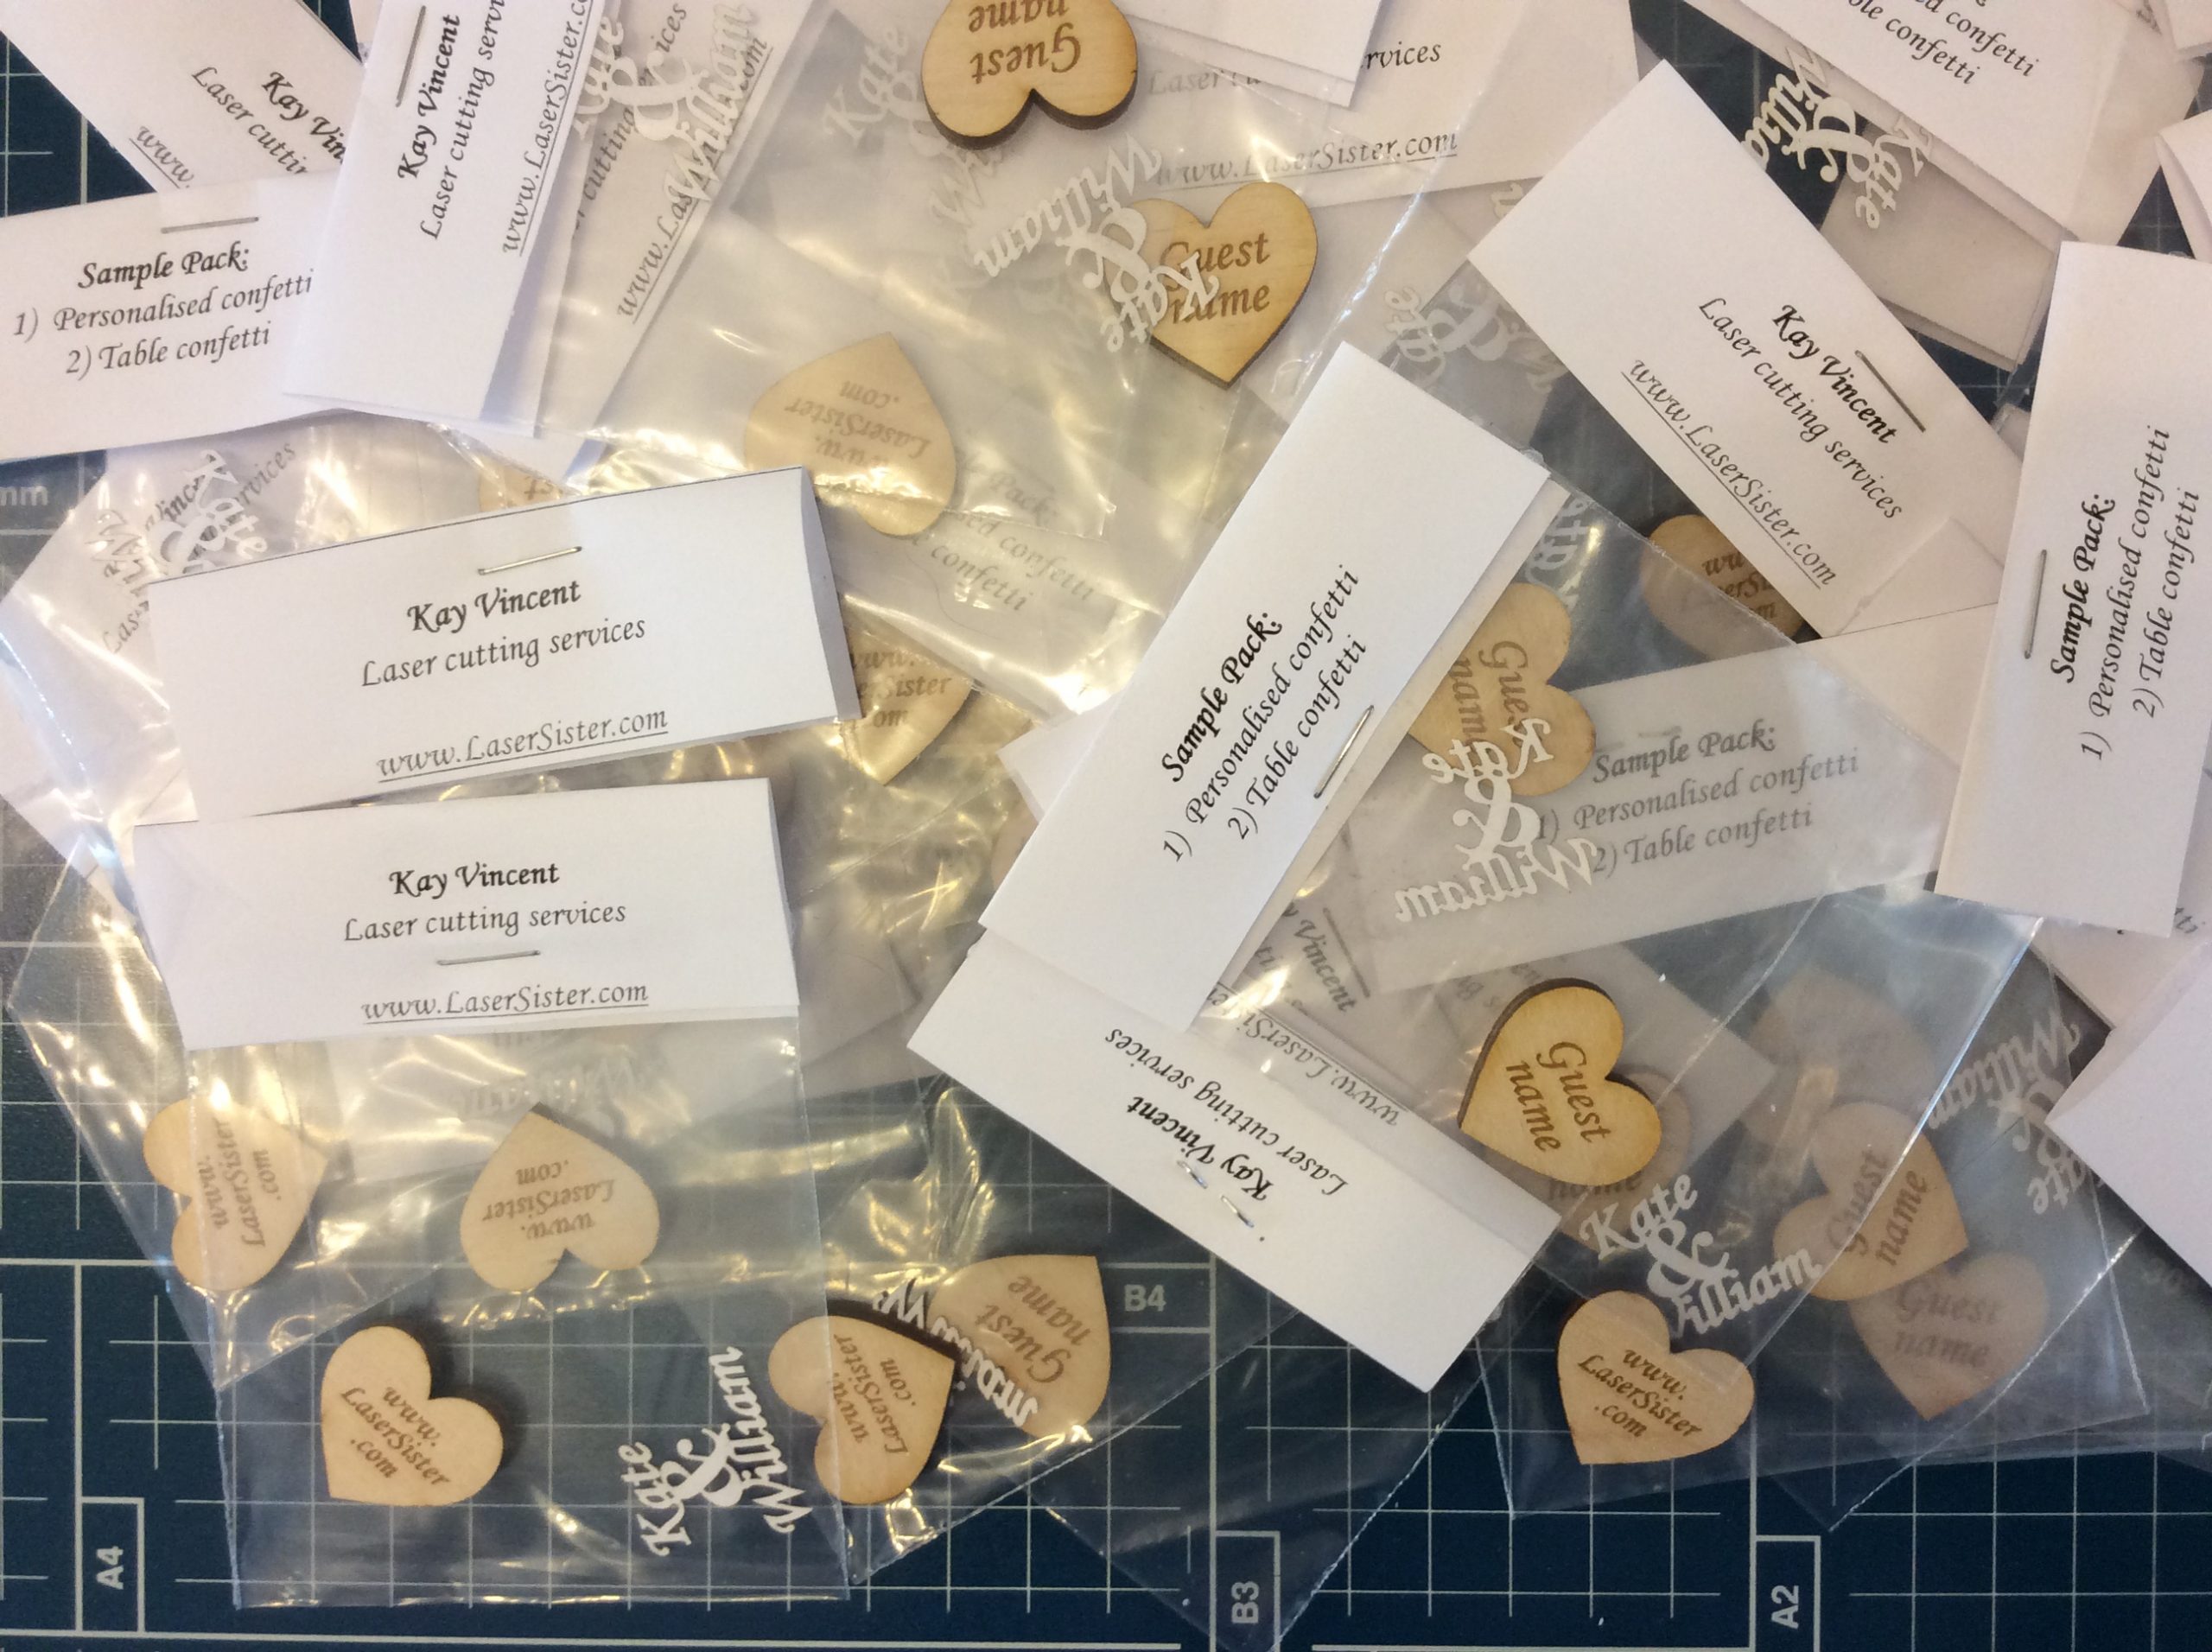
Last week at Autumn Fair I got some really nice comments about my wedding-related personalised items, so today I am going to a wedding fair in Worthing to see if anyone there would like some free samples.
I still haven’t seen anyone else yet who makes laser-cut personalised confetti, so I hope I’m offering a useful service 🙂

 I like the way that it has two layers to it. But whoever made it has left quite a bit of scorching/smoke-marking on the front, and I’d be really disappointed if I sold a piece like that. On the other hand, I’m too much of a perfectionist. Weird how it didn’t stop me buying a piece, but it would stop me selling one. Maybe I’ve got things the wrong way round?!


 Last week at Autumn Fair I got some really nice comments about my wedding-related personalised items, so today I am going to a wedding fair in Worthing to see if anyone there would like some free samples.