Here is a roundup of what I’ve recently been researching and saving to Pinterest.
I thought if I listed those findings here (and gave links to them) then these ready-made resources might save other people time and effort.
Hopefully you might even find some inspiration for your own craft projects.
So far this month I’ve created a Pinterest board for the following area of research:
Alphabet: Initial letters to display on children’s doors.
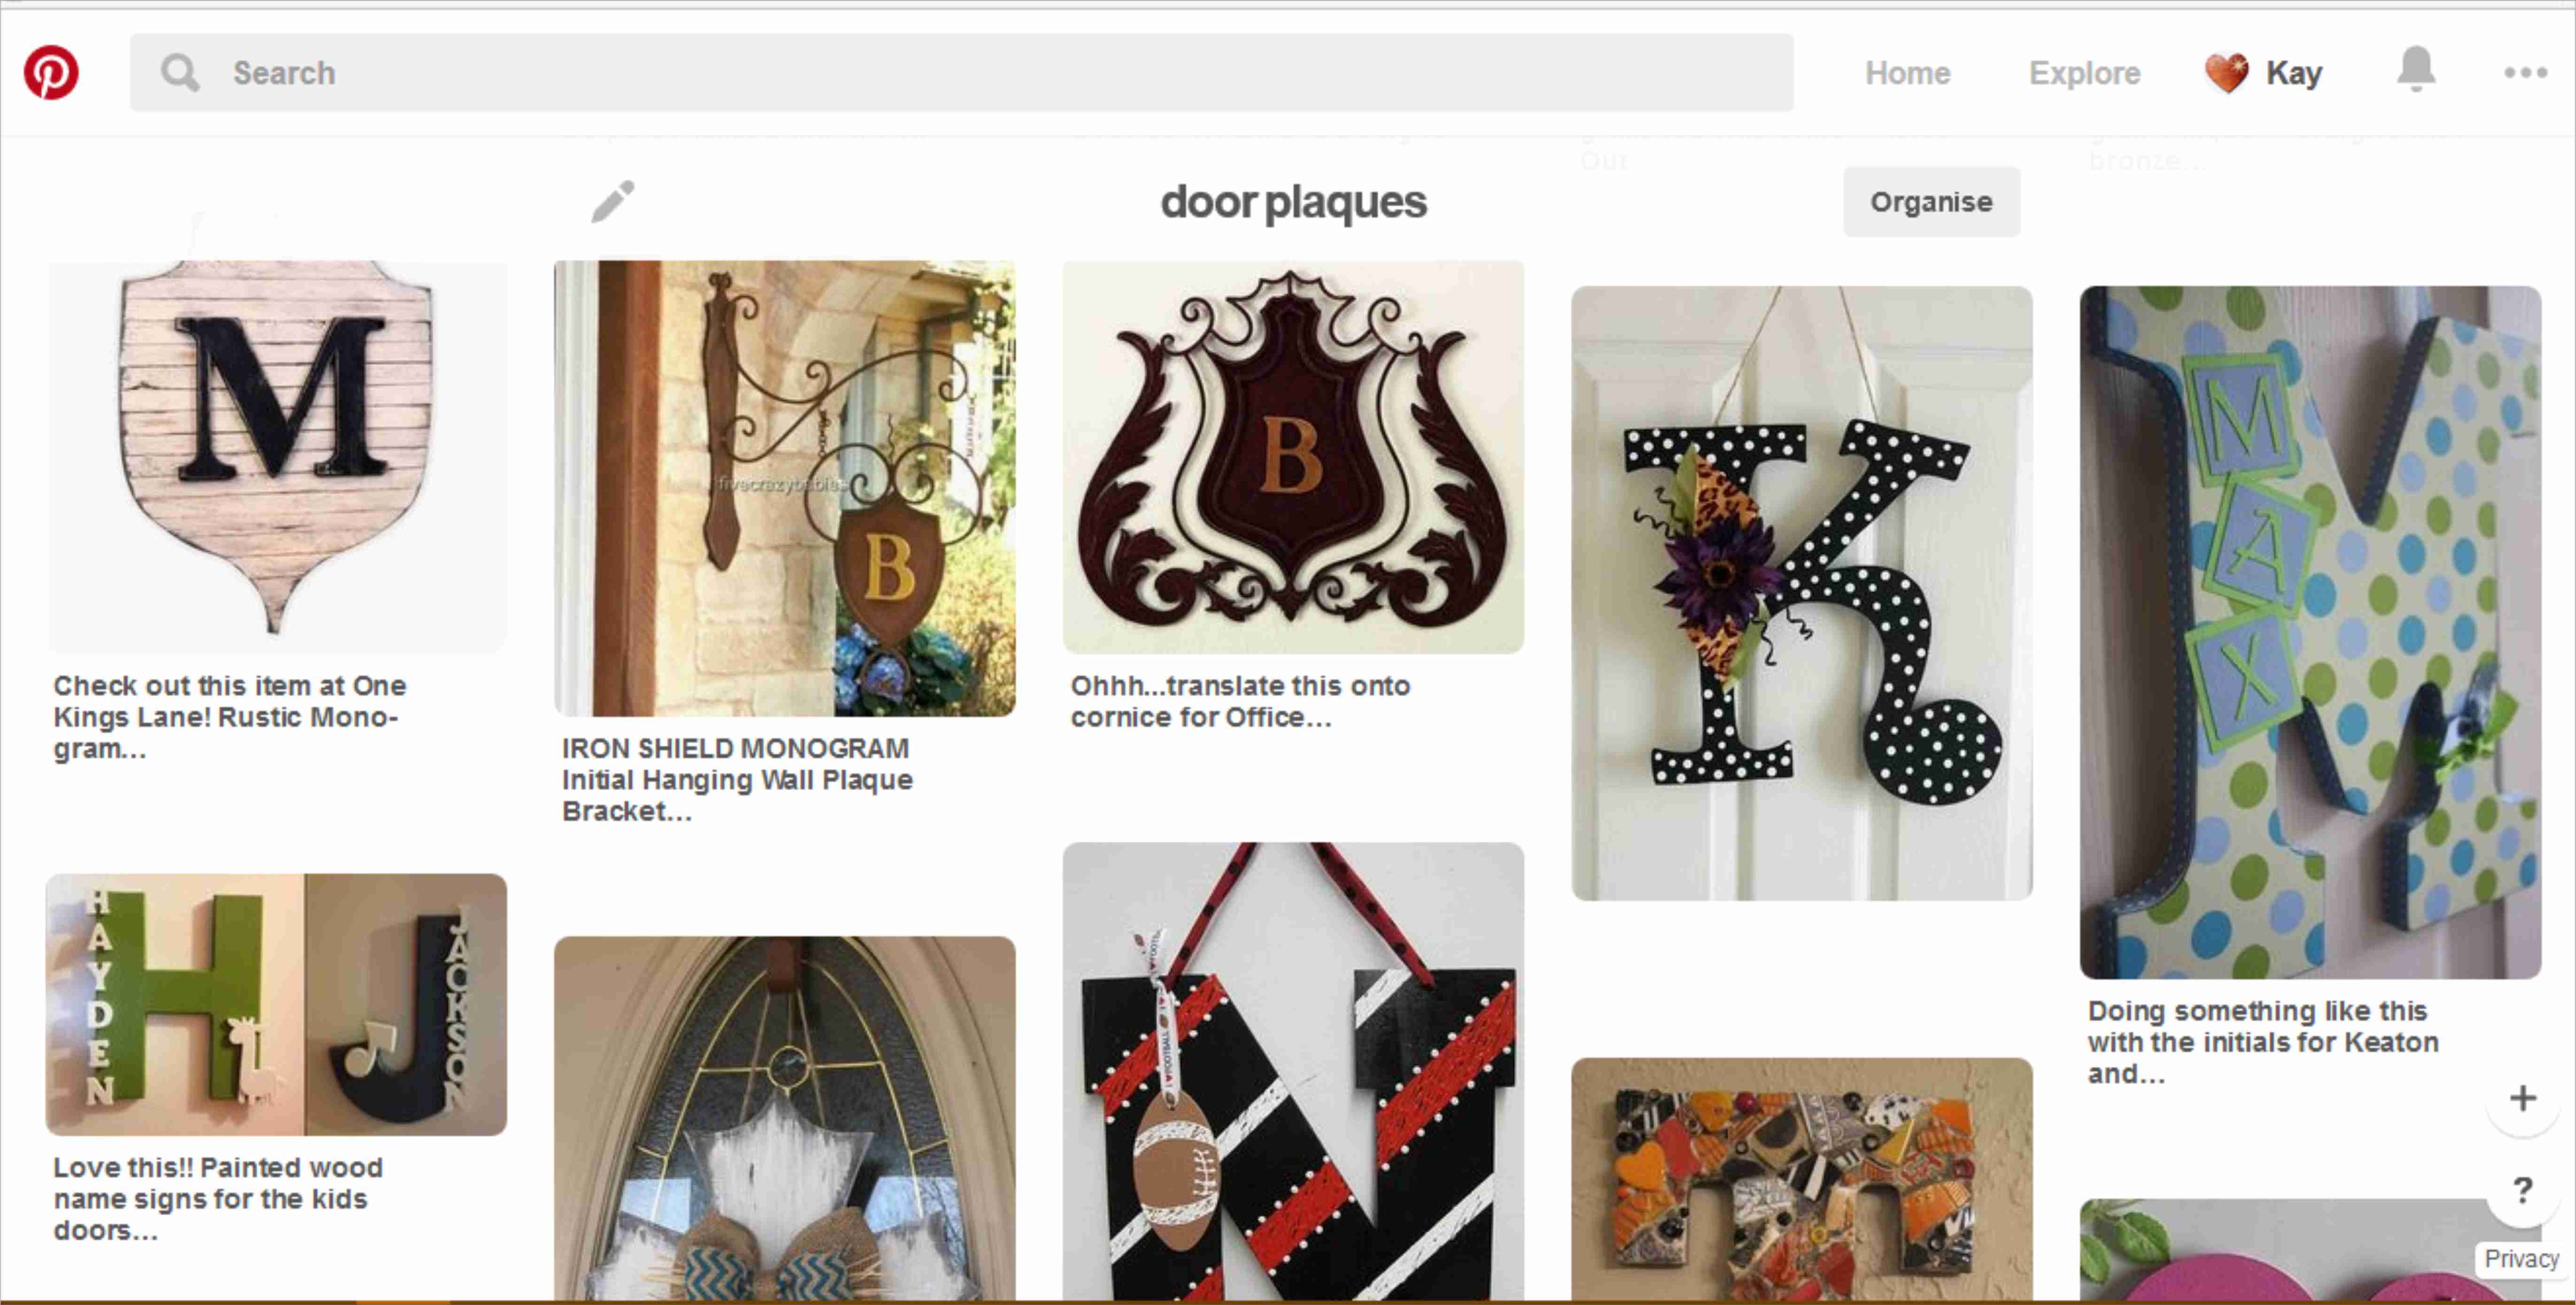
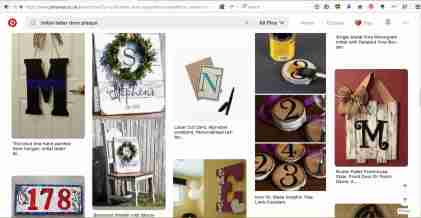
Screenshot of Pinterest search for shield initial plaques
Have you made anything similar, or seen any good (preferably free) resources that might help other people? If so, please do comment or use the contact form, or tweet @LaserSister
This is a quick and easy way to make a personalised door plaque for children (or yourself!).
As mentioned previously in an earlier post, this is the start of an “A-Z” resource of laser-cutting business tips and information. We’re starting with ‘Alphabet’ because there are so many ways to personalise objects with a laser cutter, and this is a great way to start earning money with your laser machine.
If you’re interested in creating your own designs then Pinterest is great for picking up inspiration from the different types of door plaques …
Pinterest search results
… but in the meantime here is a quick project if you are looking for instant gratification 🙂
Basically,
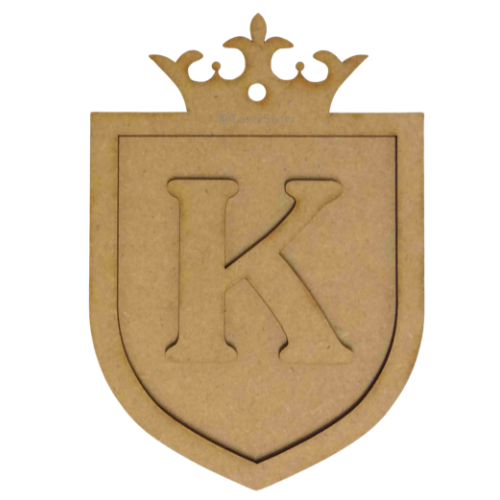
1) Download the free .pdf file below, of “Alphabet Door Plaque”. (If necessary, copy or import the designs into your blank file ready for cutting.)
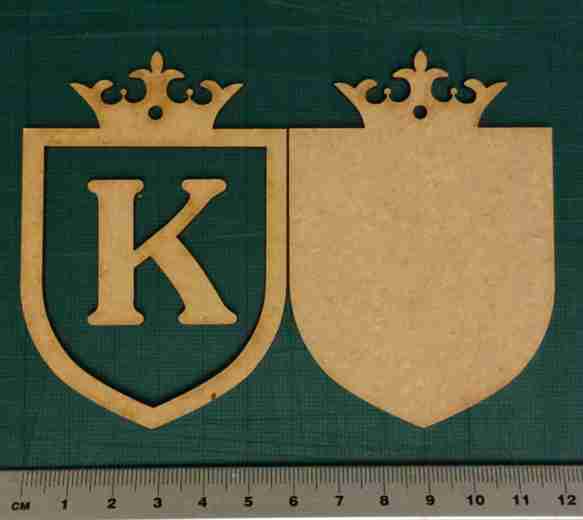
2) Create your required (capital) letter of the alphabet in whichever font you prefer. (The “K” in the sample file happens to be in a Jasmine font, but please do experiment with your own; maybe the child you have in mind deserves a more delicate, refined-looking font, or perhaps they are more of a straightforward sans-serif person?)
e.g. of selecting different letter and font
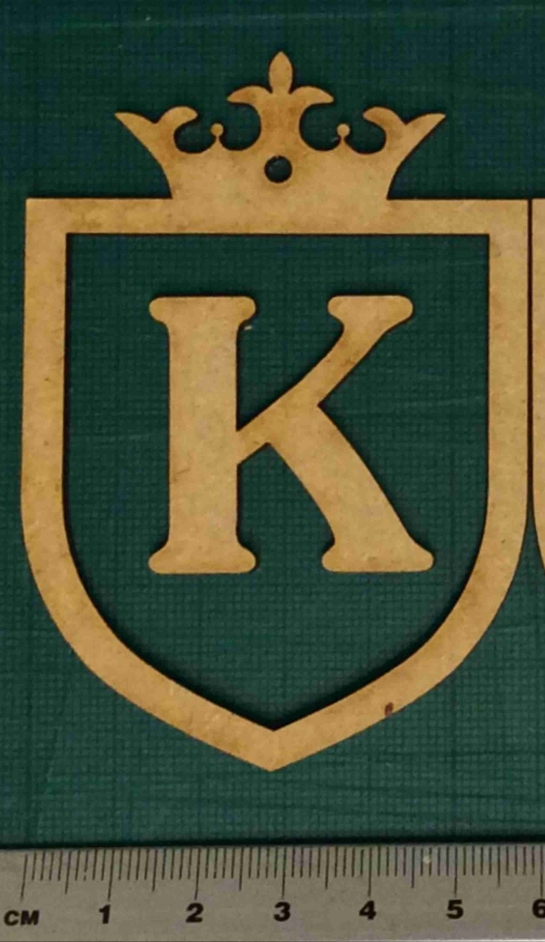
3) Make sure the letter you just created has got a “hairline” width of outline, and preferably no colour filling (this is a lesson I’ve learned from accidentally etching a lot of items instead of just cutting them…)
“S” with hairline outline and no colour fill.
4) Check that the initial letter will fit inside the frame of the plaque. (This is down to personal preference, really, but as a guide the inside of the frame on the .pdf design is 50mm wide, and the “K” example letter is 35mm wide so it fits nicely inside the frame.)
trying out different font sizes
5) Decide how big you would like the whole plaque to be. The example in the .pdf sample file is 60mm across, but you might like a bigger or smaller version. (Remember to change the size of the backing piece as well as the frame piece, if you are making the design larger or smaller.)
Small laser cut door plaque
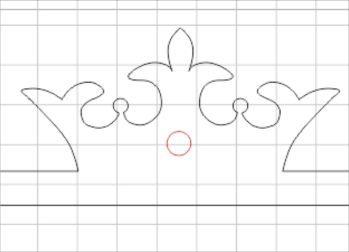
6) Decide whether you would like to include a hole in the piece, for hanging it on the door. If so, then keep the red circles in the cutting design. Otherwise, remove the red circles before you cut the pieces out.
red circle/hole is optional
7) (Optional) Cut out the blue circle as a test piece, to make sure you have the correct settings for the laser.
Optional: cut out test piece
8) Cut out the plaque pieces
Individual pieces cut out
9) Glue the frame and letter onto the backing.
Assembled plaque
10) Paint/spray/decorate/sell the plaque.
If you have found this useful (or if you’ve got any suggestions for making the resources better), or if you’ve created a door plaque yourself, please comment, tweet @LaserSister, or share your photos on instagram.
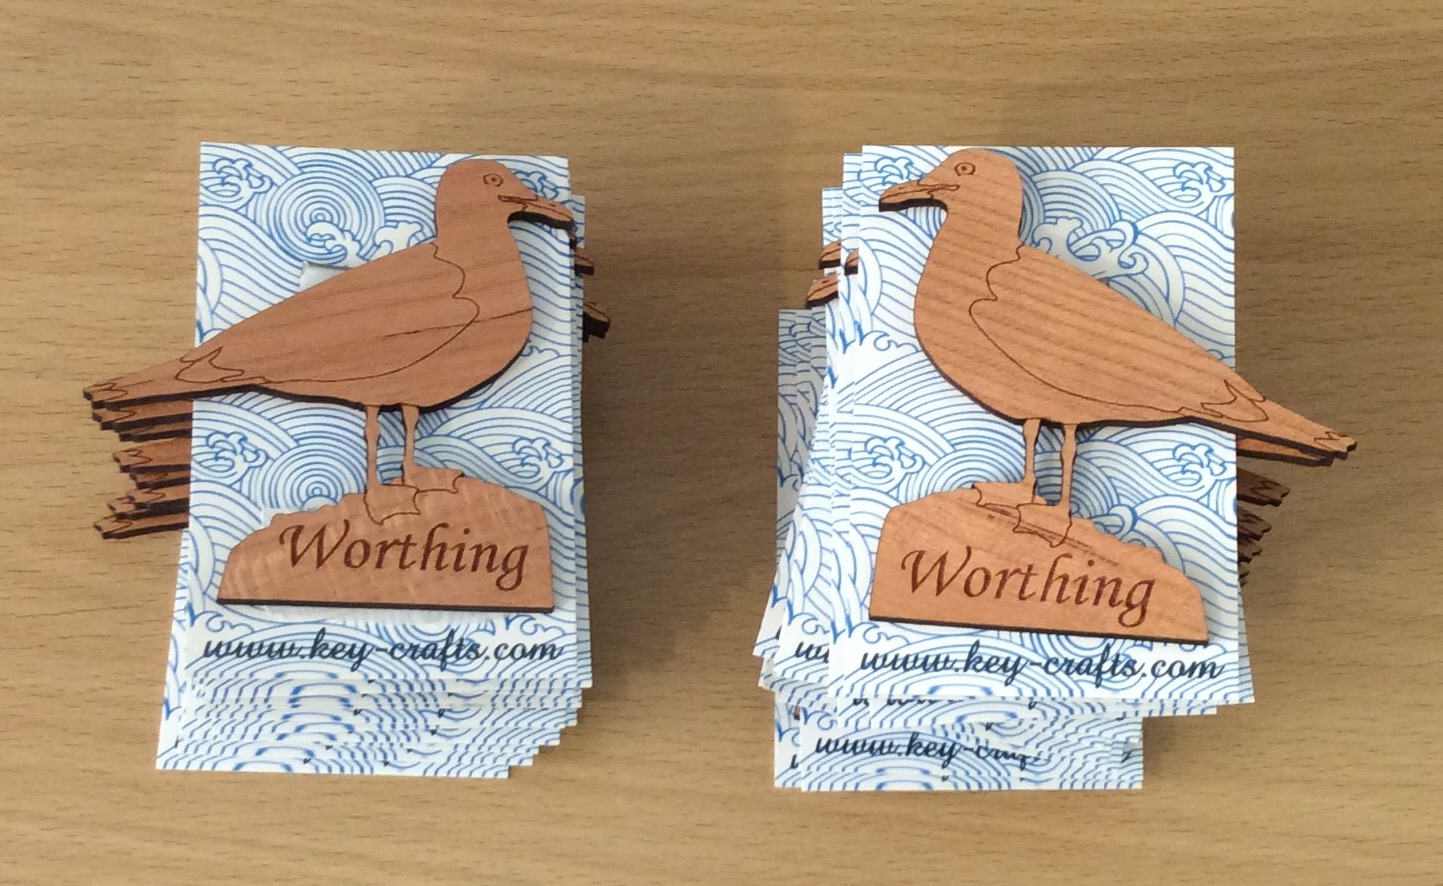
I’ve had a VERY busy couple of months, since attending Autumn Fair! Here are some of the most recent items I’ve made:
Recent work: seagull fridge magnets
But now November has sneaked up on us, and that means the Christmas rush is about to start…
I’ve got several orders that I need to work on this week, but in the meantime I need to also think about re-stocking my etsy, ebay and folksy shops. And ordering some new business cards. And re-stocking actual physical shops and galleries where I sell my work. And approaching other shops and galleries where I’d like to sell things. And taking photos of products. And updating my website.
In the meantime, it’s NaNoWriMo (National Novel Writing Month). The idea is to spend 30 days writing a 50,000 word novel. But rather than write a novel, I might use the time (and words) to update this blog, instead.
As well as NaNo, I’ve decided to participate in Jeff Goins’s “500 Words” challenge, where the idea is to write 500 words per day, no matter what. So with the combination of NaNo and “500 Words”, I’m looking forward to writing a lot more about lasercutting in future.
Jeff Goins’ 500words challenge
Over time I’m aiming to create a resource for myself and others, where I can collect as many laser-cutting-business-related links as possible.
Some of the posts will have an alphabetical theme, and will focus a lot on products that can be created with a laser cutter. And some posts will contain a mixture of tips on saving time, saving money, and getting the most (and best) out of a laser cutter.
It’s not just all about me, though! I would really appreciate your help in creating the ‘library’ of resources. So if you’ve found a great article or technique or business/time/design hack, then please share it by leaving a comment, or tweeting @LaserSister. I’ll also look into setting up various other wiki-type resources, that can be added to by the lasercutting community as we all learn from each other.
Along the way I’ll try to create tutorials or articles on how to make money via a laser-cutting business. If you’d like to receive the articles and tutorials via email to make sure that you don’t miss any of them, please subscribe or sign up for the newsletter. That way you’ll be the first to hear about any new tutorials, tips, or downloadable files etc.
Screenshot from LaserSister tutorial
In the meantime it’s time for me to go and work on some more designs for customers. This week I will mostly be working on family trees for people who have ordered them as Christmas presents. Next week – who knows? 🙂